Dovetail Jig Review
Router jigs have their place, but don't expect them to duplicate hand-cut joints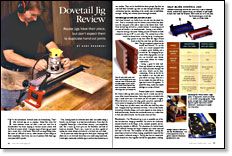
Synopsis: Gary Rogowski compares eight dovetail jigs – half-blind, through, and combination jigs – to see how easy they are to set up and how well they cut. Half-blind jigs cut both pins and tails at once, while through-dovetail jigs cut them separately. Combination jigs offer versatility and the author credits them with cleverness. He compares the features of the jigs, then cuts dovetails with each and assesses the results. He shares his opinion on which projects each would be best suited for.
To the uninitiated, dovetail joints are intimidating. That’s why dovetail jigs are so popular. Seems like every few years someone comes out with a new one. And lots of woodworkers buy them, hoping to become master joiners with the flick of a router switch. I imagine many of these jigs get tossed into a corner after a brief tussle. Most will cut snug-fitting joints. But some are difficult to set up, either because of poor design or sheer complexity. And if you run out of patience with these jigs, your joints will fit poorly.
True, making hand-cut dovetails takes skill, and unlike riding a bicycle, you do forget, or at least lose proficiency, if you don’t do it regularly. Router jigs—a few of them, anyway—can simplify the task. But a router jig won’t give you the flexibility and look of hand-cut dovetails. There’s not a router bit out there capable of cutting the classic skinny pin hewn by a dovetail saw and chisel.
I’m no purist and realize that jigs have their place. Many jigs will allow you to cut dovetails faster than you could using hand tools. I tried eight commonly available jigs to see how they stacked up to one another. They can be classified into three groups: Jigs that cut only half-blind dovetails; jigs that cut only through-dovetails; and combination jigs that, depending on the model, may cut half-blind, through-, sliding and variably spaced through-dovetails.
Half-blind jigs cut both pins and tails at once
Half-blind dovetails are visible from one side. They’re commonly used for drawer joinery when you don’t want the end grain of the tails to show in the drawer front. Halfblind dovetail jigs all work in a similar fashion: A matching pair of pin and tail boards is cut simultaneously. Spacing is not variable. Setup for each jig is the same: Mating pin and tail boards are both clamped in the jig at 90° to each other. The outside faces of the boards are placed down, or facing the jig. Locating pins, edge guides or stop bars offset the edges of each board so that the joint lines up when assembled. The jig’s template is placed on the boards and secured. To cut the joint, use a router equipped with a template guide bushing and a dovetail bit. By changing the position of the edge guides, you can also cut dovetails onto drawer fronts with rabbets for overlay construction.
Getting a good fit with halfblind jigs depends on setting the bit’s depth precisely through trial and error, which can be time consuming. If you set the bit for too shallow a cut, the tails and pins will be too large. If the bit is set too deeply, the joint will be so tight that it won’t fit together. To speed the setup, mark your depth settings on a scrap of wood.
From Fine Woodworking #134
For the full article, download the PDF below:
Fine Woodworking Recommended Products
Veritas Standard Wheel Marking Gauge

Dustopper Pro
3M Blue Tape




Log in or create an account to post a comment.
Sign up Log in