Frame-and-Panel Bed
Design rests on faceted legs with compound curves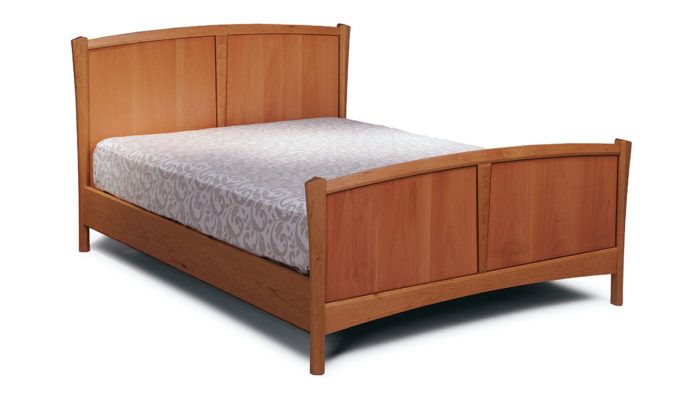
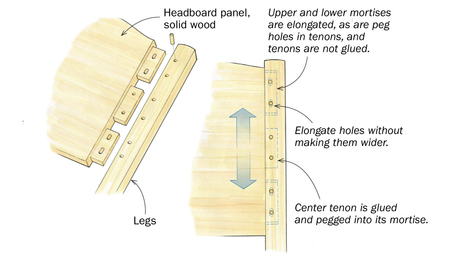
Synopsis: David Fay spends a lot of time refining what may seem like small details, but the effort pays off in a handsome inlaid piece. He explains how he designed the bed to have an adjustable inner rail, to fit a client’s futon; a detailed project plan shows the dimensions and parts. Fay cuts the joinery first, and then begins shaping, and he shows how to cut the eye-catching, subtle bedposts, which have three straight, flat sides; two curvy sides where the plane twists; and a curved, tapered side. A side note explains how to cut and use templates to rout the curves. Another highlighted explanation shows the hidden bed-rail-to-post connection and how to put it together. The headboard and footboard also have six-sided parts, which, like the bedposts, you join while they’re square and then shape to their six sides later. He finishes the bed with hand-rubbed tung oil.
My favorite designs have come to me unexpectedly, in a flash of an idea, far away from the drafting table. The ensuing challenge to develop that vision into a finished product requires a lot of time spent refining what may seem like small details.
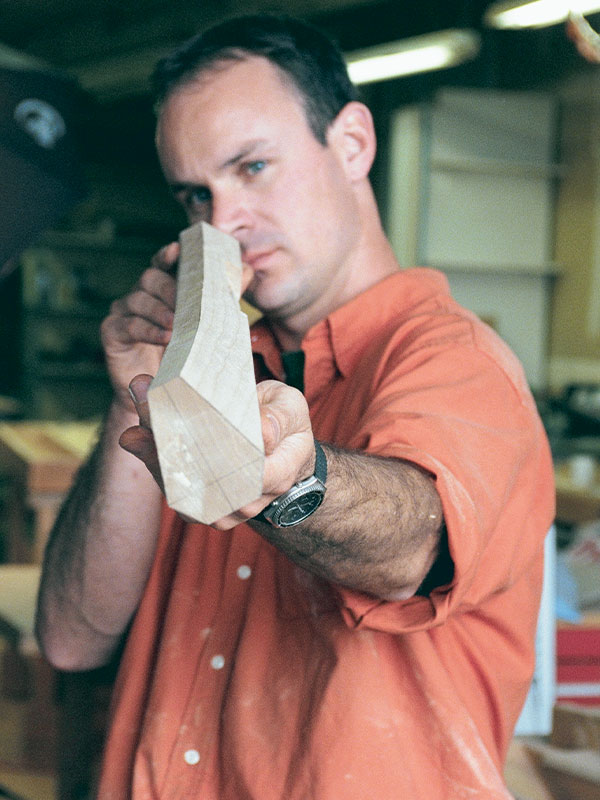
I begin with a sketch, nothing fancy or beautiful. The back of an envelope or napkin will do. Drawing this way frees me from the constraints of trying to perfect the piece; all I’m after is getting the inspiration down on paper.
If the piece is a commission, the next step is listening to the customer. That often influences the dimensions of a project. For this bed, the customer wanted a queensized frame that could accommodate a futon mattress or a standard box-spring and mattress set. As a result, I had to make the bed rails wide enough to accommodate an adjustable inner rail.
A dimensioned drawing comes next. Although an accurate drawing can help me visualize a piece, this two-dimensional tool has limitations. That’s why I build a fullscale model of any tricky parts to work out design and construction needs and to perfect technical skills.
The model allows me to evaluate how the details relate to the rest of the design. For example, I used a model to determine the proportions of the posts and rails. I experimented with the reveal at various widths. A 7⁄8-in. reveal looked chunky, and a 5⁄8-in. reveal looked skinny. But when I tried a 3⁄4-in. reveal, it looked right. I also used the model to determine the size of the granadillo reveal as it related to the panel and posts and rails. Using the model, I was able to refine subtle details and their proportions. There’s nothing scientific here, no golden rules. It’s a matter of trial and error and trusting your instincts.
Cut the joinery, then begin shaping
The bedposts are thick at the top and get skinnier near the floor. As the thickness changes, the widths of the two faces also change. But one thing stays constant: the width of the outside edge or reveal.
All of the joints that involve the bedposts are machined while the stock is still square. These joints include the tenons for the upper and lower rails of the headboard/footboard, the mortises in the bedposts, the tenons on the long rails and the grooves for the panels.
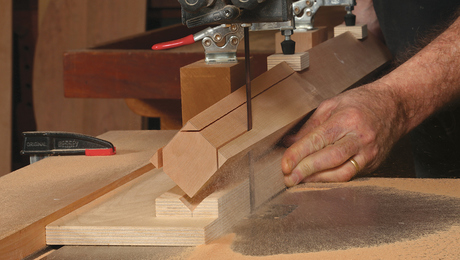
Next, lay out each post’s six-sided profile on the end grain. Then connect the lines from end to end along the outside of the post—use a black, thin-line pen, which is easier to see than a pencil line.
From Fine Woodworking #134
For the full article, download the PDF below:
Fine Woodworking Recommended Products


Stanley Powerlock 16-ft. tape measure




Log in or create an account to post a comment.
Sign up Log in