The Quick, Modern Way to a Polished Finish
Combine automotive finishing materials and power-buffing methods to work wonders on furniture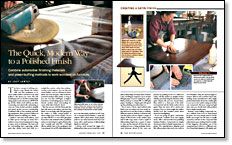
Synopsis: Jeff Jewitt discusses how modern products can speed up the process of polishing a finish. The best tools for wet-sanding large areas have opposing, in-line pads that vibrate back and forth in a straight-line motion, rather than making a circular scratch pattern. Jewitt explains how to dry-sand finishes with an electric-powered random-orbit sander using very fine stearated or nonloading papers. You start with the finest grit size that will remove the defects and level the finish, and you work around the edges first and then move toward the center. For a satin finish, you use steel wool and a product called Wood-Lube. He also explains how to use automotive compounds to achieve a gloss finish, and he demonstrates how to apply the products. The article offers steel-wool and buffing tips.
The basic concept of rubbing out a finish is easy: Abrade the surface with very fine sandpaper to remove surface defects and level it out, then polish to the sheen you want. The old world approach is to do this work by hand, using pumice and rotten stone, which work well but are time consuming and physically exhausting to carry out. Some modern products simplify and speed up this process considerably. Combined with power-sanding and buffing equipment, these products deliver an efficient system for rubbing out a finish.
I prefer to wet-sand small surfaces, such as table aprons and legs, by hand. But I switch to air-powered equipment for larger areas, such as tabletops. The best tools for wet-sanding have opposing, in-line pads that vibrate back and forth in a straight-line motion, rather than making a circular scratch pattern. You can dry-sand some finishes, such as oil-based polyurethane and some lacquers, with an electric powered random-orbit sander, as long as you use very fine (1,000-grit, or higher) stearated, or non-loading papers. Never use electric sanders when wet-sanding because of the risk of electric shock.
Start the process with the finest grit size that will remove the defects and level the finish. You can begin with 320-grit paper if the surface is badly orange-peeled or shows ridges from brush strokes. Or you can start with 800- or even 1,000-grit paper if you have only minimal surface problems and you’re shooting for a gloss finish in the end. I usually start with 400- or 600-grit silicon-carbide wet-or-dry sandpaper, and I use mineral oil cut 50% with mineral spirits as the lubricating medium for all of my oil- or lacquer-based finishes. I spray the mixture with a plant mister. Some people prefer to use water instead of oil. If you use water, add a small amount of dish washing liquid as a lubricant.
I always work around the edges of a tabletop first, then move toward the center (this routine helps me keep track of where I am), working in sequence up to at least 600-grit paper. If you’re aiming for a gloss finish, work up to at least 800- or 1,000-grit paper. Sanding to a higher grit will speed up the polishing procedure later on.
From Fine Woodworking #134
For the full article, download the PDF below:
Fine Woodworking Recommended Products
Double Sided Tape
Compass
Diablo ‘SandNet’ Sanding Discs




Log in or create an account to post a comment.
Sign up Log in