Curved-Leg Table
Making a floating top is easy. Designing just the right leg curve is the hard part.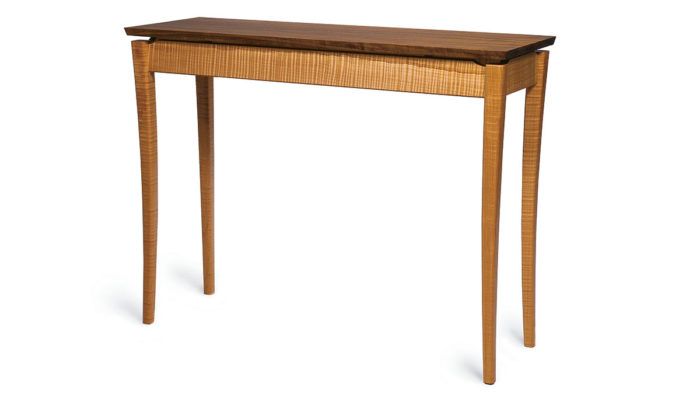
Synopsis: Building “swoopy” furniture takes time, but it’s appealing, Don Kondra writes. In this article, he tells how to make full-sized drawings, which he says is the key to finessing the joinery and accurately milling curved parts. He shows how to make templates to draw the curves and advises that you should acclimate the leg stock in your shop for a month before shaping. The joints for the legs are cut after shaping. Kondra ough-cut the top and eyeballed it to keep the overhang in proportion. And to finish the piece, Kondra used a simple tung oil/spar varnish combination. Side information describes an easy way to draw smooth curves using sticks and nails.
Although I rely heavily on machines to get the job done quickly, I aim to build furniture that looks organic and invites people to touch it. That’s why I’ve turned to using lots of curves in my work. It’s true that building swoopy furniture requires more labor than making stick-straight pieces, but I think curves are appealing. And they’re also more interesting from a design or construction point of view. Furniture that’s square to the world bores me.
Once you get hooked on curves, a whole new world of design opens up. I always make full-sized drawings on newsprint (end rolls) that can be purchased cheaply from the local newspaper. Working from an accurate drawing is the key to finessing the joinery and accurately milling curved parts. To get consistent results and to minimize the amount of handwork required, I also make a router or shaper jig.
I’ve made several versions of this hall table, and no two were alike. The current version, with a walnut top and curly maple base, suits me for now. But who knows? The next one might have a different curve or two.
Make templates to draw the curves
The two most prominent features of a hall table are the top and the legs. The top is rectangular with edges that are beveled under. The legs are curved gently and tapered, and the edges are rounded over. To ease the transition from the square, dark top to the curvy, light base, I created a gap (negative space), which makes the top appear to float. The top is secured to a pair of cross braces with four screws.
Whether you wish to copy this plan or use it as a starting point for your own design, the first step is the same: Make a simple jig for drawing smooth curves (see the story and drawings on the facing page), and use the jig to make a drawing template out of 1⁄4-in. medium-density fiberboard (MDF) or hardboard. That template is then used to lay out the leg-shaping jig (see the story and drawings on p. 68). The drawing template need only have a convex curve on one side.
Once the curve has been drawn on the MDF, cut the template on the bandsaw and fair the curve using a belt sander or sanding block. It’s worth taking your time on this step, because everything you make later will be dependent on the template.
From Fine Woodworking #135
For the full article, download the PDF below:
Fine Woodworking Recommended Products

Drafting Tools

Sketchup Class

Stanley Powerlock 16-ft. tape measure







Log in or create an account to post a comment.
Sign up Log in