Pop the Curl in Curly Maple
Woodworkers choose this species for its stunning figure. Here are four goof-proof steps to bring out the best in this premier wood.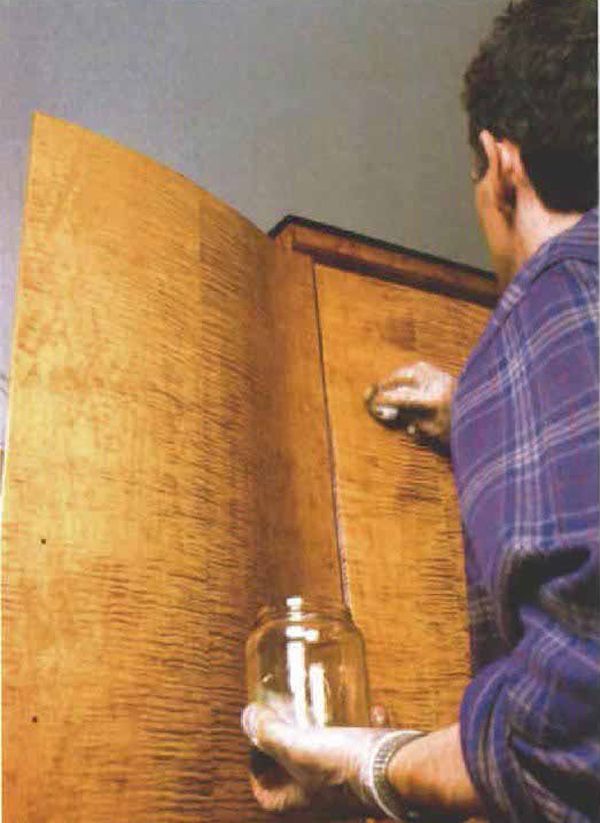
Synopsis: Curly maple is difficult because of its density and alternating grain. In this article, master finisher Jeff Jewitt explains how to finish this wood, using an armoire to illustrate his “goof-proof” finishing techniques. He includes recipes for color options. It’s important to start with water-soluble dye stains, not pigment-based stains. He explains how to darken the curl and raise the grain, how to seal the wood with a liberal coat of oil, and topcoat with the film finish of your choice. A side article on color effects help you experiment for a natural look, an antique maple look, or a two-tone effect.
The question from one concerned woodworker was direct. “I built an entertainment center out of curly maple. I want to finish it so that it looks a hundred years old—you know, that caramel color with real dark curl that jumps out and follows you around the room. I spent months sweating over this project, and the stuff was a bear to work with. I really don’t want to mess it up. How should I put a finish on this project?”
I understood his concern. I went through the same scenario years ago when I built my first piece out of curly maple. As one of our premier native hardwoods, curly maple is a rough wood to work: The wood is dense, and the alternating grain makes it tough to plane, cut and shape. However, the rewards of this challenging wood pay off when it comes time to put a finish on it. Using the armoire shown above and on the facing page, I’ll show you how to apply my favorite finish for curly maple—one that’s virtually goof-proof. I’ll also provide some recipes for other color options.
Start with the right stain
Pigment-based stains, which are made of fine, colored powders suspended in a medium, don’t bring out the best in curly maple. The pigment tends to mask both the grain and the figure. For that reason, I prefer to use the more transparent watersoluble dye stains, which are user-friendly. Dye stains can be used one of two ways. In diluted form, they highlight the curl a bit, making it just a tad darker. And used in a stronger solution, they can color the wood and accentuate the curl even more. As always, practice on some scraps first to get the color you want.
Darken the curl and raise the grain— To slightly darken and accentuate the curl, apply a diluted brown dye stain as the first step. I dilute it eight times the recommended concentration, or until it’s the color of strong tea (see the photo above). After sanding the wood through 150-grit paper, lay on this dye as a grain-raising step. Wipe or spray it quickly all over the wood as evenly as you can, then let it dry. Sand the raised grain with 180-grit paper. Sanding will remove almost all of the dye color from the surface that has no curl, but some of the color will remain in the curl figure. This is exactly what you want. If you like the color of the wood, leave it this way and move directly to applying an oil sealer. But if you want to add more color, follow this step with a darker coat of dye stain.
From Fine Woodworking #135
For the full article, download the PDF below:
Fine Woodworking Recommended Products

Bahco 6-Inch Card Scraper
Diablo ‘SandNet’ Sanding Discs
Double Sided Tape





Log in or create an account to post a comment.
Sign up Log in