Six Steps to a Perfect Inlay
A little glue, a sharp knife and a minirouter make inlaying easy
Synopsis: Roland Johnson explains a process he developed to add inlay to a tabletop. In this short article, he leads readers through the six steps to completing the job. First, position the inlay on the workpiece with office-supply rubber cement, scribe the area, and then rout and chisel away the waste. Read all the details, then try them out on your next project.
Several years ago I was commissioned to restore an antique pool table with rosewood rails inlaid with ivory. The high quality of the original craftsmanship demanded that the repairs be of a similar level, a fact underlined by the $30,000 value of the table. After trying several methods I finally hit on a process that makes perfect inlays every time, whether for pool tables or Federal tables.
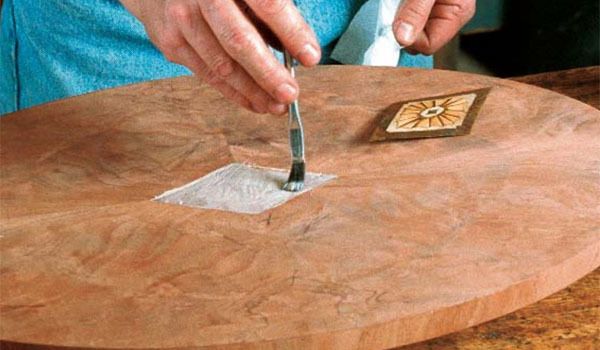
Start by gluing the premade inlay to the tabletop using rubber cement, the kind found in office-supply stores and hobby shops. Once the glue has set, carefully cut around the inlay with an X-Acto knife. I use the type of knife that has the snapoff blade sections so I can always have a dead-sharp point to follow the edge of the inlay. The first couple of times around the inlay, take light cuts to avoid following the grain of the wood rather than the edge of the inlay. Once a groove has been established, harder pressure can be applied.
Because inlays are not always perfectly symmetrical, and because you are cutting the outline by hand, mark one corner of the inlay and its corresponding place on the table with an X to maintain the correct orientation when you permanently glue the inlay in place.
Carefully remove the inlay from the tabletop using a thinbladed putty knife. I rounded one corner of my knife to lessen the risk of cutting into either the inlay or the table while I am lifting. A bit of acetone on a cotton cloth will remove the rubber cement from the inlay and the veneer, leaving a perfect outline of the inlay.
To remove the substrate, I use a Dremel tool with an added router base (see FWW #132, p. 36, for more information on Dremel router bases). A laminate trimmer would work just as well, as long as the opening for the bit allows for a good view of what you are cutting. I use a 1 ⁄8-in. straight router bit extending past the base by the thickness of the inlay plus room for adhesive.
From Fine Woodworking #148
For the full article, download the PDF below:
Fine Woodworking Recommended Products

Whiteside 9500 Solid Brass Router Inlay Router Bit Set

Bahco 6-Inch Card Scraper


Log in or create an account to post a comment.
Sign up Log in