Wooden Chisel Plane
Build this classic tool in an afternoon
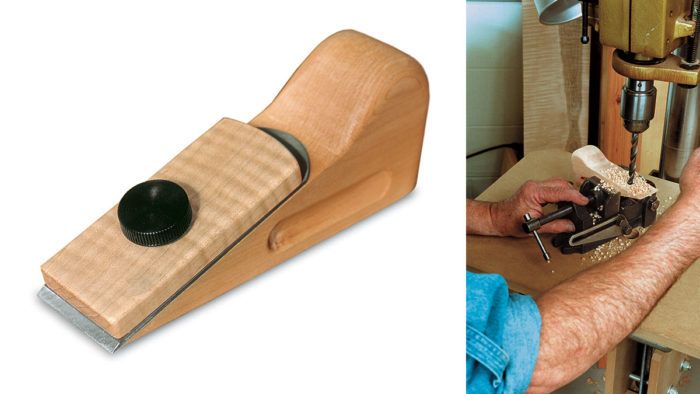
Synopsis: Build a classic wooden chisel plane with detailed project plans and instruction by woodworker Norm Pollack. The location of the blade is what makes the chisel plane unique. This article details how to make the body, cut the taper with a trimming jig, rout the finger grooves, shape the heel, mount the threaded insert, and make the cap. Pollack also shares finishing tips and his methods for adjusting and using the plane.
Tools are made to fill a need. That’s why the chisel plane has been around for centuries in one form or another. It’s able to do some things that other planes can’t do as well—or at all.
What’s unique about the chisel plane is the location of the blade. It extends ever so slightly out the front, allowing a planing cut right up to an inside corner. A bench chisel can do the same thing, but the plane provides more control. The chisel plane also is useful for trimming dowel plugs flush with a surface. And many woodworkers like to use this plane to remove glue squeeze-out along a joint line.
The construction is simple enough that you can easily make one in less than half a day. It’s best to make the plane from a tightgrained hardwood. Beech is a good choice, so is hard (sugar) maple.
The chisel plane uses a steel blade (also called a plane iron) that’s made to fit a block plane. If it’s not available locally, a mail-order source for the blade and the other hardware needed can be found on the facing page.
I like to round the heel of the plane until it fits comfortably in my hand. You may want to round it more or less, depending on what feels best for you. A shallow groove for the fingers is added, one on each side of the body, for a better grip.
Making the body
The body of the plane has two parts—a base and a heel—which are glued together. This construction lets you cut the 20° angle of the body in a single pass on the tablesaw before glue-up. And because the base and heel are ripped from the same piece of stock, the glueline hardly shows once the two parts have been attached.
Start with a piece of 1 5/8-in.-thick stock, measuring at least 3 in. wide and 10 in. long. Although the length here is almost double that of the finished plane, the extra material allows for some trimming that’s done later. By the way, you can make two of these planes almost as fast as you can make one. If you want two planes, start with a 24-in. length of stock.
Rip the board to 1 1/2 in. for the base. Then relocate the fence and rip the 1-in.-tall heel.
From Fine Woodworking #148
For the full article, download the PDF below:
Fine Woodworking Recommended Products

Starrett 12-in. combination square

Veritas Micro-Adjust Wheel Marking Gauge

Suizan Japanese Pull Saw


Log in or create an account to post a comment.
Sign up Log in