Planing Corner Joints
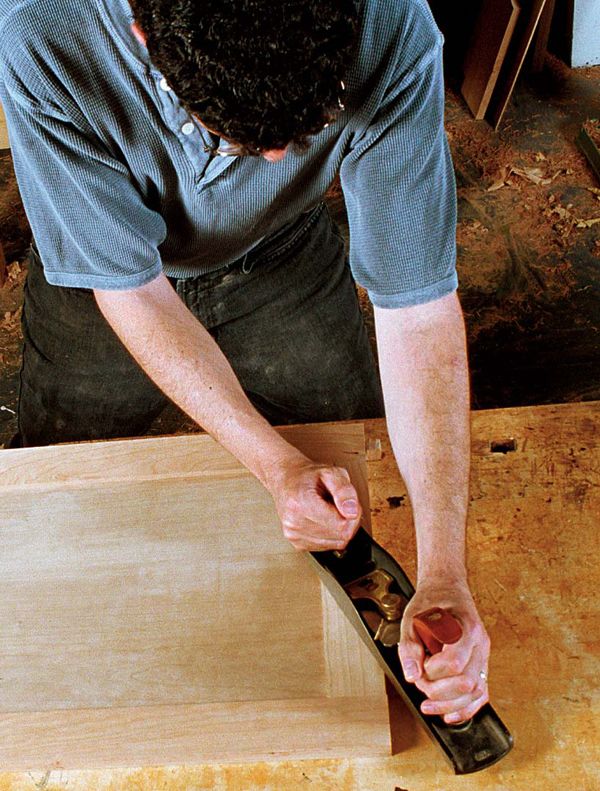
Set a plane for thin shavings, and take sweeping strokes
Synopsis: When flushing up surfaces that meet at a right angle, Jeff Miller prefers to start with a handplane, which allows him to remove just the right amount of stock without having to worry about distorting surfaces or rounding over edges. He explains here how to tune the handplane first, and then how to use it to pivot properly, how to produce a flush joint, when to straighten and lift off, and use pulling strokes. This technique can be used on drawers and face frames as well as rail-and-stile and frame-and-panel construction.
Not all corners meet exactly as planned. Sometimes, despite the best efforts at cutting and fitting, parts end up glued together with surfaces that aren’t quite flush. When this happens, many woodworkers reach for a random-orbit sander. But if you’re not careful, a random-orbit sander can create more problems than it solves. It sands quickly and indiscriminately, so you could end up rounding over edges in no time or inadvertently removing material from low spots, when it’s only the high spots that you want to sand.
So when flushing up surfaces that meet at a right angle, I prefer to start with a handplane, which allows me to remove just the right amount of stock without having to worry about distorting surfaces or rounding over edges. I still use a random-orbit sander on occasion but only after the surfaces have been pretty well flattened with a handplane.
Start with a well-tuned handplane
For this procedure to work, your plane must be sharp enough to slice thin shavings. If it’s not, some extra honing and adjusting is in order.
Although you can use any smoothing plane or jack plane, I prefer to use a block-style, low-angle smoothing plane. Unlike the standard jack or smoothing plane, which has the bevel of the blade facing down, a blockstyle plane has the blade bevel facing up. I sharpen the blade to between 35° and 40°, much steeper than the original 25° angle. So the cutting edge of the plane meets the wood at a steeper angle than a typical smoothing plane and does a better job of cutting difficult grain. Then, I adjust the mouth so that it’s close to the blade, between 1⁄32 in. and 1⁄64 in.
Plane surfaces
flush The procedure for getting the surfaces flush can be distilled into two main steps: roughing, which removes most of the wood, and smoothing, which gets the parts perfectly flush. The handplane does all the work in both steps, although the planing technique for each one is different.
From Fine Woodworking #150
For the full article, download the PDF below:
Fine Woodworking Recommended Products

Marking knife: Hock Double-Bevel Violin Knife, 3/4 in.

Olfa Knife

Freud Super Dado Saw Blade Set 8" x 5/8" Bore


Log in or create an account to post a comment.
Sign up Log in