Smooth Tambours
Flat, veneered slats give the illusion of solid-wood doors
Synopsis: Mike Weiss explains how to rip tambour slats with minimal kerf loss and without interrupting the wood grain. He advises creating a drawing of the project first to dimension it. Weiss details every step – veneering the back, cutting the slats, gluing on the face veneer, installing the tracks, building jigs to keep the slats aligned, applying the canvas, and machining the pins. He also offers tips on easing friction along the pins.
Tambours are universally recognized for their rounded, canvas-backed slats and may be found on everything from rolltop desks to appliance garages. But there’s a lesserknown type of tambour that masquerades as a smooth, solidwood door. The first time I came across a door constructed this way, I pulled on it, assuming it was hinged, to the amusement of the desk’s owner.
Suitably impressed with the illusion, I set out to make a set of these tambours for a contemporary entertainment center. My tambours are made of veneered medium-density fiberboard (MDF) cut into slats and held together by canvas, like traditional tambours. The biggest challenge of this project was figuring out how to rip apart the slats with minimal kerf loss and without interrupting the grain on the front of the tambours.
Tambours demand lots of planning
When building tambours, allowances must be made for the considerable loss of material that results from ripping stock into lots of narrow slats. Then the slats must be dimensioned so that they operate smoothly when going around the interior corner of the case. And the end slat should be double the width of the others so that a handle may be attached.
I used a full-sized drawing to figure out the dimensions. The slats for the entertainment center are 5 ⁄8 in. wide with 11⁄32-in.-thick pins, which ride in the tracks. The end slats (handle attachment points) are 13 ⁄8 in. wide. The tracks are 3 ⁄8 in. wide to allow for smooth operation without excessive play. Where each track enters the case, it makes a 90° bend through a 2-in. radius.
Veneer the back and cut slats
Use 1 ⁄2-in.-thick MDF as the substrate for the slats. MDF is stiff enough for doors of this size (311 ⁄2 in. high), and the material’s uniform density allows it to hold up well where it makes contact with the track.
To begin, cut an MDF panel oversized and glue a backing veneer to one side. The substrate must be veneered on both sides to prevent it from warping (the face veneer goes on later).
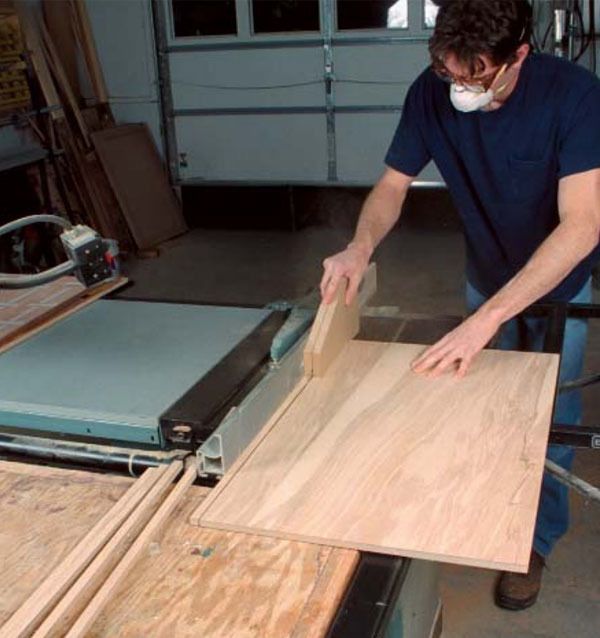
Next, rip the panel into slats. I made up a double-thickness push stick that allowed me to apply uniform pressure on both sides of the sawblade. The added control of such a push stick produces clean cuts. After cutting, number the slats on their ends and sand away any saw marks. When assembled in order, it is critical that the slats fit together tightly; otherwise, excess glue may find its way into the gaps when applying the face veneer.
From Fine Woodworking #150
For the full article, download the PDF below:
Fine Woodworking Recommended Products

Bahco 6-Inch Card Scraper

Dubuque Clamp Works Bar Clamps - 4 pack


Log in or create an account to post a comment.
Sign up Log in