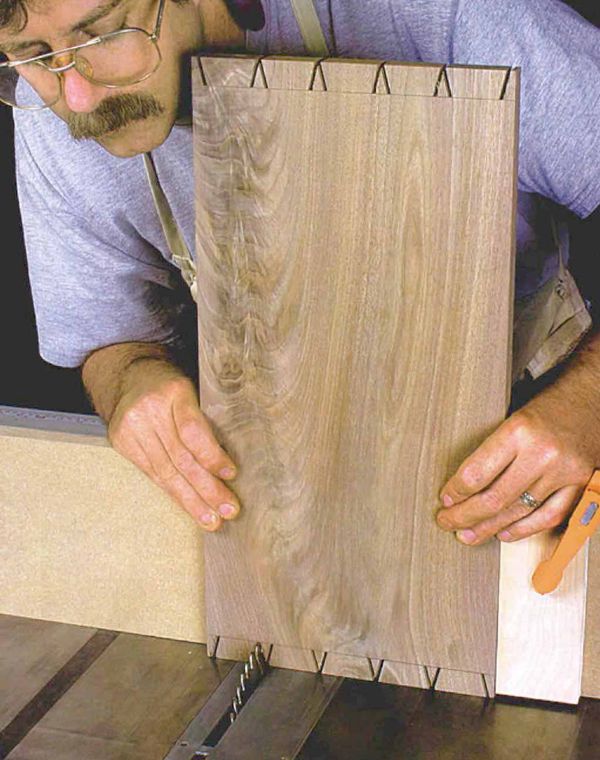
Synopsis: Steve Latta’s method of cutting dovetails on the tablesaw guarantees accuracy and lets you control spacing and size. It ensures square cuts, helping with an accurate transfer and a better joint. You can also run a stack of parts in one pass. In this article, Latta shares his tips, including sharpening the sawblade to your favorite dovetail angle and rabbeting the tails before cleaning out the waste.Through- and half-blind dovetail joints are explained.
Dovetailing—time-tested, reliable and strong—is also ornamental and should reflect the personality of the builder. For this to happen, the cabinetmaker must control the number of pins and tails and their size and spacing. Unfortunately, most router dovetailing jigs don’t allow for that type of expression. The appearance of the final joint, with thick pins and uniform spacing, is void of personality.
Hand-cutting represents the other end of the spectrum. The size and spacing of the pins are determined by the cabinetmaker. Combine that with the natural irregularities of handwork, and this technique yields a look that is truly wonderful, tying the builder to traditions that are hundreds of years old. However, it requires a great deal of time and skill.
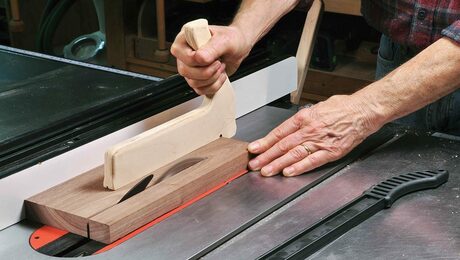
I teach students a tablesaw method that bridges the gap between router-cut and totally hand-cut dovetails. The technique guarantees accuracy while allowing you to control spacing and size. The tails can be as close together as the width of your sawblade. And it’s easy to make the spacing irregular, another sign of handwork.
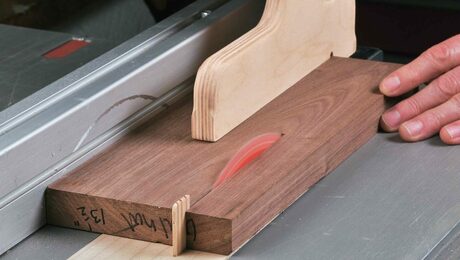
The main problem my students have with hand-cutting dovetails is crooked sawcuts, which come back to haunt them when they use the tails to lay out the pins. Any irregularities create gaps and splits when the boards are joined. Cutting the tails on a tablesaw, using a miter-gauge setup or a guide block riding the rip fence, ensures square cuts. This leads to an accurate transfer and, inevitably, a better joint. The guide-block setup also lets you run a stack of parts in one pass.
Another big advantage is that you spend less time on layout. For multiple dovetails that are identical, the tails need to be marked on only a single piece of stock. The tablesaw setup guarantees repeatability. This also means that pieces are interchangeable, so when running components such as drawer sides, I send a few extra parts along for the ride. If one gets damaged later, a replacement is at hand.
The pins are pretty easy, as long as the layout is transferred accurately with a marking knife. I use machines to remove the waste between the pins and then pare them by hand, working to the incised line.
Have a blade specially sharpened
Years back I read an article where a cabinetmaker ground all of the teeth of a table saw blade in one direction and used the blade strictly for dovetailing. Fascinated by this idea, I spent $12 to have an old narrow-kerf blade ground this way to work with my Unisaw. I had another blade sharpened in the reverse direction to fit my left-tilting Powermatic 66.
From Fine Woodworking #152
For the full article, download the PDF below:
Fine Woodworking Recommended Products

Veritas Precision Square

Starrett 12-in. combination square
Pfiel Chip Carving Knife




Log in or create an account to post a comment.
Sign up Log in