Turn a Classic Floor Lamp
Manageable sections, connected by concealed joints, combine to make a lamp you won't find in any store
Synopsis: This 18th-century inspired lamp offers a chance to practice both faceplate and spindle turning. The design accommodates a range of lathe sizes and turning abilities by using beads to conceal joints. The author explains how he pieced the shaft from four pieces of 4/4 stock; there are directions on how to make a shaft using a single piece of stock, too. He offers detailed information on wiring the lamp to code and where to find the hardware necessary to finish your lamp.
As an avid reader, I have long appreciated the good illumination afforded by a floor lamp. Most store models are incompatible with period furniture and tend to be expensive and, to my way of thinking, a bit too low for good over-the-shoulder illumination.
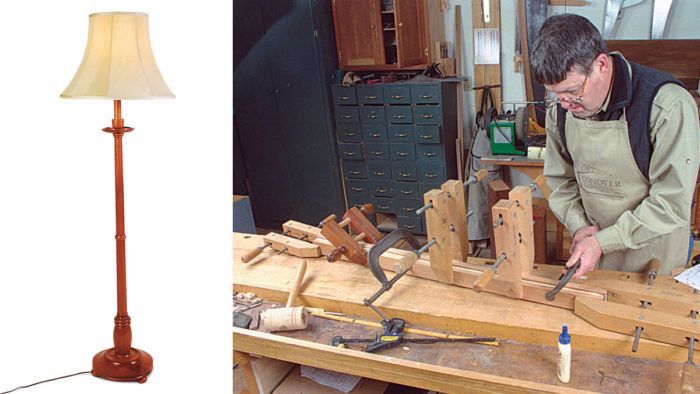
When designing the floor lamp, I looked to the late 18th century for inspiration. A design that originally would have held a candle (hence such vestiges as the cup just below the socket to catch wax drippings) still works well electrified. Building this lamp allows you to practice both faceplate and spindle turning. The base (12 in. dia. by 3 in. high) is faceplate-turned, as is the wax cup. The three spindle-turned feet ensure that the lamp will never rock and allow the electrical cord to exit the bottom of the lamp in any direction.
The design accommodates a range of lathe sizes as well as different turning abilities. Depending on your lathe’s distance between centers, you can either turn the shaft in one 36-in. section, as I did, or in 24-in. and 14-in. sections, the extra 2 in. to allow for a tenon. A bead in the main shaft will conceal the joint.
The lamp can be turned from any durable hardwood. I chose mahogany because it was the preferred wood of late 18th-century craftsmen. Also, it is straight grained, so it is very easy to turn and will tolerate generous amounts of scraping.
Prepare the stock
It is easiest to glue up stock for the shaft from two or more pieces of wood. Before glue-up, mill a trough in each half of the blanks with a small core-box bit. While I do this with a handheld router and a fence, a router table will work just as well.
When I made the lamp, my lumber merchant had sold out of 8/4 and 6/4 mahogany. I therefore had to assemble four pieces of 4/4 stock to create a hollow core. Two pieces of 3 ⁄4-in. square poplar at both ends keep the four mahogany sections correctly separated and act as points of contact for the headstock and tailstock centers. To avoid gaps, apply strong, even clamping pressure during glue-up.
If you prefer to make the shaft from a single piece of mahogany, you will have to drill through the center of the main shaft with a pod auger (often call a lamp auger). This task requires special equipment: You will need either a hollow-tailstock spindle with a special hollow center or an accessory that mounts in the tool base (banjo) and holds the work during drilling.
From Fine Woodworking #152
For the full article, download the PDF below:
Fine Woodworking Recommended Products

Veritas Standard Wheel Marking Gauge

Veritas Wheel Marking Gauge

Blackwing Pencils


Log in or create an account to post a comment.
Sign up Log in