Miter-Saw Tune-up
Keep your chopsaw or sliding compound-miter saw in peak form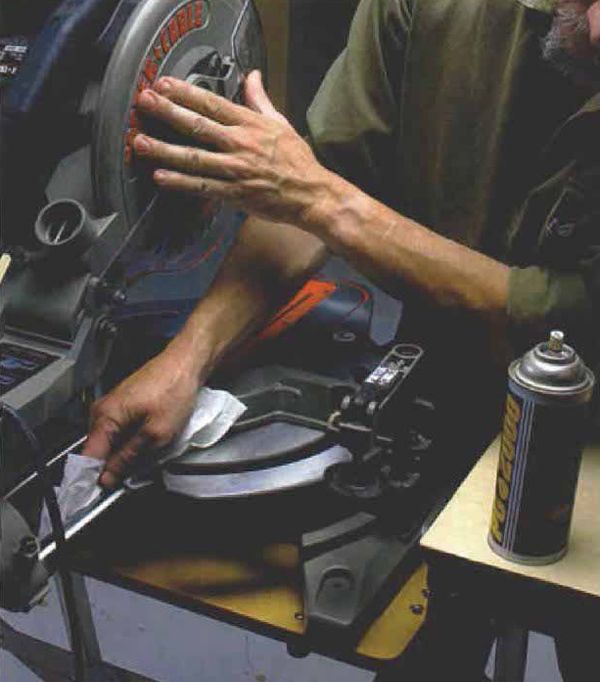
Synopsis: To get consistently clean cuts with your chopsaw or sliding compound miter saw, you have to tune it up and carry out periodic maintenance. John White, Fine Woodworking’s shop manager, takes you through all the steps necessary to do both. From cleaning parts to testing angles and fences, he helps you troubleshoot every element. Also, refer to his troubleshooting chart to fix common ailments on your saw.
Miter saws are showing up more and more in cabinet- and furniture-making shops. Although some of the earlymiter saws weren’t reliably accurate, the current generation has evolved into tools capable of furniture-grade precision for joinery and trimwork. One big advantage of a miter saw is that you can get a cleaner cut—especially on long lengths—than you get with a tablesaw miter gauge because you’re moving the blade into the stock, not the other way around. The result is less wobble when the cutting edge meets the workpiece. To get consistently clean cuts with one of these machines, whether you own a chopsaw or a sliding compound-miter saw, you first have to tune it up and then carry out periodic maintenance.
Start with a Thorough Cleaning
Begin a tune-up by removing dust and chips from the base of the saw. You can safely use compressed air to blow out the crevices under the saw’s table, but don’t use it to clean off the rods of sliding saws because the blast of air can force dust past the seals to the bearings. A shop vacuum is the better choice. Take off the blade and clean out the inside of the blade housing and the guard, removing any pitch buildup that may interfere with the guard’s motion. Spray penetrating oil, an efficient pitch solvent, on a clean towel and use It to wipe down the guard mechanism and the guide rods for the sliding mechanism. Don’t leave excess oil on the rods; wipe them with a dry towel once they are clean. Use light machine oil to lubricate the pivot points where the head rotates when the saw is pulled downward.
Make sure the fence is Flat and Square
Most miter-saw fences consist of an aluminum casting with a large semicircular segment connecting the left and right halves of the fence. The circular part of the casting is a weak spot that can get bent, throwing the two faces of the fence out of line. Check the fence with a straightedge. The left and right sides should be in perfect alignment. If the fence is bent, you have two options to correct the problem: You can try to straighten the casting, or you can add wood shims to the front faces. To straighten the casting, remove the fence from the saw and set it up across two blocks on the benchtop. With the high side of the fence uppermost, press down on it with moderate pressure for just a moment, then recheck it for straightness. Don’t use a lot of pressure because most fences are not that stiff, and you can easily overdo it.
From Fine Woodworking #154
For the full article, download the PDF below:
Fine Woodworking Recommended Products
Ridgid EB4424 Oscillating Spindle/Belt Sander
Craftsman Random Orbit Sander
Fein Turbo II HEPA Wet/Dry Dust Extractor





Log in or create an account to post a comment.
Sign up Log in