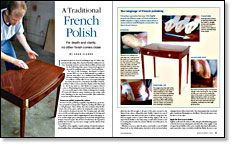
A Traditional French Polish
For depth and clarity, no other finish comes close
Synopsis: Sean Clarke studied the intricacies of French polishing under French masters, and demonstrates his knowledge in this article. Clarke shares the recipe he’s been using for 18 years, and offers instruction for preparing the surface, applying the finish, and rubbing it out to create a classic aged result. The aim of French polishing is to use as little material as possible to gain the most effect. The article also illustrates application techniques and advice on picking the right supplies.
I became hooked on French polishing at age 15, when I apprenticed with a large firm of period furniture makers in London. I instantly wanted to pursue this incredible art form, and for the following three years I learned all aspects of the craft by studying under master French polishers. The aim of this technique, developed in France around 1820, is to use as little material as possible to gain the most effect. It’s a traditional hand finish that involves working several coats of shellac deep into the wood fibers, and the effect is one of exceptional depth and clarity. Because it is of moderate durability, a Frenchpolished surface is best suited for display rather than hard use. But in my mind, no other finish can compare when it comes to illuminating the natural beauty inherent in wood. As you would expect with a finish technique that is nearly 200 years old, there are many variations in the recipe, with each claiming to be the true French polish. This version has served me well for the past 18 years.
Before you polish, prepare the surface
Because French polishing magnifies imperfections, good surface preparation is imperative. Begin by sanding all surfaces up to 320-grit paper. Clean off the dust, then evaluate what the finished color of the piece will be by wiping the surfaces with a cloth soaked in denatured alcohol. The Georgian-style side table shown at left was built using Honduras mahogany for the legs and frame, but the drawer, with its highly figured Cuban mahogany veneer, and the single-piece mahogany top were both salvaged from antiques beyond repair. The alcohol revealed that the legs had a pinkish hue, but the top was more orange, and the drawer front was a dark brown.
To pull the colors together, I used a mixture of water-based powdered aniline dyes: red mahogany and golden-amber maple.
From Fine Woodworking #155
For the full article, download the PDF below:
Fine Woodworking Recommended Products

Veritas Standard Wheel Marking Gauge

Starrett 12-in. combination square

Dividers


Log in or create an account to post a comment.
Sign up Log in