Get the Most From Your Router Table
Make controlled cuts using special jigs that hold the work and keep hands away from cutters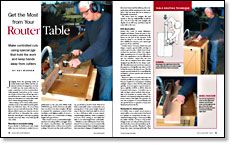
Synopsis: Instruction on how to use a router table correctly has been all but ignored. Too many woodworkers use risky methods to achieve disappointing results. Here, router guru Patrick Warner shares three keys to successful routing and detailed plans for building his favorite router sleds and fence. Along the way he provides tips for getting smooth cuts every time, even with difficult operations.
Judging from the growing ranks of ready-made router tables and the numerous articles in magazines on how to build one, the router table has become a must-have tool for woodworkers. Unfortunately, instruction in the correct use of this tool has been all but ignored. I can tell from the e-mails I receive that too many woodworkers are using risky methods to obtain disappointing results.
Most routing can be done safely and accurately on the router table if certain guidelines are followed. Here I’ll cover three keys to success and talk about bits. I’ll also discuss which routers are okay for use in a table and how to determine the correct feed rate. And I’ll give a few tips on getting smooth cuts every time, even with special cuts or bits.
Three keys to successful routing
If you decide to build your own router table, you are welcome to make it as so phisticated as the one John White built (FWW #153, pp. 55-61). However, the table does not have to be that complex. All that is required for maximum control of the workpiece and highest quality of cut are a flat table that’s at a comfortable working height and a good fence.
If the work is not at a comfortable height, any form of routing will be a struggle. Even for shorter woodworkers, the standard bench height (34 in. to 36 in.) is too low for routing. You can’t see the work, and if you try, you’ll fold yourself in half. What level feels comfortable varies considerably even among those of the same height. A good way to discover what feels right for you is to use a drill-press table as your experimental height platform. Hold a workpiece as if you were routing it, and adjust the table to see what height feels comfortable.
Whether a router tabletop has been “windowed” for an insert or not, it must be flat and uninterrupted. If the workpiece bumps into any minor changes of height between the router insert and the tabletop, these imperfections will be transferred to the workpiece. The top must also be as square to the spindle as practical.
The fence must be straight, flat and square to the top. Adjustability would be nice, but if it ain’t flat and straight, the depths of cut will vary, and there may be some risk to the user.
From Fine Woodworking #157
For the full article, download the PDF below:
Fine Woodworking Recommended Products
Veritas Micro-Adjust Wheel Marking Gauge

Starrett 12-in. combination square
3M Blue Tape




Log in or create an account to post a comment.
Sign up Log in