Traditional Hammer Veneering
A low-tech method gives high-style results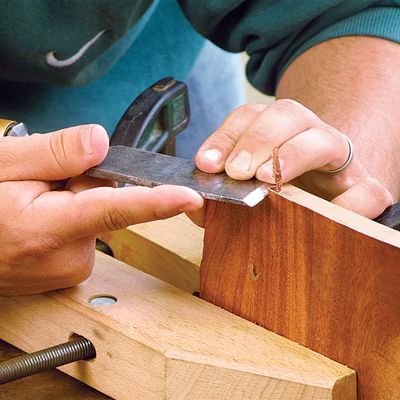
Synopsis: When it comes to applying veneer, many woodworkers lean toward higher-tech procedures such as veneer presses, vacuum bags, and clamps and cauls. Yet with a relatively small investment in a glue pot and veneer hammer, you can veneer both flat and curved surfaces efficiently. Dan Faia gives a step-by-step procedure for this low-tech method that gives high-style results.
When it comes to applying veneer, modern woodworkers tend to lean toward more mechanical procedures, such as veneer presses, vacuum bags, and clamps and cauls.
Veneer presses work well on large, flat surfaces, but they take up an enormous amount of floor space. And while vacuum bags are excellent for all veneering applications, flat or curved, a quality bag system is a big investment ($500 and up). Clamps and cauls are labor-intensive to set up, especially for curved surfaces. Hammer veneering, on the other hand, requires only two items: a glue pot to keep the hide glue at the proper temperature and a veneer hammer to apply it.
The glue pot ($100) and veneer hammer ($32) can be purchased from a number of sources, including Highland Hardware (800- 241-6748; www.highlandhardware.com). For the very frugal, a stove-top double boiler can be assembled easily from household items, and the veneer hammer can be shopmade.
Hammer veneering involves applying heated hide glue to the substrate, the underside of the veneer, and its top side (to lubricate the hammer). Then the veneer is pressed, not pounded, into place with the straight edge of the veneer hammer. The job is complete within a few minutes after the glue has cooled. Hide glue has many qualities that make it suitable for hammering. For one, with hide glue you may loosen the glue bond using heat and reposition or readhere problem areas. Also, glue applied to the top side of the veneer acts as a grain filler and sealer coat and can be scraped, sanded, and finished more easily.
The hammering technique works on both flat and curved surfaces. On curved substrates, I usually glue the veneer seams with yellow glue and remove any veneer tape or masking tape before hammer veneering. The veneer should overlap the substrate by roughly 1 ⁄8 in. all around to allow for minor shifting during application.
Cook up some glue
I buy hide glue from Bjorn Industries (704-364-1186), where an expert will recommend a particular strength based on the substrate, the veneer type, and the desired open time. But standard, goodquality hide glue is widely available. Buy it in ground form, as opposed to pearls. In my experience, ground glue melts more quickly in the pot and produces a smoother consistency.
From Fine Woodworking #171
For the full article, download the PDF below:
Fine Woodworking Recommended Products

Bahco 6-Inch Card Scraper
Diablo ‘SandNet’ Sanding Discs
3M Blue Tape





Log in or create an account to post a comment.
Sign up Log in