A Shaker Blanket Chest
Dovetails, figured wood, and traditional moldings enhance this timeless piece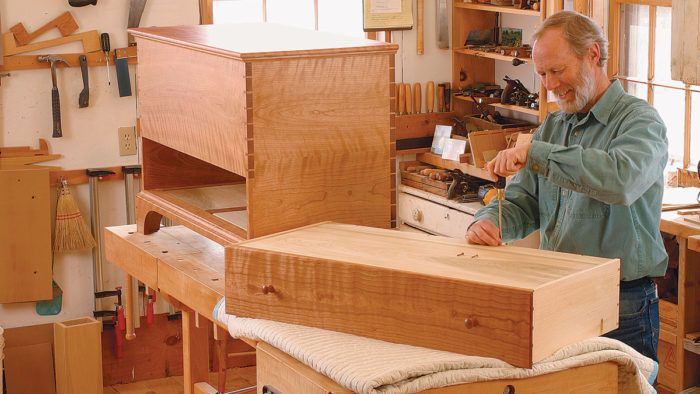
Synopsis: Charles Durfee’s traditional Shaker blanket chest design harkens back to the days when horizontal wood grain was used on chest sides, allowing the carcase to be joined by dovetails and the sides to move together with seasonal changes in humidity. In addition to his instructions for building the piece, Durfee gives a trouble-shooting primer on what to do when things go wrong with your dovetails.
The earliest storage chests were simple boxes made of six boards. As they evolved, a base, or plinth, was added to lift them off the floor and give them aesthetic appeal, while molding the edges created a more finished look. However, anyone who used such a chest soon found that they had to fish around for small items that ended up on the bottom. To solve this problem, furniture makers added first one drawer, and then two or even three drawers. Finally, the lid was eliminated, leaving a full chest of drawers as we know it today.
During the evolution from blanket box to chest of drawers, the grain in the sides changed from horizontal to vertical. Many of the single-drawer versions exhibit an intermediate stage in this evolution, with vertical grain in the sides nailed to horizontal grain in the front, which probably is the only way they could be joined. In this piece, the older style with all horizontal grain is retained, which enables the front, back, and sides to be joined with dovetails. As long as the sides don’t get too tall, this is a superior form of construction: Seasonal wood movement results in the parts moving together, instead of against each other.
Although the Shakers probably would have used painted pine, modern woodworkers may prefer the natural look of fine wood. I used some excellent single-log Pennsylvania cherry with lots of curl, nicely matched in grain and color.
You may need to adjust the overall dimensions if you want to use specific boards in particular places. In this case, I made the overall height a bit less than planned so that I could use an exceptionally fine single-width board for the front. You can lay out the actual dimensions on a story stick, using one face each for height, width, and depth. The story stick will give you all of the information necessary to begin construction, so you won’t need any drawings.
After double-checking to ensure planning and layout make sense, mill and glue the boards for the front, sides, back, top, and drawer front. Leave the inner bottom oversize; it should be sized to just fit into its grooves. In addition, you can make up the bottom frame-and-panel. Remove any dry excess glue and flatten the boards using planes or sanders and a straightedge. To save time, I take the parts to a local mill shop and run them through a thickness sander.
From Fine Woodworking #172
For the full article, download the PDF below.
Fine Woodworking Recommended Products
Circle Guide

Stanley Powerlock 16-ft. tape measure
Compass







Log in or create an account to post a comment.
Sign up Log in