Handplane Tune-up
Step-by-step instructions to get maximum performance from any handplane.
Synopsis: Frustrated because the new handplane you bought doesn’t give you the fine shavings you expected? David Charlesworth shares a trade secret—a new handplane should be treated more as a collection of parts than a finished piece. Refining the fit of the frog, sole, throat, lever cap, and chipbreaker, and replacing the blade will soon have that $80 plane working like a $300 model. Learn how to get your handplane cutting cleanly and without chatter. Also, learn to flatten the back and sharpen the tip of your handplane replacement blade using artificial Japanese waterstones.
There is a well-kept secret in fine cabinetmaking. Most new planes should be treated as a kit of parts, not as a tool ready for fine work. Recently, while reviewing a new jack plane, I set the plane to take a 0.001-in.- or 0.002-in.-thick shaving—a setting not unreasonable for planing figured hardwood—but it was impossible to plane a straight edge. The cause of the problem, I discovered, was the plane’s sole, which was 0.003 in. hollow in its length.
Unaware of these flaws, many woodworkers are frustrated by the performance of their shiny new planes; I certainly was when I started out, and my new students have the same problem.
In the heyday of English plane making, a plane made by Norris or Spiers cost a cabinetmaker one to three weeks’ wages, so perhaps we should not expect too much from that new Stanley or Anant costing the equivalent of a few hours’ wages. The good news is that spending a few hours tuning up these planes will result in an outstanding improvement in their performance. The methods I’ll describe can be applied to any Bailey-type plane with a metal body, whether old or new.
The quickest way to improve a plane is to purchase a high-quality A2 steel replacement blade that has been cryogenically treated. These blades are available from Ron Hock and Thomas Lie-Nielsen, but if you buy from the latter, be sure to order the 0.095-in.-thick blade because the thicker 0.130-in. blade may not fit in your plane. Even the 0.095-in.-thick blade will be significantly thicker and stiffer than a stock blade, greatly reducing vibration and chatter.
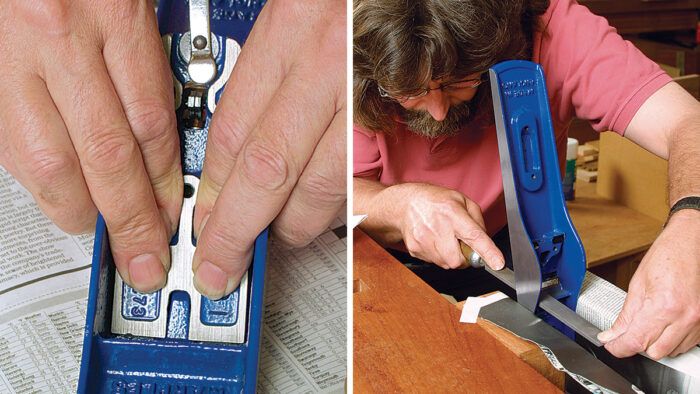
The first step in the tune-up process is to disassemble the plane, remove the frog, and check its seating—the four contact points between the body and the underside of the frog. A badly seated frog screwed down tight will distort the thin area of the sole just behind the throat of the plane.
To determine how well the surfaces fit, work the relevant areas of the body casting with a black felt-tip pen. Remove the fore-and-aft adjustment plate, press the frog in place, and slide it back and forth. The ink will be scraped off where the surfaces make good contact. If the frog rocks, only two diagonal points are making contact. Work on the contact points until you achieve about 60% contact on all four surfaces.
From Fine Woodworking #172
For the full article, download the PDF below.
Fine Woodworking Recommended Products
Veritas Micro-Adjust Wheel Marking Gauge
Lie-Nielsen No. 102 Low Angle Block Plane

Wen Diamond Grinding Wheel



Log in or create an account to post a comment.
Sign up Log in