Perfect Mortise-and-Tenon Joints
A plunge router, a tablesaw, and a couple of jigs make the process of cutting a mortise and tenon almost foolproof.
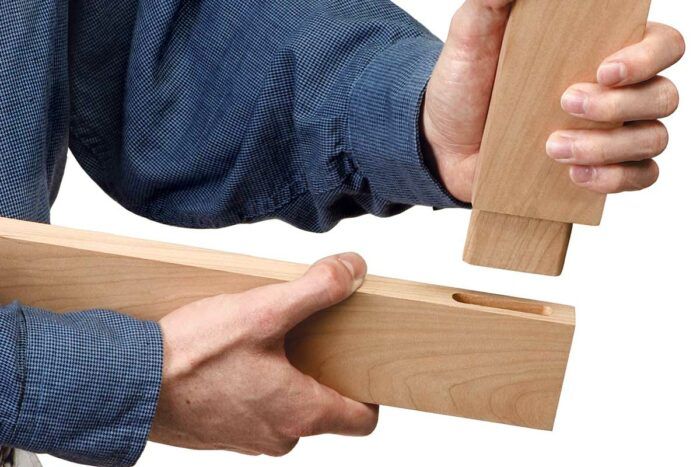
Synopsis: Using a plunge router, tablesaw, edge guide, and shopmade jig, Jeff Miller makes mortise-and-tenon joints that fit right every time. Here, he shares his technique and his plans for a simple jig that ensures well-cut mortises, then his tips for cutting and fine-tuning tenons for a perfect fit.
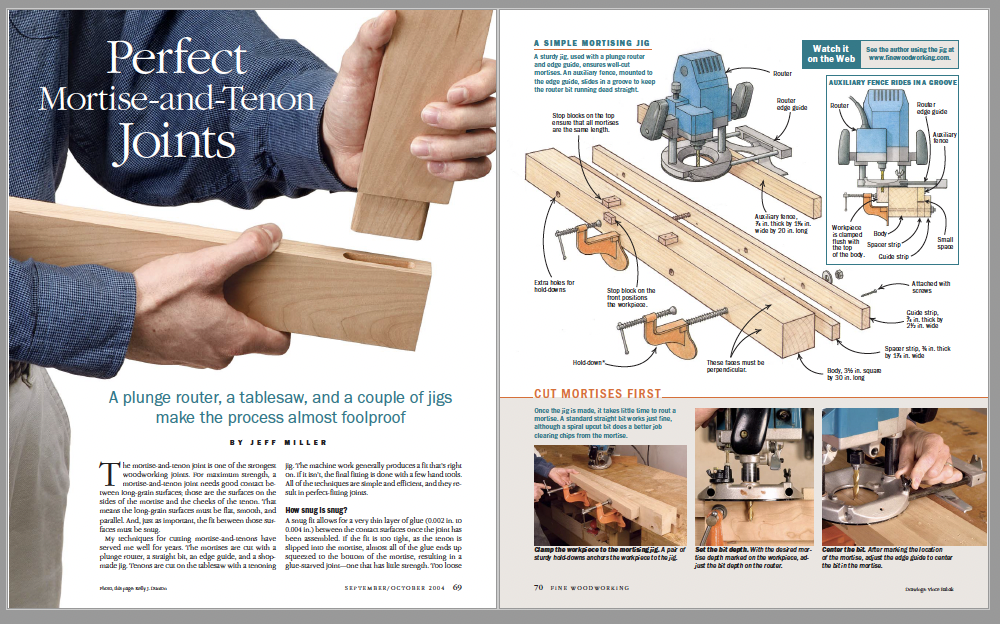
The mortise-and-tenon joint is one of the strongest woodworking joints. For maximum strength, a mortise-and-tenon joint needs good contact between long-grain surfaces; those are the surfaces on the sides of the mortise and the cheeks of the tenon. That means the long-grain surfaces must be flat, smooth, and parallel. And, just as important, the fit between those surfaces must be snug.
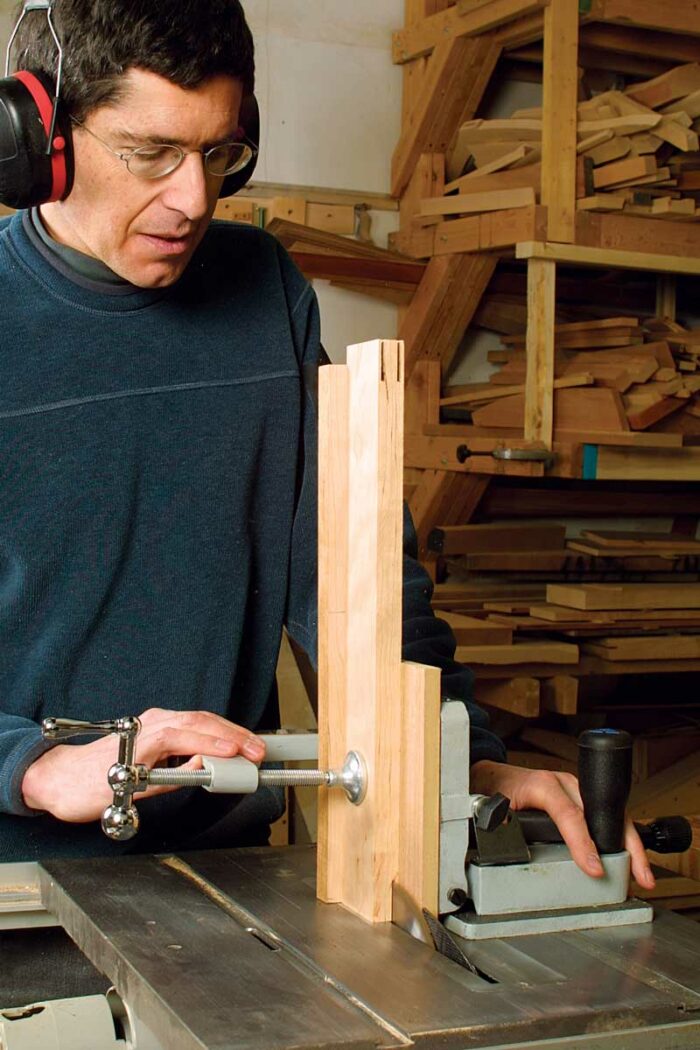
My techniques for cutting mortise-and-tenons have served me well for years. The mortises are cut with a plunge router, a straight bit, an edge guide, and a shopmade jig. Tenons are cut on the tablesaw with a tenoning jig. The machine work generally produces a fit that’s right on. If it isn’t, the final fitting is done with a few hand tools. All of the techniques are simple and efficient, and they result in perfect-fitting joints.
How snug is snug?
A snug fit allows for a very thin layer of glue (0.002 in. to 0.004 in.) between the contact surfaces once the joint has been assembled. If the fit is too tight, as the tenon is slipped into the mortise, almost all of the glue ends up squeezed to the bottom of the mortise, resulting in a glue-starved joint—one that has little strength. Too loose a fit, and there isn’t enough surface contact for a good glue bond.
A joint is too tight if a mallet or clamp is needed to put it together. It’s too loose if it goes together with little or no resistance. A joint that’s just right goes together by hand with only a moderate amount of pushing and wiggling.
One more point here: The end of the tenon shouldn’t extend to the bottom of the mortise. To allow room for excess glue, cut the tenon about 1 ⁄32 in. shorter than the depth of the mortise. Keep in mind, though, that it’s difficult to get perfect-fitting mortise-and-tenons if the stock isn’t properly prepared. So make sure the moisture content isn’t too high or low. And be sure to mill all of the parts on a jointer and thickness planer, or by hand, until each workpiece ends up flat, straight, and square.
Keep in mind, though, that it’s difficult to get perfect-fitting mortise-and-tenons if the stock isn’t properly prepared. So make sure the moisture content isn’t too high or low. And be sure to mill all of the parts on a jointer and thickness planer, or by hand, until each workpiece ends up flat, straight, and square.
Cut the mortises first
In general, it’s best to cut the mortises first and then cut the tenons to fit the mortises. First, though, you need to get a few things together, and you need to make a jig. Use a plunge router and a straight bit—A plunge router, rather than a fixed-base router, is pretty much a must to cut mortises. Any effort to tip the bit of a fixed-base router into a workpiece to create a mortise is not only dangerous, but it’s also likely to produce an inaccurate cut. A midsize (11⁄2 hp to 21⁄2 hp) plunger is sufficient, as this technique creates mortises by making lots of light cuts.
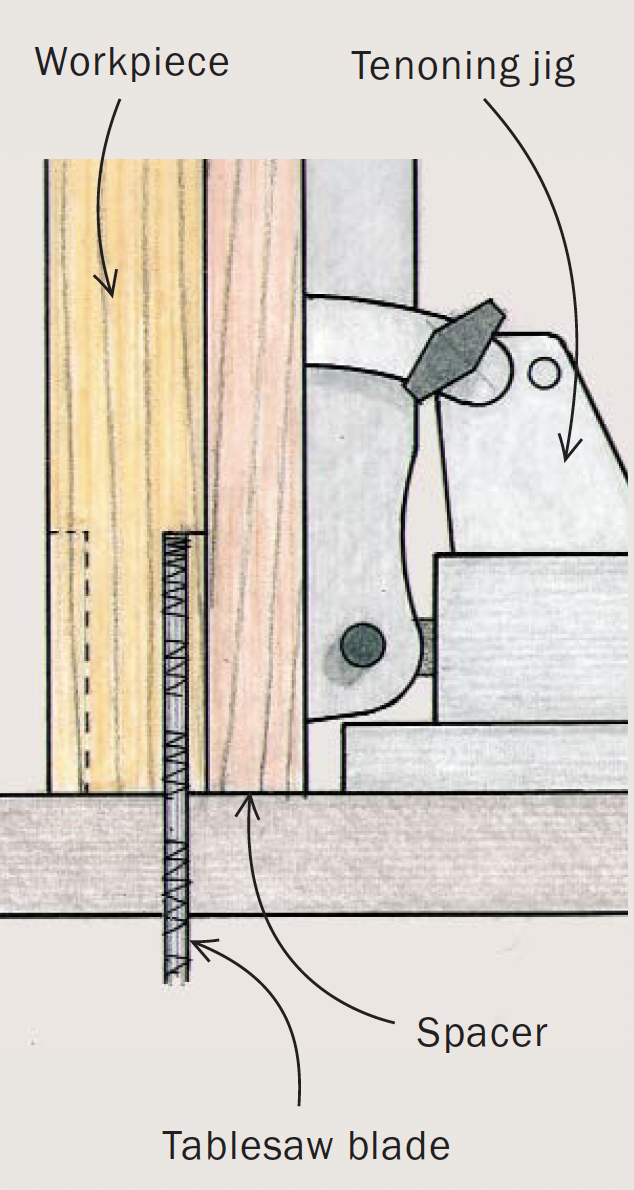
Cut tenons last1. Insert the spacer 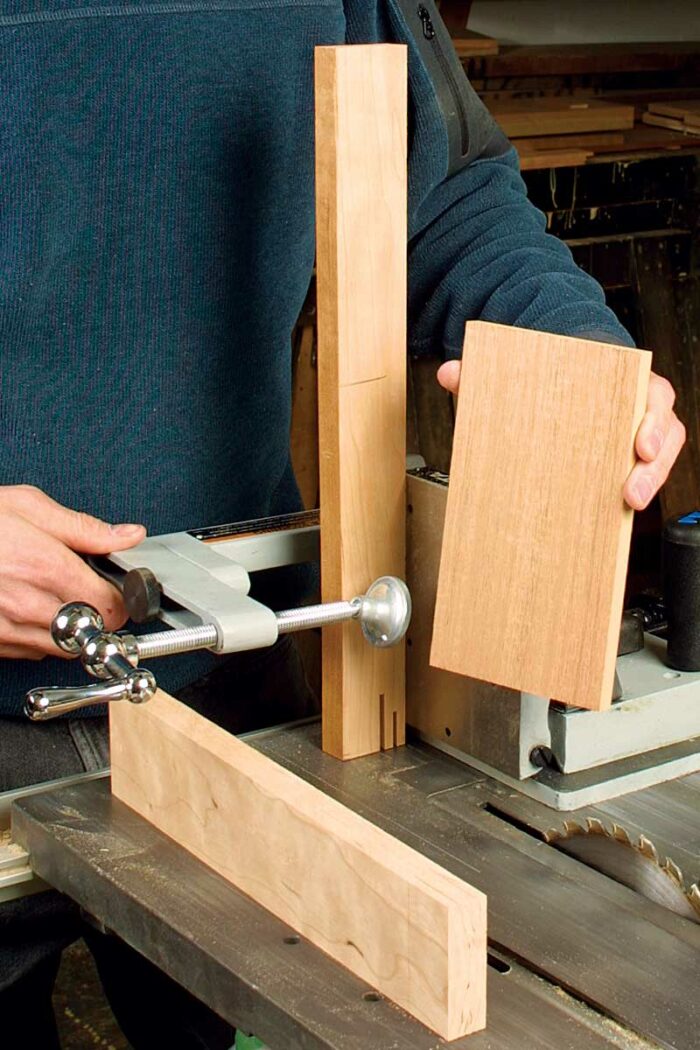 2. Cut the first cheek
3. Remove the spacer and cut the second cheek 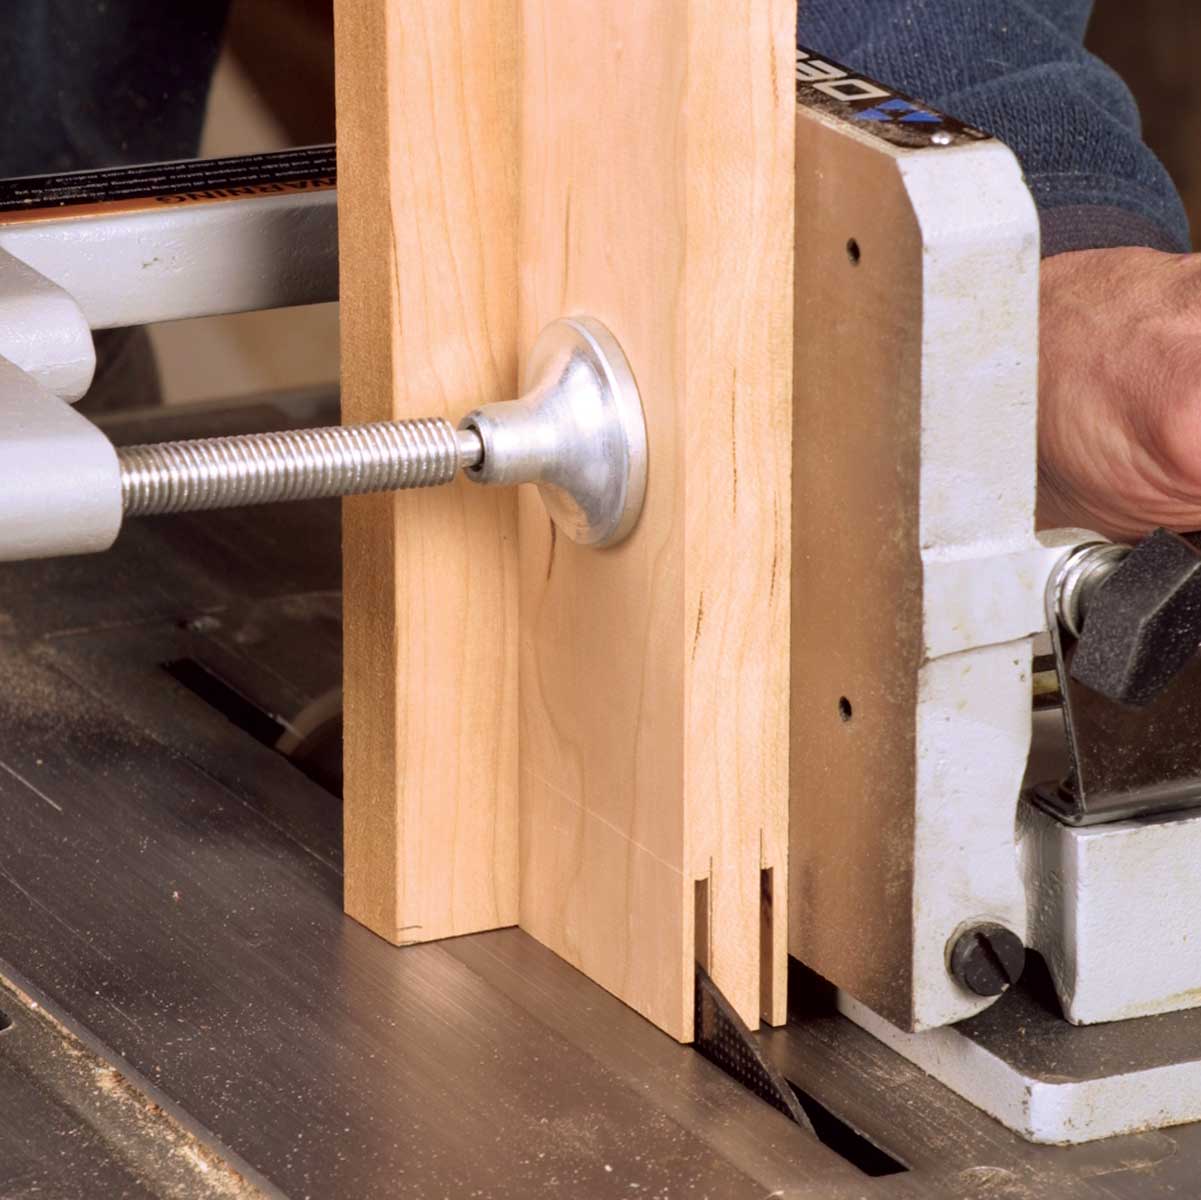 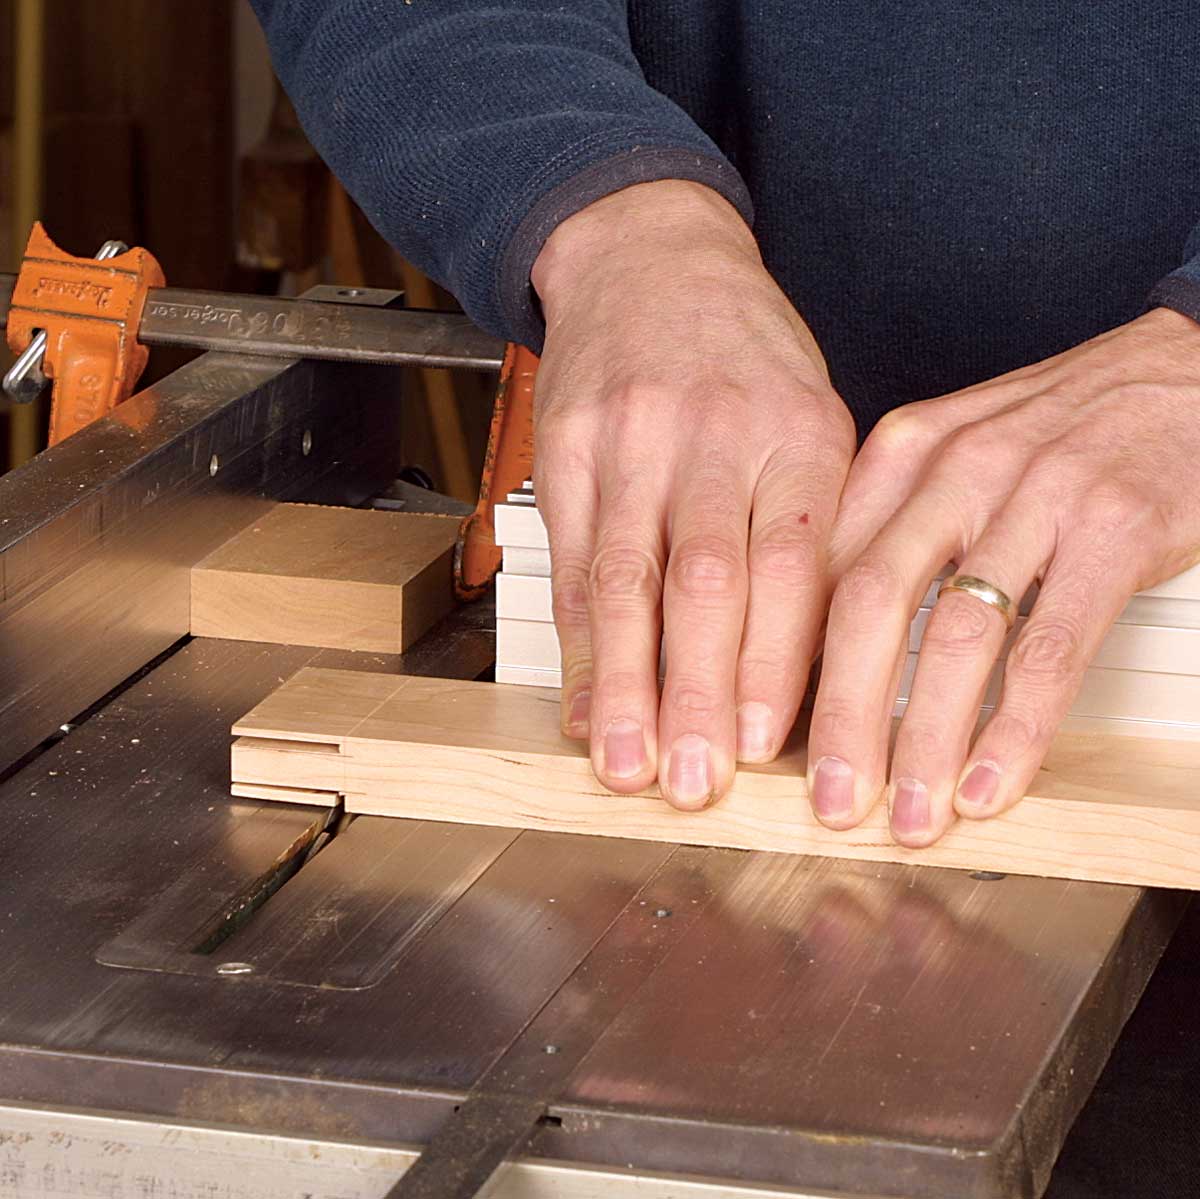 |
Use a plunge router and a straight bit—A plunge router, rather than a fixed-base router, is pretty much a must to cut mortises. Any effort to tip the bit of a fixed-base router into a workpiece to create a mortise is not only dangerous, but it’s also likely to produce an inaccurate cut. A midsize (11⁄2 hp to 21⁄2 hp) plunger is sufficient, as this technique creates mortises by making lots of light cuts.
The diameter of the router bit determines the width of the mortise. For example, a 1⁄4-in.-wide mortise is cut with a 1⁄4-in.-dia. bit; and a 3⁄4-in.-wide mortise is cut with a 3⁄4-in.-dia. bit. You also could choose a mortise width that requires moving the router over and taking extra passes to widen the opening. But because straight bits are available in so many sizes, you can usually find one to match the mortise width you need.
 From Fine Woodworking #172
For the full article, download the PDF below:
Fine Woodworking Recommended Products
Compass
Veritas Standard Wheel Marking Gauge

Dividers




Log in or create an account to post a comment.
Sign up Log in