Five tips for better bandsawing
Michael Fortune's no-hassle approach delivers smooth, straight cuts on the bandsaw.
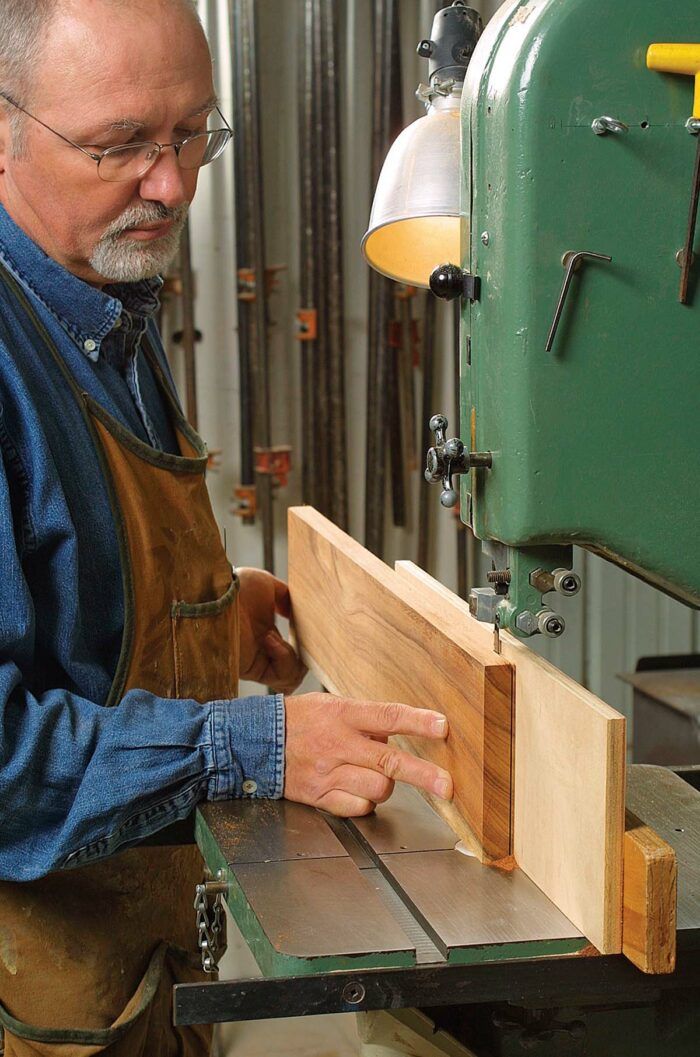
Synopsis: The bandsaw can be the most useful tool in the shop, provided you know how to set it up properly. Blade type, blade alignment, and correct tension are the keys to getting the bandsaw to do a multitude of woodworking jobs such as ripping stock and cutting smooth tenons, fine inlay stringing, perfect veneers, and curved patterns.
In my first year of design school in the early 1970s, I remember the shop manager telling me that the bandsaw was the most useful piece of equipment in a woodshop. This struck me as a dubious statement, given that we were standing in a workshop filled with state-of-the-art European woodworking equipment. But time and again he proved it.
After I graduated in 1974, my first purchase was a 15-in. General bandsaw. However, I soon realized I could achieve the accuracy and versatility I had experienced at school only if I set up the saw the way my shop manager did.
Once I figured out the keys to success, I came to rely on that bandsaw. With a single blade, I routinely cut smooth tenon cheeks, fine inlay stringing, and perfect veneers that use the entire height capacity of my machine.
I also do all of my ripping on that 15-in. bandsaw. The task is safer and requires less horsepower than the tablesaw, and the narrow kerf consumes less wood. New employees and students are surprised at first by my preference for ripping on the bandsaw, but they are converted quickly. Although I have three excellent industrial tablesaws in my shop, they are used almost exclusively for dadoing, squaring panels, and cutting shoulders on joints.
There are three key elements to getting the most from your bandsaw: blade type, blade alignment, and moderate tension. My approach contradicts some of the common advice for setting up bandsaws. It does not require high blade tension, special equipment, exotic blades, high horsepower, or continual fence adjustments to accommodate blade drift.
Start with a coarse blade
During teaching assignments, I run into many woodworkers experiencing difficulties with their bandsaws. They complain about severely cupped kerfs, poor tracking, and saws that seem underpowered, so their bandsaws are relegated to cutting curves in thin stock.
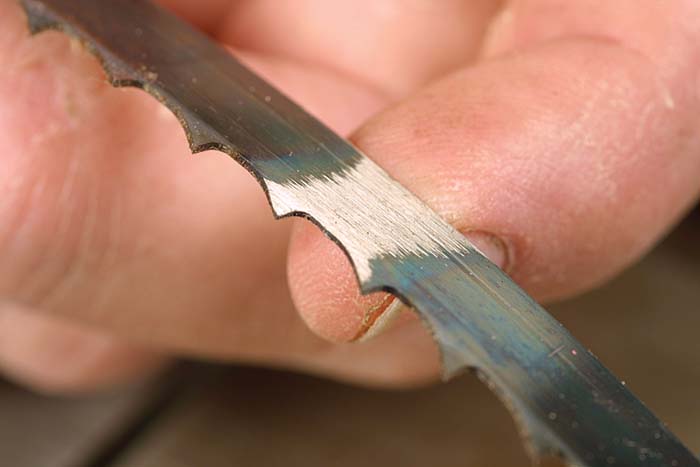
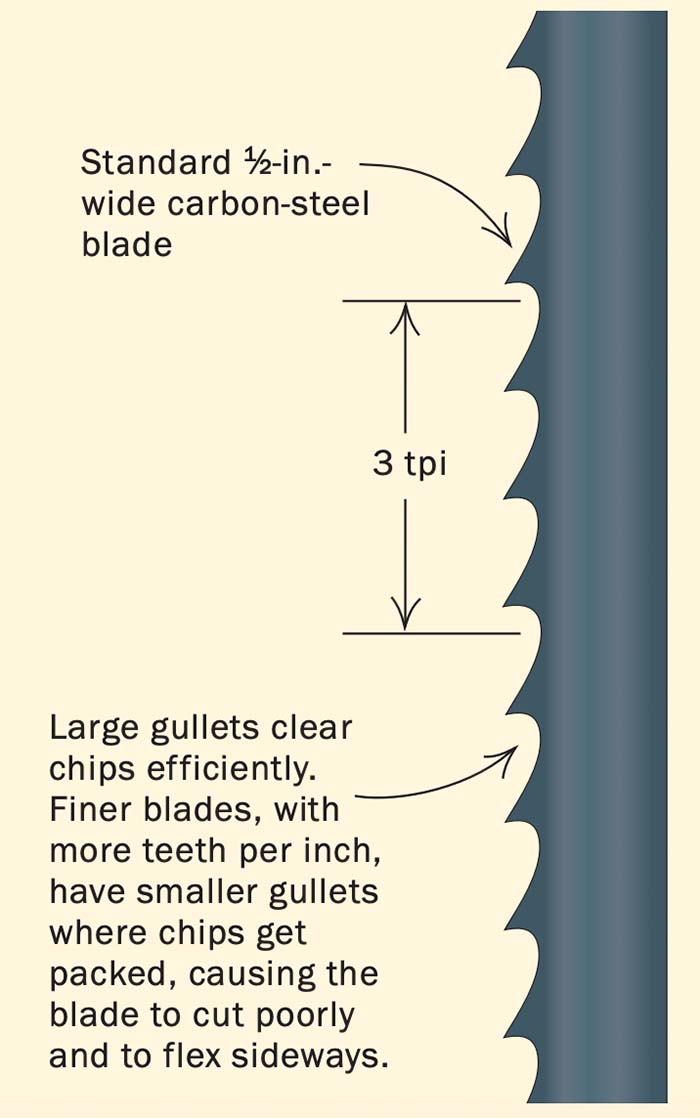
The number-one culprit behind all of these difficulties is a bandsaw blade that has too many teeth, with small gullets in between. Sawdust generated in the kerf must be removed efficiently. A tremendous amount of heat is created by the friction from the sawdust that is jam-packed in each small gullet right at the point where the wood fibers are being cut. The intense heat can cause the blade to lose its temper and dull prematurely. The heat and pressure buildup also can cause the blade to flex sideways and backward, creating a dished cut. A typical reaction here is to tighten the tension on the blade. But over tensioning the blade creates a whole new set of problems (see Tip 2).
My bandsaw does everything, every day: cutting joints, resawing wide laminates in exotic woods, making curved patterns in 1⁄16-in.-thick stock. It is not practical to change the blade and the guide blocks for each situation, nor is it necessary, in fact.
With rare exception, a standard carbon-steel 1⁄2-in.-wide, 3-tpi, skip-tooth blade installed on my bandsaw performs all of the above tasks.
Blades are inexpensive, so keep a sharp one loaded—The blades I use are made by Starrett but are welded and distributed by BC Saw and Tool in Canada (888-251-2236; www.bcsaw.com). By delightful coincidence, these blades are relatively inexpensive. It helps that I buy them in groups of 10, which earns me a 25% discount. For example, 941⁄2-in.-long blades, which fit a 14-in. bandsaw, cost about $6.71 (U.S.) each, or $8.95 if purchased one at a time. This is one of the rare cases when inexpensive equals good.
Unfortunately, not all blade distributors weld bandsaw blades properly. A poorly welded, misaligned saw blade will not give you the smooth and effortless results you are after.
Simply using a 3-tpi blade, with its larger gullets, will eliminate many problems. Even 4 tpi is too fine a tooth pattern for general woodworking and resawing. If you want a fine cut, use a coarse blade, even on thin stock. In my experience, the old rule of thumb about having two teeth engaged in the stock at all times is bogus. The reason I use a 1⁄2-in.-wide blade is that it is stiff enough to resaw but flexible enough to follow a curve down to a 21⁄2-in. radius. A cautionary note: Cutting particleboard is extremely hard on carbon-steel bandsaw blades and can reduce their life by 75%.
High horsepower is another myth—For most 14-in. bandsaws with a 1⁄2-in.-wide, 3-tpi blade, a 1⁄3-hp motor is fine. The same saw with a riser block in the column could use a 1⁄2-hp motor for big resawing tasks, but anything larger is overkill. If the motor is bogging down, you are either forcing the cut or using a dull blade.
Don’t overtension the blade
It is important that the tires on the bandsaw remain in excellent shape. Grooves in the rubber tire on either the upper or the lower wheel will make it impossible to keep the blade on the centerline, in line with the rip fence. And the most common cause of grooves in the tires is overtensioned blades. Very high tension even can flex the saw frame out of alignment.
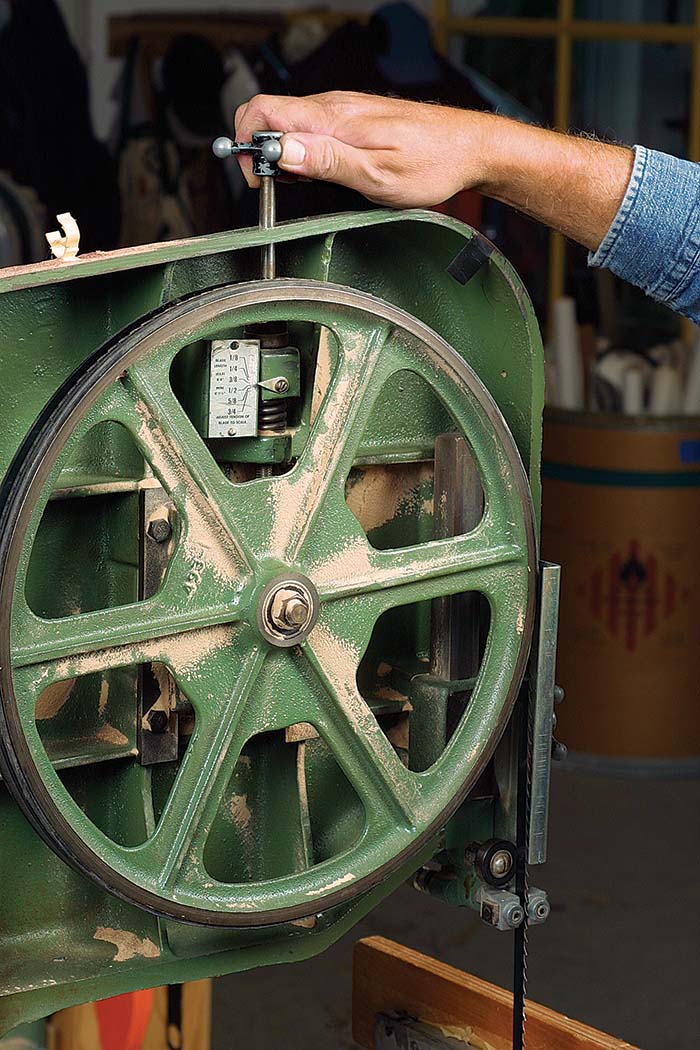
I slightly undertension my 1⁄2-in.-wide blade. Because of its excellent ability to clear sawdust, the blade is not inclined to flex, wander, or heat up. For the 1⁄2-in.-wide blade I adjust the tension scale to the 3⁄8-in. setting. If no scale is present on the machine, I tighten the adjustment knob (with the machine off and unplugged) until the blade deflects about 1⁄4 in. to the side without making my fingertips go white.
A side benefit of lower blade tension is that I seldom have to release the tension on the saw, as is commonly recommended to prolong blade life.
Align the blade to eliminate drift
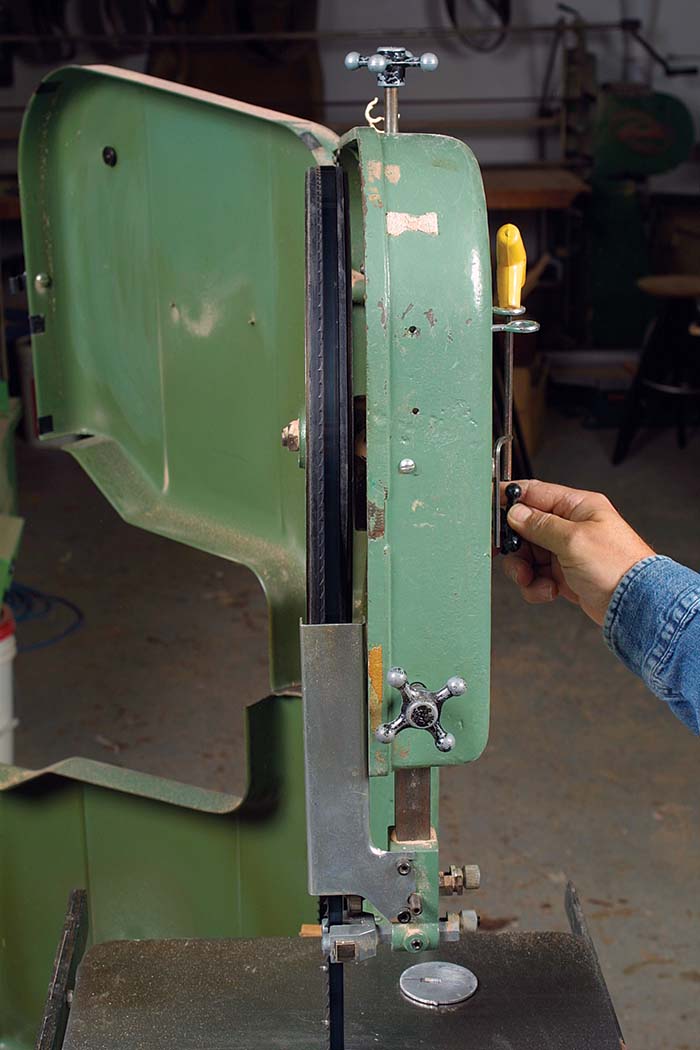
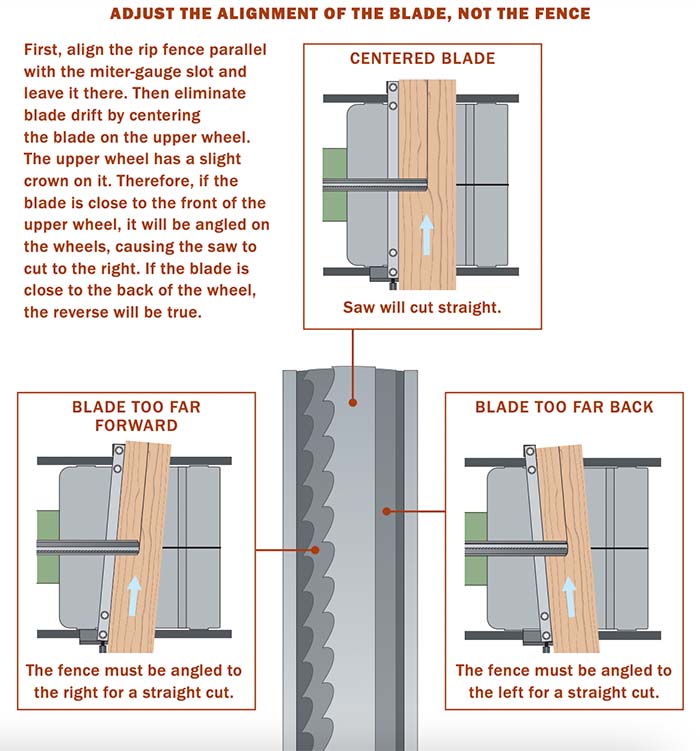
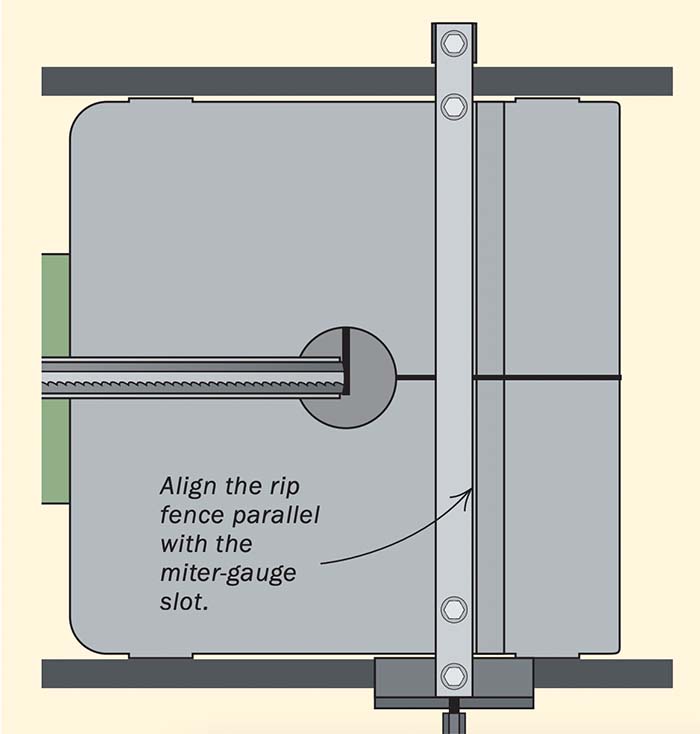
When I bought my bandsaw in 1974, I set the fence parallel to the miter-gauge slot in the table, and I haven’t had to adjust it since. The reason is that I use the tracking adjustment on the upper bandsaw wheel to align the blade (see the drawings on the facing page). A nightmare of fence adjustments ensues if each new blade is allowed to track differently.
Simply by keeping the centerline of the blade (regardless of width) in line with the centerline of the upper wheel, I am able to keep the blade aligned correctly at the blade guides.
The relationship between tracking the blade on the centerline of the upper wheel and having the fence aligned parallel to the miter slot should produce a kerf with equal space on either side of the blade.
Much has been made in books and articles of the alignment of the two wheels to each other. In my shop and in my travels to schools around North America, I have never found this to be a problem. Tracking the blade properly on the upper wheel has always been enough, except in the case of a severely damaged bandsaw.
Now square the table and align the fence—The table is now aligned with the cutting direction, but it also should be adjusted so that it is square with the vertical line of the blade.
Last, the fence should be aligned parallel to the blade and square to the table. I use a 31⁄2-in.-high birch plywood rip fence screwed onto the metal fence. I have shimmed the plywood with masking tape to get it perpendicular to the table. Taller plywood fences can be screwed to the existing plywood fence, but I use these only when I am resawing to the maximum capacity of my bandsaw, about 61⁄2 in.
Use metal guide blocks, set close
Again, simple is the way to go. When setting up my bandsaw in 1974, I took out the metal guide blocks and squared their working faces against the side of the wheel on my bench grinder, being careful to check the blocks for square. I have not had to replace them or resquare them since.
The sequence for setting the guide blocks is as follows. Unplug the saw, pull the guide’s well back, tension the blade, and then spin it a few times backward and forward by hand. Now turn on the saw and adjust the tracking of the blade to center it on the upper wheel.
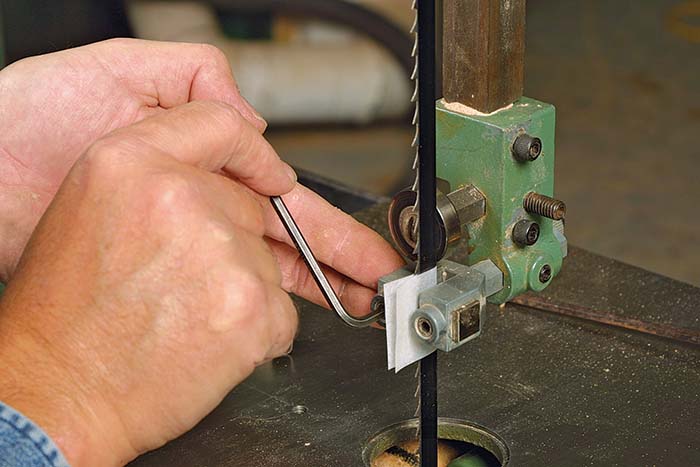
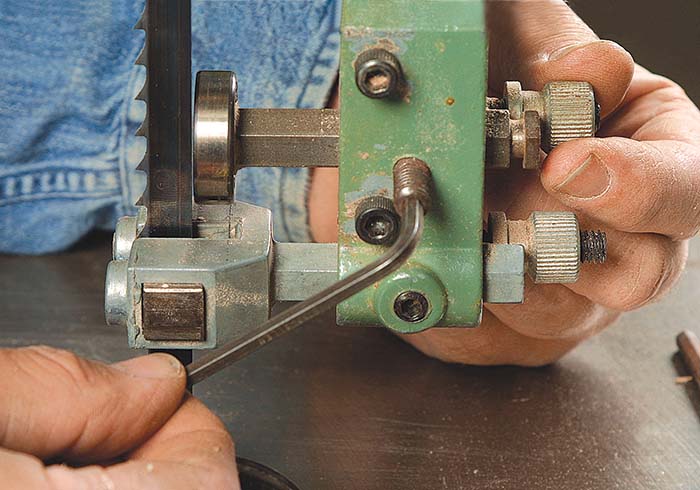
Next, turn off the saw again, and bring the guide assembly forward so that the front of the blocks aligns with the back of the blade’s gullets. Then adjust each guide block to within the thickness of cigarette paper, or 0.001 in., of the blade. The Allen screw might pull the blocks in or out when they are tightened, so this process could require one or two attempts. With practice, you will be able to adjust the guides by eye, looking for the smallest crack of light between the blade and the guide blocks.
Last, bring the thrust bearing in the rear to within 1⁄32 in. of the blade. This bearing is the only part that requires replacing when it becomes stiff or scarred. But it is a standard part and can be bought in most automotive- or bearing-supply houses.
With the guide blocks set this close, and with the back of the gullets just aligned with the front of the blocks, there is no room for the blade to twist or for the teeth to hit the metal guide blocks.
If I thought there was some advantage to replacing the guides or the blocks, then I would, but I find the original system gives me excellent results. With the blade and fence aligned properly, the metal guide blocks are not rubbing constantly against one side of the blade or the other and creating friction heat.
The lower guides are set in the same way as the upper ones, though I often leave them backed slightly away from the blade unless I am resawing particularly difficult wood. I have worked in several shops in Europe, and none of them bandsaws I used there had lower bearing assemblies.
Feed stock with mild pressure
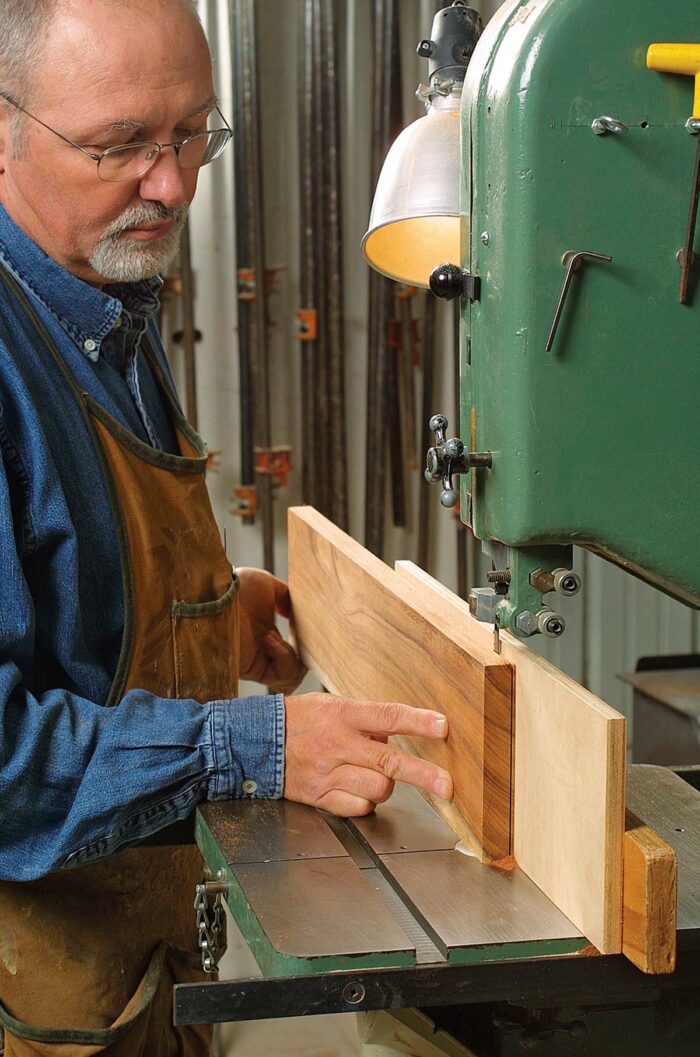
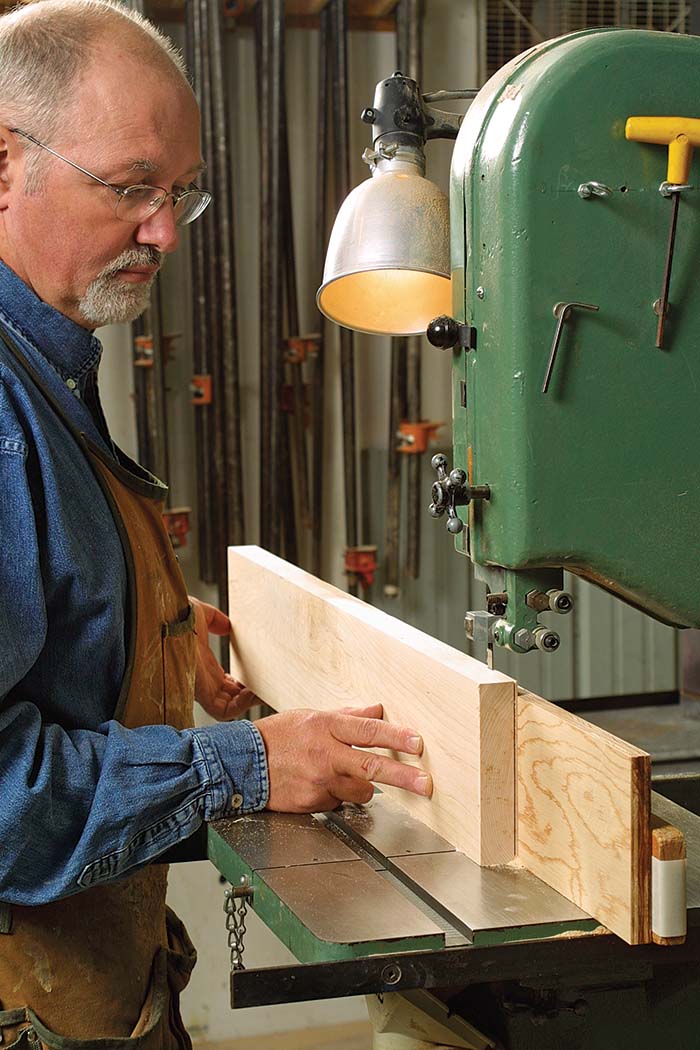
With the saw properly set up, it is necessary to place only two of your fingers against the workpiece: You should be able to use one finger to push the stock and the other to hold it against the rip fence. If you have to use the butt of your hand to push the stock, something is wrong—either the blade is dull or it is no longer tracking on the centerline of the upper wheel and is misaligned with the fence, causing the wood to bind.
Use mild but consistent feed pressure, allowing the blade to do the work. The sawdust must have a chance to be cleared from the kerf. For safety, once your pushing fingers are within 6 in. of the blade, use a push stick.
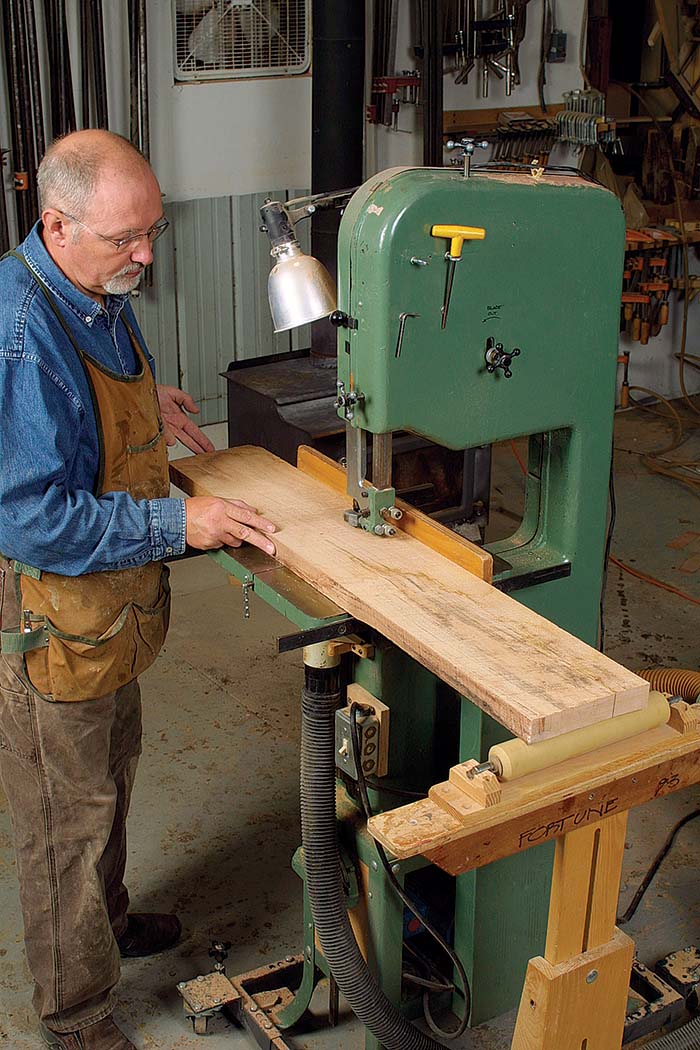
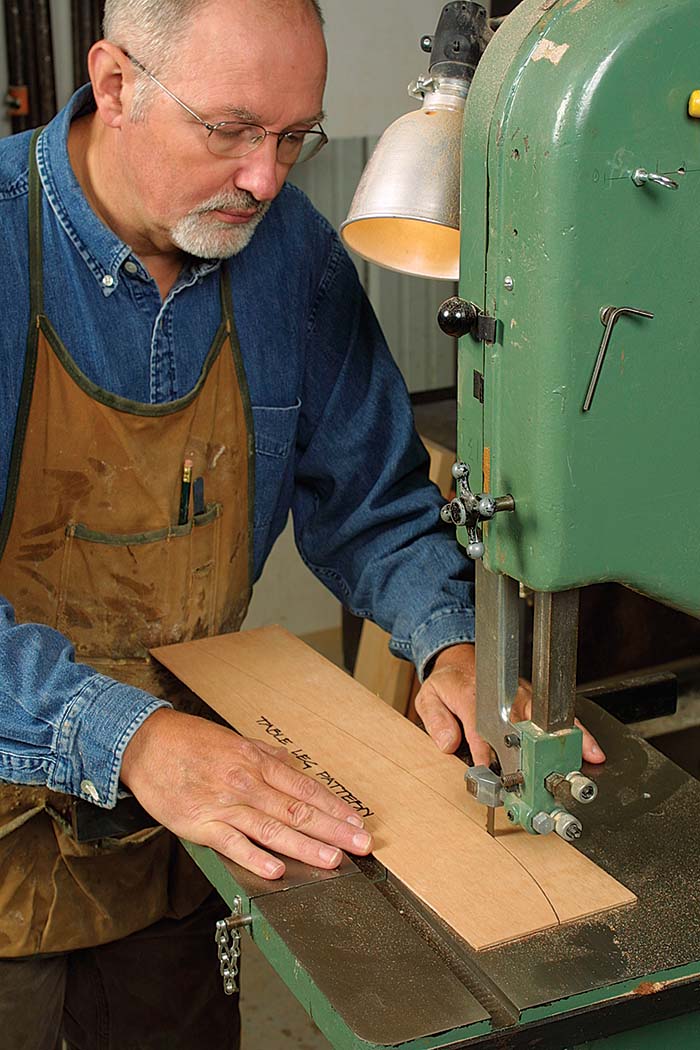
Tip 1: A single blade can handle most
A 1⁄2-in.-wide, 3-tpi blade—properly set up—will handle general ripcuts, resawing, and even cutting curves in thin stock, not to mention cutting precise tenons.
 |
 |
 |
Tip 2: High blade tension is not necessary
High tension eventually will groove the tires, pulling the blade out of alignment (for more on blade alignment, see Tip 3). High tension even can flex the machine’s frame out of alignment.
Tip 3: You can eliminate blade drift by adjusting the
Advice on blade alignment usually centers on the rip fence instead of the blade. You can eliminate blade drift by adjusting the position of the blade on the upper wheel.
Align the fence just once
|
|
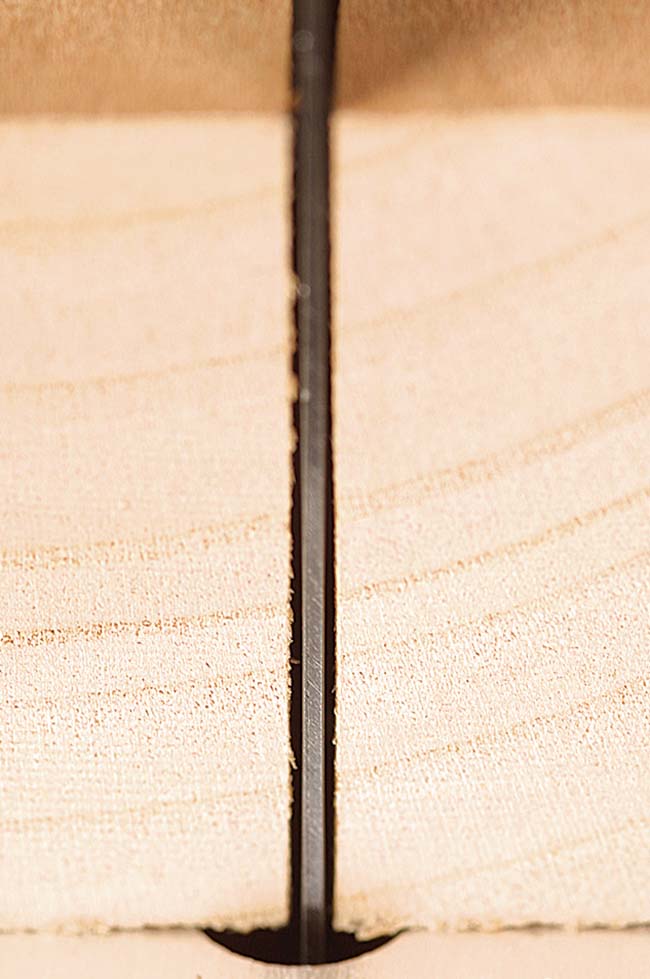 |
Now push gently and let the blade do the work. Pushing too hard will make the blade flex sideways, which will cause it both to overheat and to drift off line. With the blade, fence, and guides properly aligned and adjusted, the back of the blade should be centered in its kerf.
Tip 4: Replacement guides aren’t necessary
A set of metal guide blocks will keep your blades on track for many years. The key is to set them very close to the blade and just behind the gullets.
 |
 |
Tip 5: Add dust collection to keep your saw running well
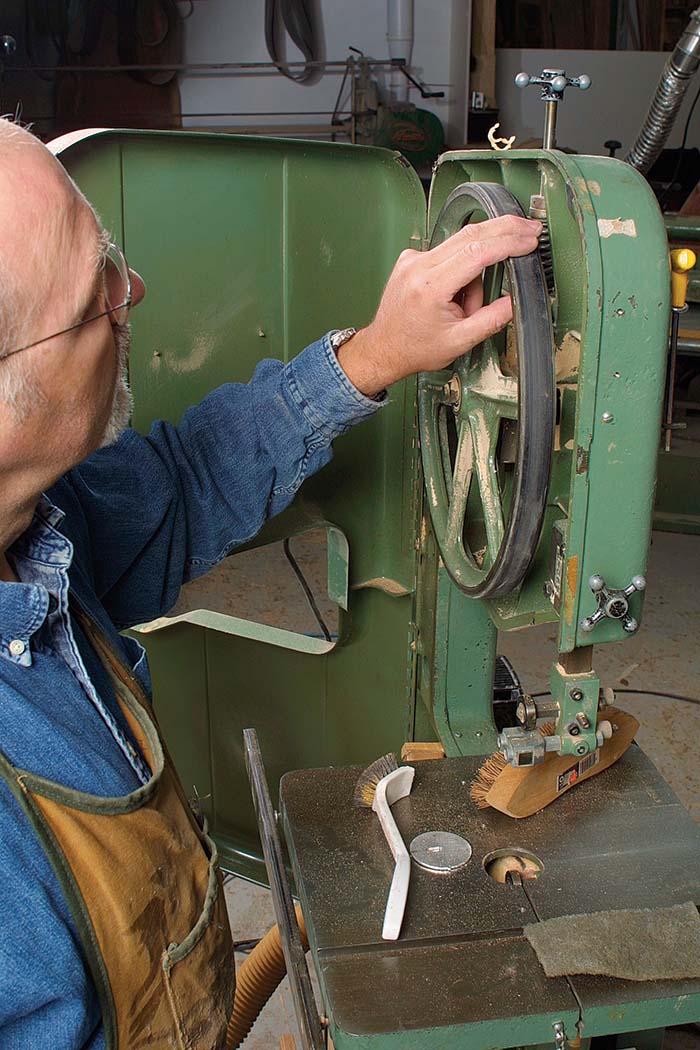
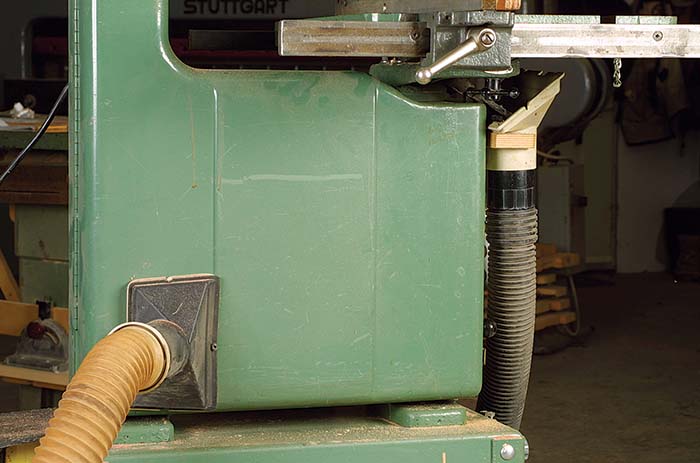
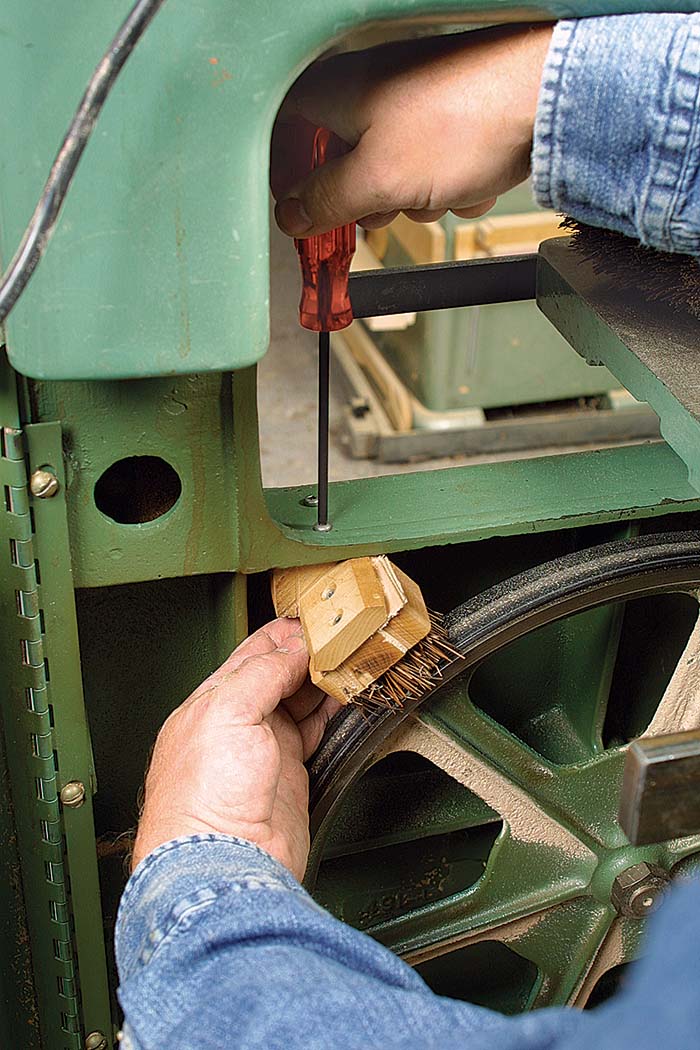
Sawdust extraction is very important. Wood dust will get compressed onto the lower wheel by the revolving blade.
The resulting bumps will cause the blade to vibrate and wander off-center.
Many saws provide for some dust extraction directly below the cutting area, but that isn’t enough. Attach a second dust pickup at the lower-left corner, where the air current generated by the lower wheel makes dust accumulate.
Also, attach a wooden brush with stiff natural bristles to the frame of the saw so that it continually cleans off the lower wheel. The lower dust port will catch the debris.
 From Fine Woodworking #173
To view the entire article, please click the View PDF button below:
Fine Woodworking Recommended Products
Ridgid R4331 Planer
Ridgid EB4424 Oscillating Spindle/Belt Sander

Starrett 12-in. combination square




Comments
Thanks for the very useful information. Some is a refresher and some new to me. I just purchased a new Laguna bandsaw with 14” resaw capacity. When tensioning the blade using the finger pressure method, where do you position the upper guides ? The higher the guide assembly, the easier it is to flex the blade.
Bandsaw tension using the finger pressure method should be done on the section of the blade that is going from the lower wheel to the upper wheel. An excellent YouTube video that explains bandsaw setup is the "Bandsaw Clinc with Alex Snodgrass". Using Alex's method has provided excellent results on my bandsaw and is my go-to method for decades.
Thanks so much. I was never really sure about this method for tensioning because I never had all the relevant information.
Log in or create an account to post a comment.
Sign up Log in