Making a Cutlist
A chart that details the parts for your project will prevent the inconvenience of not buying enough material and the expense of buying too much
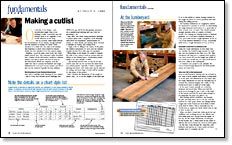
Synopsis: Generating a good cutlist for a woodworking project takes some work, but will save you frustration. In this article, veteran furniture maker Philip C. Lowe explains how to make the most of a cutlist and shares his process. He works backwards from his project drawing, listing the name and quantity of each part, the rough and finished dimensions, and the wood to be used. Lowe explains how to calculate board feet to estimate cost. Then when you go to the lumberyard, cutlist in hand, you’ll be able to use it to ensure that you get what you need for your project.
On the list of fun things a new woodworker might want to try, making a cutlist is probably near the bottom. Most of us, beginner or not, would rather be in the shop.
But an accurate cutlist helps prevent the inconvenience of not buying enough material and the expense of buying too much. Close attention to a cutlist also can help avoid mishaps like forgetting to allow extra length for tenons, which can turn valuable wood into miscut scraps.
Building a good list takes some work, but you’ll thank yourself later. The chart-style cutlist described here contains all the information needed to estimate lumber costs and to guide selection of stock at the lumberyard. When you organize your list, make sure that it contains the finished and rough dimensions for each part in your project, and that it lays out the numbers logically for easy addition.
Work backward from finished dimensions
Start with a carefully made drawing of your project. I like to work with full-size layout drawings (see FWW #161, pp. 68-74) for the greatest precision, but a smaller-scale drawing also can work for generating a list.
Take extra care when using purchased drawings or project plans from a magazine. Such drawings often leave out thicknesses, measurements for joinery, or other details, and missing them can lead to mistakes in buying and cutting stock.
I begin a list by filling in the names of the parts, the finished dimensions for each, and the number of parts needed (four table legs, for example).
When filling in the length, be careful to include the ends of any joinery—such as tenons—that are hidden in the finished piece. Overlooking joinery details is an easy mistake to make.
I also include special notes on my list for any curved parts that can be cut from the same board in a nested pattern. Typically, I make a separate drawing that shows how those parts can be laid out for cutting, and how large a board will be needed for this phase of the project.
|
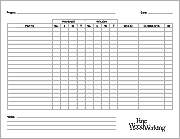
Download a Free Printable Cutlist How it works: Use our simple spreadsheet to keep track of every part of a woodworking project, and to tally your board-footage before your trip to the lumberyard. Columns included track number of parts, rough and finished dimensions, and notes for milling. |
 |
From Fine Woodworking #176
For the full article, download the PDF below:


Comments
The printable cutlist link doesn't work
Fixed
Log in or create an account to post a comment.
Sign up Log in