All About Coloring Wood
Woodworkers are sometimes baffled and intimidated by the many choices available to them when they want to add color to their projects. Some techniques are easy to accomplish, others can be more complicated, but just like applying clear finishes, none of the methods used to add color are really too difficult to master with a little practice.
The Basics:
• Pigments and dyes: Pigments and dyes are easy to apply
• Toners: Toners even out color variations
• Glazes: Glazes highlight molding details or the open grain of a wood surface
• Ebonizing and pickling: Home-brew solutions to color wood
Pigments and dyes
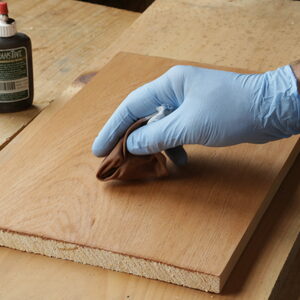
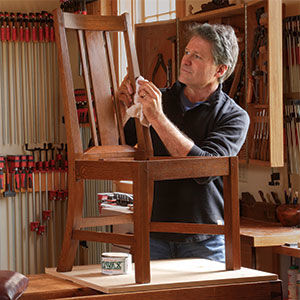
Pigment stains, primarily oil-based, are simply finely ground mineral powders held in suspension by some kind of thinner and mixed together with resin binders. They are the easiest type of stain to apply. Flood them on with a rag, brush, or spray gun, and wipe off the excess vigorously. Wipe in a circular motion to remove most of the excess, and then wipe the surface in a direction parallel to the grain pattern. Any unintended streaking will therefore be less visible. After wiping them down, what remains trapped in the open pores, or as a fine film on tighter grained woods, is similar to a thinned-down layer of mud. They work better with open-grain woods such as ash, mahogany, oak, and walnut.
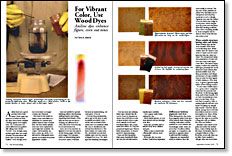
Dye stainsare made of much smaller particles, which are actually dissolved in a solvent. You can buy them in powder or liquid form and mix your own colors. The solvent base can be alcohol-, lacquer-, oil-, or water-based. Dye stains afford much better clarity than pigments stains, so you can see the patterns in the wood grain more clearly after a finish goes on the wood. Dye stains also tend to penetrate more deeply, leaving more color on the wood surface after they’ve dried. The learning curve to using dye stains is steeper than that of pigment stains, and they pose more of a threat toward something going wrong. One common problem is that of overlap, caused by streaks of darker color that can emerge on some areas that receive more stain than others.
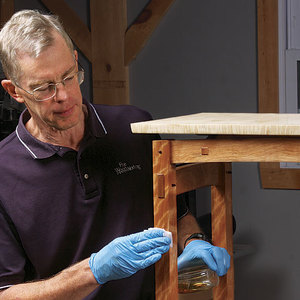
One way to avoid color disparities from forming is to flood the surface as quickly and thoroughly as possible. It also helps to pre-wet the surface with the same solvent used to make the stain — water and alcohol are the most common solvents used to make dye stains. Doing that will lessen the amount of stain that soaks into the wood fibers, and it will also decrease the depth of color left behind. The pre-wetting technique is especially useful for applying water-based dye stains. By flooding the surface first, and then letting it dry, you’re left with raised grain, which can then be sanded off before the stain goes on, which lessens the chances of ending up with a rough finish.
Toners
Maybe you’ve looked at mass-produced furniture and wondered how they made all the pieces of that complete cherry bedroom set look just alike. They did it by using toners. Toners are simply clear finishes, usually lacquer or shellac, that have been tinted with a pigment or a dye stain. They even out color variations, leaving a more balanced overall color tone to the wood. Dye stains are preferable because they lay on each coat of color in a clearer, more transparent fashion. You can apply toners effectively only by spraying them on, either with your own spray equipment or by buying pre-mixed toners from finish suppliers. These are packaged in disposable aerosol cans, just like those used for spray paints.
The biggest mistake novices make with toners is trying to lay on too much color at once. Once you’ve made a surface too dark, it’s very difficult to lighten it up again. When that happens, the best solution is just to strip off the finish and start over. The better approach is to sneak up on the color, just a little at a time, until you get it right. Both lacquer and shellac dry so quickly, that you can put on several coats of toner in a day.
Glazes
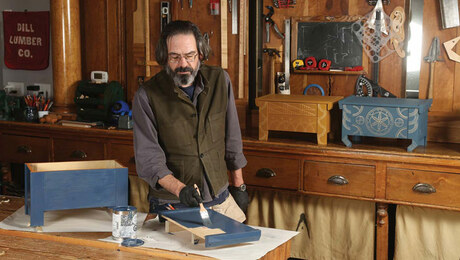
Glazes are more easily reversible than toners, as long as you use the oil-based variety. Glazes are simply pigment stains that are applied by brush or wiping rag to an already sealed surface and partially wiped off, leaving some color behind to highlight molding details or the open grain of a wood surface. Commercial varieties commonly available are both oil- and water-based acrylic latex formulations. The oil-based versions take longer to dry, which gives you more working time to get the effect you are after. Because you apply glazes to an already sealed or finished surface, they are easy to remove if you’re not happy with the results. Simply saturate a rag with the solvent used to make the glazing stain, wipe it off and start again.
The first coat can go on quickly, and you don’t have to be neat because after slopping on the stain, you wipe most of it off anyway. After the first wipe, you can use a dry brush to better blend in the pigments left behind. Once the first coat is dry (usually an overnight wait), if you are satisfied with the results, you need to seal in the color with another clear coat of finish.
Ebonizing and pickling
Ebonizing wood is sounds mysterious, and it’s sometimes suggested that the process is difficult to do. Nothing could be further from the truth. All the word means is “to make it black,” and you can do that in any number of ways, or by using a combination of them. The practice arose when woodworkers decided to fool their customers into believing parts of projects were made from ebony, which is costly.
To make wood black, you can dye it with pigment, dye, or chemical stains; or you can paint it with black lacquer. Whatever technique you choose, you’ll probably want to complete the job with a clear coat of finish over the ebonized surface.
The age-old homemade chemical stain produced by soaking nails and steel wool in vinegar works incredibly well on woods (such as oak and mahogany) that contain a lot of tannins. Black dye stains also penetrate the surface effectively and deliver a deeply rich color to the wood. Pigment stains are the least effective; they often leave the surface looking a somewhat lifeless, dark gray, not the deep brown/black of real African ebony.
One method is to use both the chemical stain and a dye stain after the first one has dried. Or you can use a dye stain, and then topcoat it with a misted layer of black lacquer. You should follow either of those approaches with a final clear coat for protection against wear-and-tear on the colored finish.
During the 1970s to early 1980s, pickling was a very popular finishing effect in demand for use on custom-built furniture. It has since fallen out of favor, for the most part, but will likely surface again at some point. Think of pickling as the opposite of ebonizing: the intent is to lighten the wood, not darken it.
To accomplish the task, most finishers turn to pigmented white paint, thinned or right from the can. This technique works better on open-grain woods (such as ash or white oak), but will also work with tighter-grain woods (such as maple). The process is identical to glazing: you slop on a coat of white paint, wipe some or most of it off, let that dry, and then top coat that to seal in the color. A CAB-acrylic lacquer or some of the water-based film finishes would be a good choice for a clear finish over a pickled surface because they will not yellow as they age.
The only trick to learning how to do it well is in the wiping. How vigorously you wipe is how you control the amount of color left behind. Like anything else, it just takes a little practice.
Fine Woodworking Recommended Products
Bumblechutes Bee’Nooba Wax
Odie's Oil

Bahco 6-Inch Card Scraper






Log in or create an account to post a comment.
Sign up Log in