Handplane Chamfer Guide
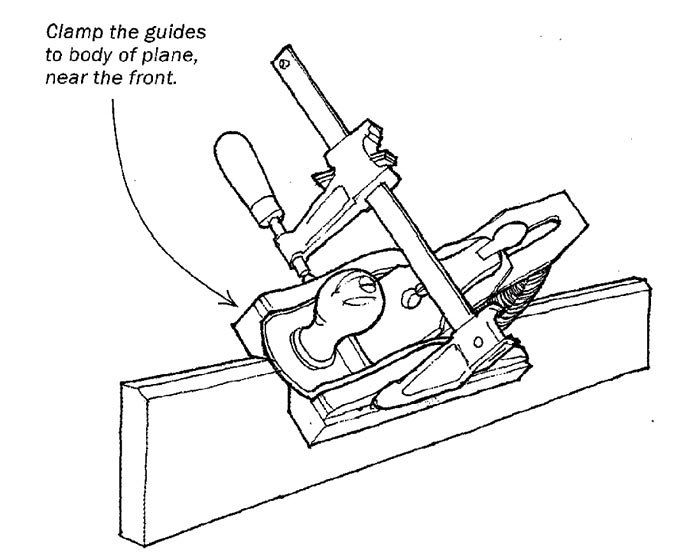
I took on a project at my summer cottage to make 90 ft. of window trim. My options were limited because I was able to bring only a few basic hand tools. The design called for chamfered edges. On a test run I marked the top and sides of the stock and planed down to the pencil lines. The results weren’t too bad, but they just weren’t consistent enough for the longer boards I needed.
To solve that problem, I built a chamfer guide to attach to the sole of my jack plane (see the drawings). I first planed the edge of a length of scrap to and then cut it in half lengthwise, to make two pieces for the base. To the tops of those I added a couple of side blocks screwed on tightly to fit against the body of the plane. I cut slotted mounting holes in one of the base pieces to allow for adjustments.
I clamped the guides to the sides of the plane ahead of the mouth where there is a support rib so that I wouldn’t crack the casting. Loosening the screws on the adjustable guide and sliding it one way or the other controls the width of the chamfer. Once I had the size of the chamfer set, the planing went very smoothly.
Darrell LaRue, Oakville, Ont., Canada
Fine Woodworking Magazine, October 2001 No. 151
Fine Woodworking Recommended Products

Estwing Dead-Blow Mallet
MicroJig Matchfit dovetail clamps

Stanley Powerlock 16-ft. tape measure






Log in or create an account to post a comment.
Sign up Log in