Milling Large Surfaces
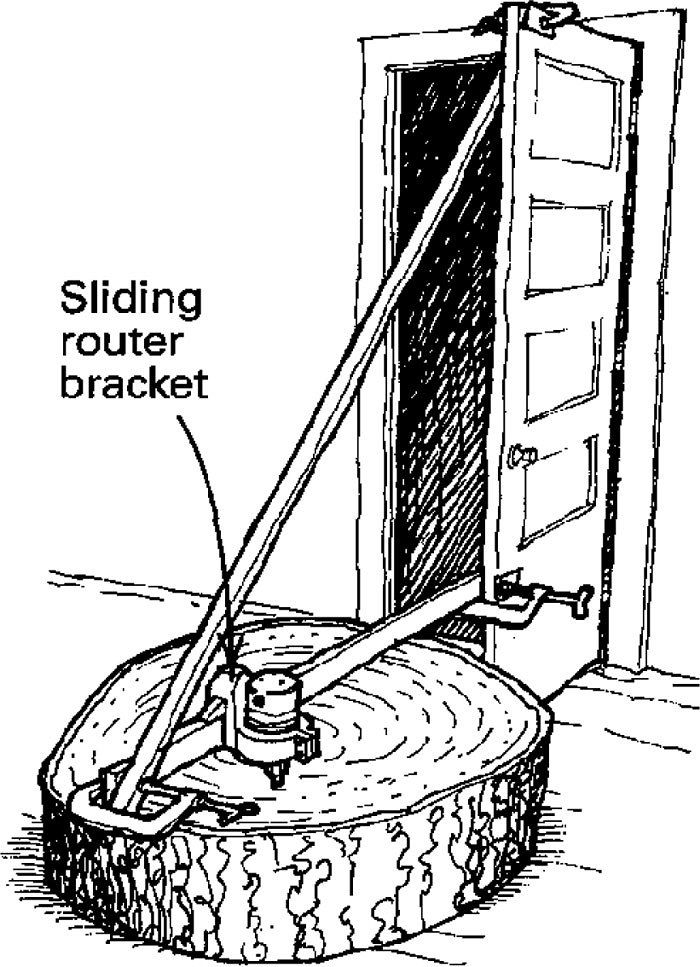
Here is the procedure I used to accurately mill the surface of a 4-ft.-dia., 288-year-old ponderosa pine section destined for a museum exhibit. I utilized the shop door as a swinging vertical axis to which I clamped a horizontal beam and a diagonal brace, as shown in the drawing. I made a mounting bracket for the router so it could slide along the beam and be locked in position anywhere. Marks along the horizontal beam designated increments slightly less than the diameter of the surfacing bit I was using so I would know how far to move the router after each pass.
To use the rig, I leveled the tree section on the floor near the shop door. Then, I turned on the router and swung the beam and router assembly back and forth across the workpiece, mov- ing the router one increment after each completed pass. I got the best results by swinging the beam first from right to left and then from left to right on each pass. On the first swing, the pressure from the cut raises the router slightly out of the workpiece; then on the back swing, the router removes just a whisker, producing an accurate surface requiring only sanding. If you aren’t getting a flat surface, your door jamb is probably out of plumb.
Laurence I. Jayne, Davenport, Wash.
Fine Woodworking Magazine, October 1990 No. 84
Fine Woodworking Recommended Products

Estwing Dead-Blow Mallet
Bessey K-Body Parallel-Jaw Clamp






Comments
To quote the Alaskan native when translating the remarks of his grandpa's verbose reaction to the revelation that the Easterner was eating mice because he ran out of food in the back country while studying the wolves and did so because the E. noticed that the wolves were eating them.....Good idea!
Log in or create an account to post a comment.
Sign up Log in