Mitering Trim on the Bandsaw

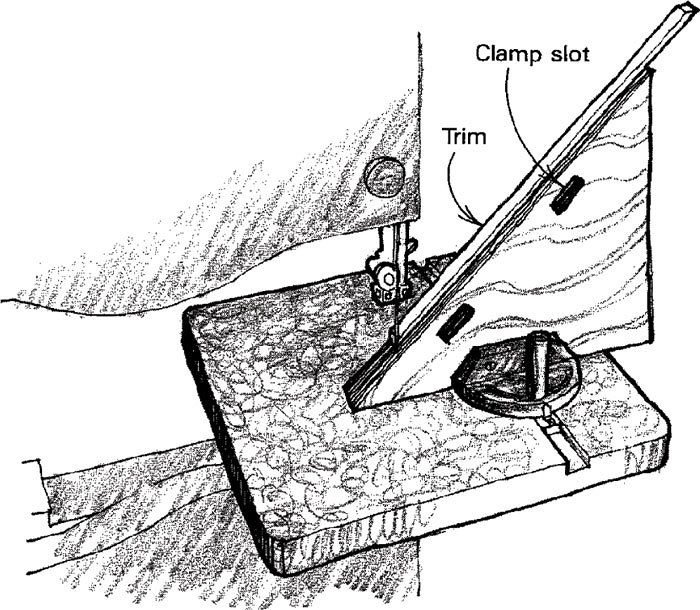
When I needed to miter a few dozen 1/8-in.-thick cock beads, I first tried a chop box, but found it produced severe chipping behind the cut. So I built the fixture shown here to cut accurate miters on the bandsaw and avoid chipping. The fixture is simply a couple of 45¡ plywood triangles glued together and mounted upright to the saw’s miter gauge. I routed two slots, as shown, to accommodate spring clamps that hold the trim to the fixture. Before use, push the fixture into the blade to leave a sawkerf halfway through. This sawkerf will serve as an index line for exact placement of the trim to be cut.
To use the fixture, first cut a trial piece to make sure the miter angle is an accurate 45¡. If not, adjust the angle by tilting the saw table slightly. Next, cut each strip of trim about 1/2 in. longer than needed, then snip the mitered corners off in the fixture.
Dave Evenson, Cumberland, Wis.
Fine Woodworking Magazine, February 1988 No. 68

Fine Woodworking Recommended Products

Festool DF 500 Q-Set Domino Joiner

Estwing Dead-Blow Mallet


Log in or create an account to post a comment.
Sign up Log in