Mortising Fixture
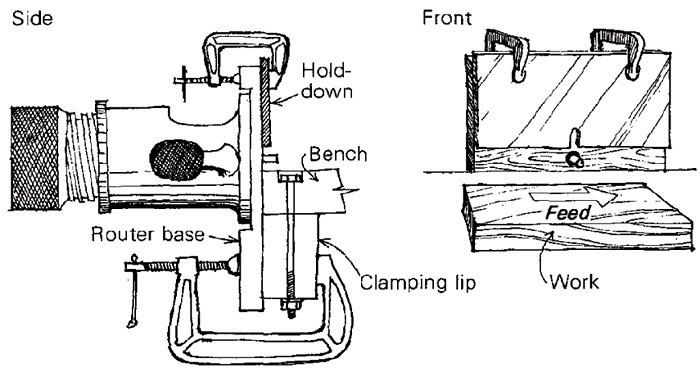
The sides of a cradle I built recently were made of slats mortised into the frame. The router-based mortising fixture I built for the project helped me cut all those little mortises quickly and easily. The fixture has three simple pieces: a hardwood clamping lip, a birch-plywood router base and a Masonite hold-down. Bolt the 2×3 clamping lip under the workbench flush with the front edge. To permit deeper mortises, rout a 3/8-in. recess in the plywood base to fit the router. Mount the router in this recess using countersunk screws driven from the face.
To use, clamp the base to the clamping lip, making sure the bit is the right height above the workbench. Then clamp the hold-down in place. Stand behind the router and, sighting from above, pull the workpiece into the router. A router cut or pencil lines on the hold-down are needed to show the left and right boundaries of the cut. Feed the work from right to left. The router produces mortises with rounded ends, which can be squared up with a chisel. But it’s easier to round the tenons with a rasp or sandpaper.
G. R. Livingston, New York, N.Y.
Fine Woodworking Recommended Products
MicroJig Matchfit dovetail clamps

Starrett 4" Double Square

Suizan Japanese Pull Saw






Log in or create an account to post a comment.
Sign up Log in