Shop-Built Panel Saw
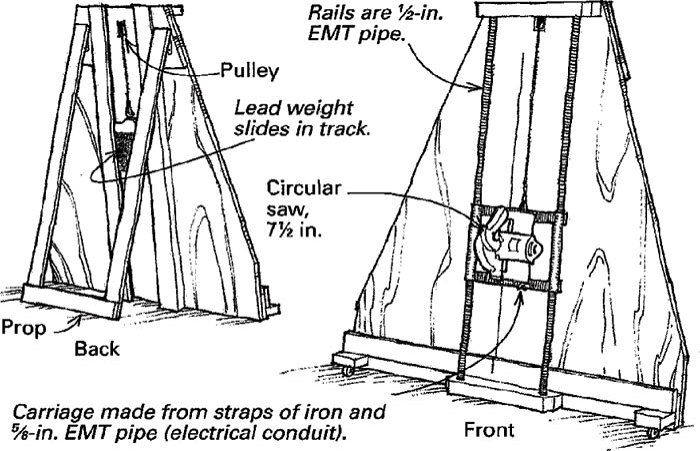
After wrestling 4×8 plywood panels around my shop for 45 years, I decided to build a panel saw. The design I used is simple and inexpensive. The fixture’s components and construction details are shown in the sketch. The only tricky part is the carriage.
For the carriage sliders, split two pieces of 5/8-in. EMT pipe (electrical conduit) end to end. Spread the cut, or squeeze until the sliders have a nice sliding fit on the 1/2-in. rails. Bend the ends of the crosspieces up to conform to the radius of the tubing. With the sliders and crosspieces clamped in place on the rails, tack-weld the pieces together. Check the carriage to make sure it is square and slides smoothly. If all is well, remove the carriage, and braze all four corners. Now position your saw on the carriage, drill mounting holes and fasten the saw to the carriage. To keep the carriage running smoothly, keep a little paraffin or light grease on the rails.
I made the saw counterbalance weight by melting down some lead and pouring it into a rectangular mold. The counterbalance should be slightly heavier than the saw so that the saw will stay parked at the top of the rails.
William Skinner, Everett, Wash.
Fine Woodworking Magazine, April 1994 No. 105
Fine Woodworking Recommended Products
Makita SP6000J1 Track Saw

Festool DF 500 Q-Set Domino Joiner
Bosch 12V Trim Router






Log in or create an account to post a comment.
Sign up Log in