Beading a Drawer
Applied molding disguises gaps, adds a sophisticated look
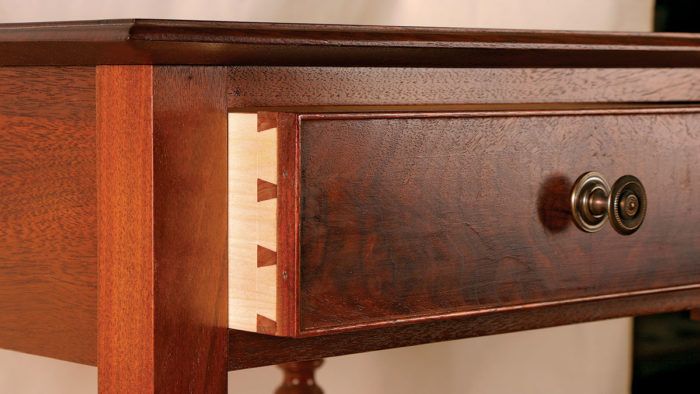
Synopsis: A thin beading added to surround and cover the edges of a drawer front adds visual interest and distracts the eye from the gap around the front, which can shift with seasonal movement. Period-furniture maker Steve Latta gives step-by-step instructions on how to shape, fit, and install beading.
Cock beading is a prime example of the design philosophy, “If you can’t hide it, accentuate it.”
As all woodworkers know, wood moves, and with components like drawers there is no real method to hold that movement in check. A nice flush and even gap probably won’t stay that way, especially on inset drawers. Cock beading distracts the eye from the gap, and by helping to break up large, dormant surfaces, adds visual distraction and consequently a little life. It can be used on many different styles of furniture, requires no special tools, and is a technique well worth acquiring.
I won’t cover beading that is incorporated into the case, but rather the method where the bead is applied directly to the drawer itself. If the front of the drawer happens to be veneered, as in this table, the beading does double duty by helping to protect the edge of the veneer.
1. Make the beading
I always apply cock beading to a drawer after the drawer has been glued up and fitted to the opening. Sometimes the drawer dividers have a little twist or bow and the drawer front must be planed to fit the opening. If the bead was already on, it would lose a bit of its profile.
It’s a good idea to make the beading before you trim down the drawer front to receive it. This way, you’ll know the exact thickness.
There are a couple of ways to make the beading. If you need beading for several large drawers, take the time to set up a bullnose bit (Amana part No. 51540) in a router table. For just a couple of drawers, a scratch stock makes quick work of the job and can produce thinner, more delicate beading than a router bit. The wooden body of the scratch stock is shaped like an inverted “T” with a handsaw kerf across the top to hold the cutter. I made mine from a piece of an old scraper and shaped the profile with a small, round, needle file. A 2-in. C-clamp holds the cutter in place and doubles as a handle.
From Fine Woodworking #183
For the full article, download the PDF below:
Fine Woodworking Recommended Products

Estwing Dead-Blow Mallet

Dubuque Clamp Works Bar Clamps - 4 pack

Jorgensen 6 inch Bar Clamp Set, 4 Pack


Log in or create an account to post a comment.
Sign up Log in