Build a Fireplace Mantel
An easy installation begins with a flat foundation
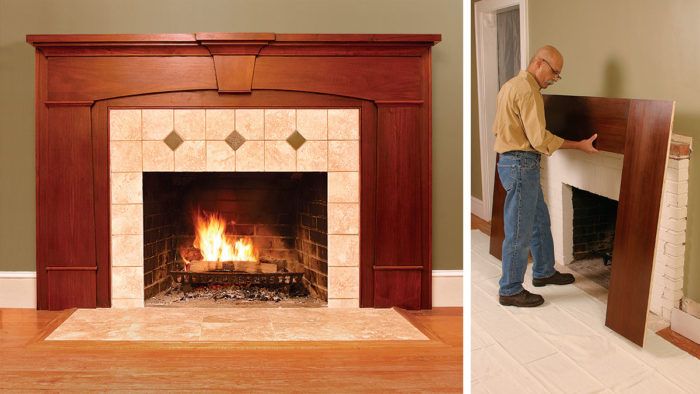
Synopsis: To truly become the focal point of a room, a fireplace needs a mantel. And whether the end product is simple or elaborate, all of Mario Rodriguez’s mantel installations start with the same foundation—sections of plywood joined to surround a fireplace opening. This foundation serves as the canvas for a multitude of mantel styles, from Arts and Crafts to Victorian. Rodriguez explains the essentials every woodworker should know about building a fireplace mantel, from surveying the site, to cutting and shaping the components in the woodshop, to final assembly.
A fireplace without a mantel looks naked and lacks character. Adding a mantel gives the fireplace an elegant frame, which becomes the room’s focal point. This frame can be as simple as two brackets supporting a shelf or a floor-to-ceiling extravaganza dripping with carved gargoyles and yards of molding.
Whatever the style, I’ve found that the secret to a solid, easy installation is the foundation—sections of 3⁄4-in. plywood joined to surround the fireplace opening. The foundation gives you something firm to anchor to the fireplace masonry, and it serves as a flat, plumb base on which to fasten the decorative elements.
The foundation can be screwed, nailed, bolted, or glued to the existing fireplace; trim will cover the fasteners. You can make and finish individual elements in the shop, then assemble everything at the fireplace, using the trim carpenter’s technique of scribing to fit the mantel snugly against the wall and floor.
Survey the site, and design to fit
Before you start cutting, carefully measure the existing fireplace. Plan your design so that the wood will be at least 6 in. away from the fireplace opening (many building codes specify this distance; check with your building department). The mantel shelf is typically 54 in. from the floor, but the overall size of the mantel, fireplace, ceiling height, and such will influence your design and affect the size (this one is 53 in. tall).
This mantel is a modern adaptation of classical elements. Plinth blocks support pilasters (pieces resembling flattened columns) that support a wide horizontal piece known as the frieze board. Separating those elements are thin moldings made with a router from solid walnut. Atop the frieze board is a wide cornice molding that supports the mantel shelf and creates a smooth transition from vertical to horizontal.
Cut the components in the shop
Once you’ve settled on a design, you’re ready to cut plywood for the foundation, mantel shelf, and returns (narrow pieces of plywood that wrap around the sides of the fireplace to hide the masonry edges). Not only is it faster and more cost-effective to use plywood than to edge-glue solid lumber, but the plywood also minimizes seasonal wood movement. For this mantel, I used walnut-veneer plywood. Shopmade molding and edging hide the exposed edges. Use the tablesaw to cut rabbets 1⁄2 in. deep by 1⁄4 in. wide on the inside back edges of the returns and the vertical foundation pieces. Those edges will be scribed to fit against the wall and floor; relieving them with the rabbets makes trimming easier. Cut plinths and pilasters from 3⁄4-in. plywood and glue 1⁄8-in. solid banding over the exposed edges. Cut the vertical foundation pieces and returns long, to allow for scribing.
From Fine Woodworking #184
For the full article, download the PDF below:


Log in or create an account to post a comment.
Sign up Log in