Enhance Furniture With Crossbanding
Veneered border enhances many kinds of furniture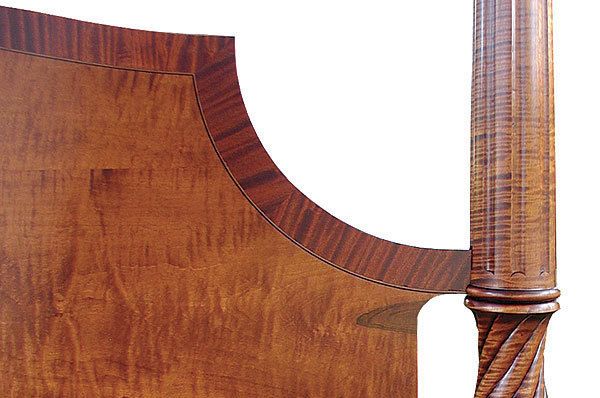
Crossbanding refers to wood, usually veneer, that is inserted flush with an underlying workpiece with its grain running predominantly across it. If you look out for crossbanding, you’ll be amazed at the many examples you’ll find. Commonly used on Federal-style furniture, it defines the outer edges of tables large and small, drawer fronts, or in this case, the headboard of a bed.
Designed to enhance a piece of furniture, crossbanding gives different degrees of embellishment depending on the type of wood chosen. Light or dark, straight-grained or figured, the effect can be as subtle or as fancy as you desire.
Work first on the arcs at each end of the headboard
On this headboard, the crossbanding and stringing define the visible top edge only, not the sides and bottom that will be hidden under bedding. The crossbanding extends right to the edge, unlike surfaces exposed to wear and tear such as tabletops, where the crossbanding ends 1/8 in. inside the edge.
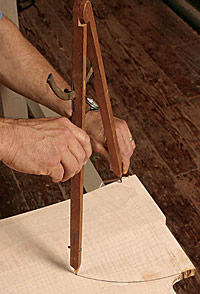
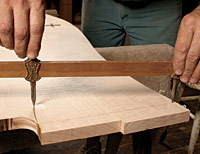
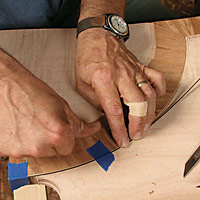
The width of the band will vary based on the area being banded—drawer-front banding may be as narrow as 1/2 in. The banding for this headboard is 1-5/8 in. wide. I used a compass and trammel points to lay out and scribe the arcs of crossbanding, locating the center of the arc on what would become waste wood (see photos, below).
If you need to locate the pin on a section that will become part of the finished surface, such as when crossbanding the corners of a dining-room table, mark where the pin should go, and then tape a double thickness of veneer to the surface for the pin to engage.
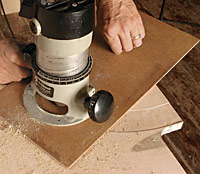
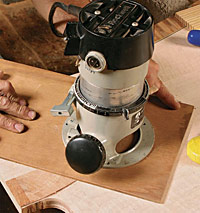
The most efficient way to remove the waste from the recess is to use a router attached to a jig. To find the centerpoint on which to pivot the jig, record the distance between the two trammel points. Measure from the extreme outside edge of the router bit and mark the plywood jig at that distance. Drive a nail 1/8 in. through the plywood and engage the nail in the hole used for the trammel. If the bit aligns with the outer edge of the arc, go ahead and rout away the waste. Because the crossbanding reaches the edge of the headboard, you can freehand the router along the inner edge of the arc, straying into the waste area. On a dining-room table, you’d have to relocate the nail and use the jig to carefully cut the inner shoulder, too. To create room for the double thickness of veneer taped to the table, chisel a recess on the underside of the jig.
Crossbanding on curves is applied in short sections. This method allows you to create symmetrical “slices of the pie” moving out from the center of the arc; it also keeps the grain of the crossbanding more perpendicular to the sides of the recess, and it wastes less veneer. I divided the arc into quarters, marking the divisions on both sides of the recess to aid installing the veneer.
Cut the veneer in place
The best veneers for crossbanding are those with prominent stripes. Not only is this pattern more dramatic, it makes it easier to conceal the joints between sections of crossbanding. Good choices include crotch or ribbon-striped veneer.
Using consecutive pieces of flitch-cut veneer, I laid the first two pieces on either side of the centerline to see how the light would affect the grain to get the best effect.
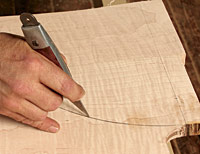
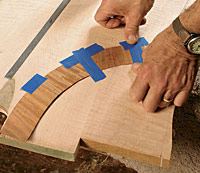
With the first piece laid over the recess, repeat the compass, trammel, knife sequence used to create the recess. Scribe the line with the trammel, and cut the veneer with the stiff-bladed knife. Try to keep the knife vertical to avoid creating an angled cut. Lay the veneer in the recess and repeat the steps to cut the inner arc. Using the lines dividing the arc into quarters, mark the ends of the veneer and cut it to length with a wide chisel or a knife. Because stringing will be inserted between the veneer and the solid wood, the joint doesn’t have to be perfect.
Take the first piece of crossbanding and use it as a template for the three other pieces that make up the arc. When all the pieces have been cut and fit, number the pieces and their corresponding locations.
Brush both surfaces with a thin layer of Elmer’s white glue. It has a longer open time than hide glue and it doesn’t stain like yellow glue. Avoid applying so much glue that it will squeeze out around the edges and come up through the pores of the grain. Lay plastic over the veneer, place a caul on the plastic, and apply even clamping pressure to avoid sliding the veneer.
The top of the headboard is cut differently
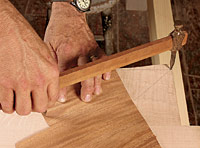
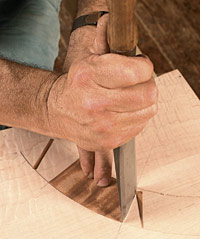
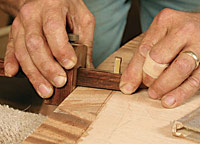
Because of its serpentine shape, the top of the headboard can’t be cut with a trammel. After cutting and smoothing the profile, set a cutting gauge at 1-5/8 in. and cut a line that follows the shape of the top. Deepen the line with a knife, and then rout away most of the waste, cleaning up close to the line with a chisel. The easiest way to cut the crossbanding to size is to lay it in place on the recess, mark the location of the edge of the headboard on the underside, and then draw a parallel line about 1-3/4 in. from the first line. This allows the crossbanding to overhang the edge of the headboard slightly.
Apply the stringing and clean up
After about an hour and a half, remove the clamps and the tape, making sure to pull off the tape across the grain to avoid tearout. Scrape away any excess glue and use a chisel to slice away the veneer that overhangs the top of the headboard.
|
Sources of Supply STRINGING |
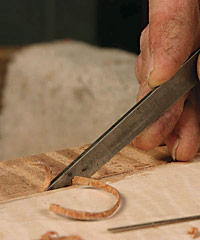
Now it is time to insert the stringing. The recess around the arcs can be cut with the router, resetting the location of the pivot nail to take account of the smaller bit. On the serpentine section, set a cutting gauge so that it cuts away veneer and not primary wood. Peel up the still slightly soft strip of veneer using a 1/16-in.-wide chisel. After the glue sets up it would be much harder to remove the very narrow strip of veneer.
Dry-fit the stringing, mitering the joint between the arc and the top section. Glue in the stringing and reapply the plastic, cauls, and clamps for a few more hours. The next day, bandsaw away the waste outside the arcs, scrape any uneven surfaces, and then sand the whole surface, being careful not to sand through the veneer on the outside edges.
Lead photo: Jeff Headley; other photos: Mark Schofield
From Fine Woodworking #184
Fine Woodworking Recommended Products

Blackwing Pencils
Drafting Tools






Log in or create an account to post a comment.
Sign up Log in