Bevel-Gauge Basics
The bevel gauge, or sliding bevel, is a simple tool that copies angles exactly without measuring them.
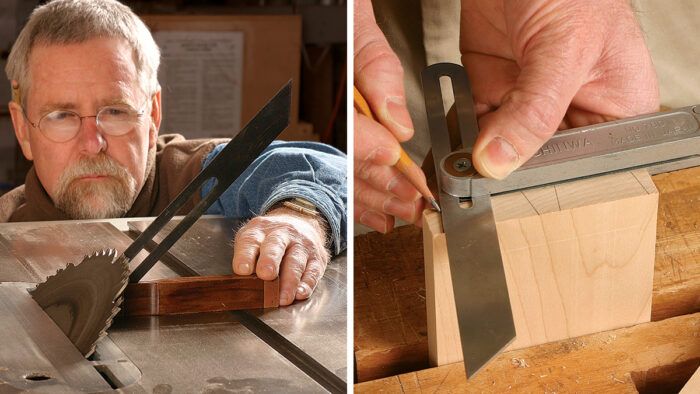
Judging by how little space it gets in popular woodworking catalogs, the bevel gauge, or sliding bevel, is an easily overlooked tool.
Don’t be fooled though.
This simple-looking tool is especially useful because it copies angles exactly without measuring them. Degrees don’t matter with a bevel gauge; only the angle itself counts. Nothing beats a bevel gauge for laying out dovetails and other angled joinery, and the tool makes it easy to set up machines for angled cuts.
There are three main parts to the bevel gauge. The head, or handle, is often made of wood, sometimes reinforced with metal strips at the edges. Some handles are all metal. The handle holds a steel or brass blade, which is secured and adjusted with a wing nut, knurled fastener, or lever mechanism.
Bevel-gauge blades range in length from 4 in. to 12 in. On a well-made gauge, the blade and handle are the same width. The blade edges are parallel to one another, as are the sides of the handle. Also, look for a wing nut that does not project beyond the handle edges, preventing the gauge from sitting flat, and hindering accurate layout.
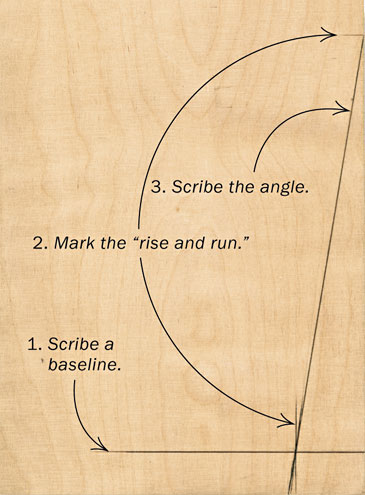
| LAY OUT DOVETAILS USING AN ANGLE BOARD
An angle board is a handy and durable reference, made from cutoff stock, for setting a bevel gauge to mark out dovetails or angles for other joinery. The board shown here is for a 6:1 dovetailangle. |
 |
Copying angles from workpieces and drawings
To copy an angle from a workpiece, loosen the blade, hold the handle firmly against one face of the angle, and adjust the blade to fit snugly against the opposite face. Retighten the blade, taking care not to alter the setting as you do so. Now you can use the gauge to set up a machine for an angled cut or to mark the angle on another workpiece.
To capture an angle from a drawing, you could use the bevel gauge to copy the angle directly, but you would need to rest the head and blade of the gauge against a pair of short boards to ensure accuracy. I find this cumbersome.
The following technique takes me further and allows me to copy any angle that I’ve drawn, even if I don’t know its measurement in degrees. I duplicate the angle by establishing a ratio for it like the one used to create dovetails.
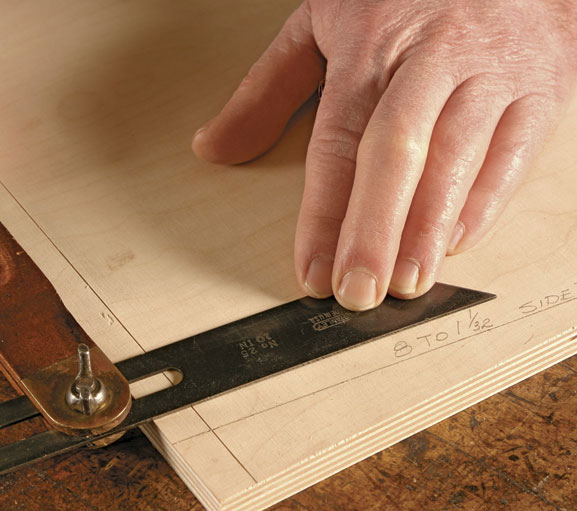
I begin by penciling a line on my finished project drawing, perpendicular to the baseline of the angle I want to copy. I mark this line at a convenient distance, say 8 in., to establish the angle’s “run.” From this mark I draw another line, perpendicular to the first and connecting it to the angled line. The length of this second line is the angle’s “rise.” I transfer these rise and run measurements to an angle board, connect the marks, and set my bevel gauge to the resulting line.

Laying out angled joinery
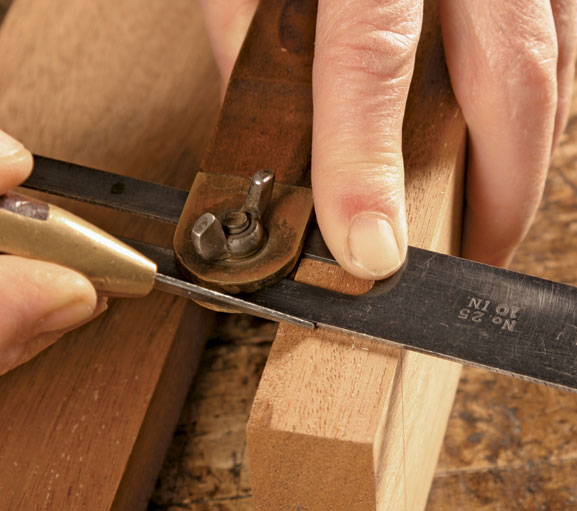
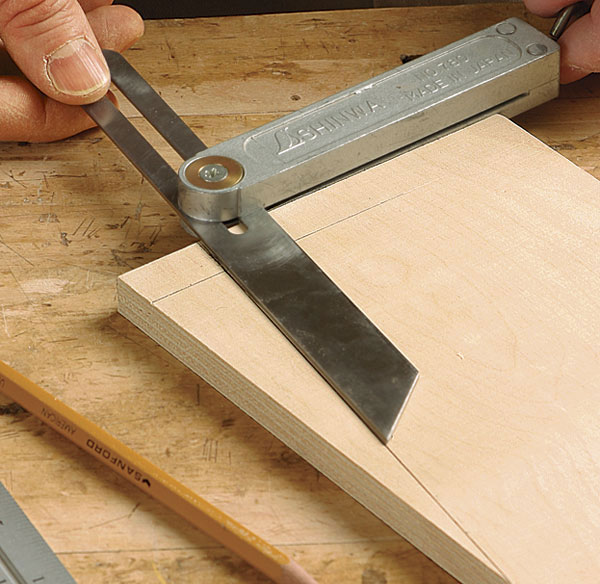
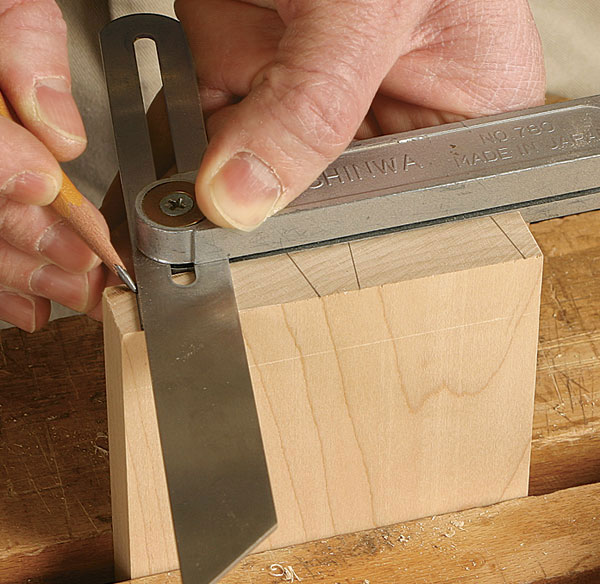
The sliding bevel really demonstrates its flexibility when it comes to laying out angled joinery. Its most familiar use is no doubt in laying out dovetails (see photos, p. 32), but that’s just the beginning. Take, for example, an angled tenon.
To capture the tenon’s shoulder angle, set the gauge with its handle against the baseline side of your angle board and swing the blade into place. Make sure the blade is pulled halfway through the head. In this way, you can mark the angle on your stock from either edge of the blade, and from either side of your workpiece.
To lay out cheeks for a tenon that’s perpendicular to this angled shoulder, you’ll need to draw angled lines lengthwise along the narrow edge of the workpiece. You could do this without changing the setting on your bevel gauge by using the end of the workpiece as the bearing surface for the bevel’s handle. But this isn’t enough to steady the gauge, which is likely to wobble as you try to strike your lines.
Fortunately, the gauge allows you to capture the same angle from a different surface. To do this, rest the bevel’s handle against the “vertical” side of the angle board. Readjust the blade, tucking it closely into the handle to match the angle. This new setting will allow you to mark out the tenon cheeks while resting the bevel’s handle securely against the face of your workpiece.
Copy the corner angle. For a snug miter around a corner that’s not perfectly square, start by recording the angle on the workpiece.
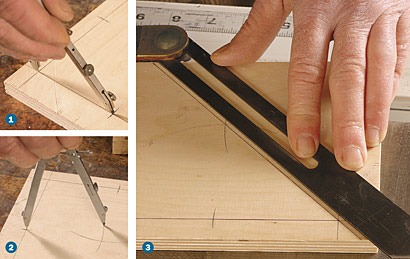
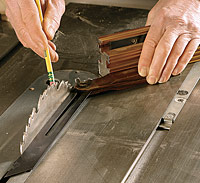 |
Transfer the angle. Use the gauge to adjust your blade tilt or, in this case, the miter-gauge angle (left). |
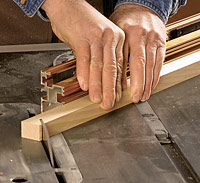 |
Cut your edging or molding at this setting. Two pieces cut at this setting should make a snug-fitting miter. |
When picking up an angle and transferring it to a machine, be sure to pull the bevel’s blade all the way through the head. This way the round end does not protrude and prevent the gauge from sitting flat on the machine.
Set blade and fence angles without numbers
One of the handiest uses for the bevel gauge lies in picking up an angle from your work or a drawing and transferring it to your machines to cut matching parts, as illustrated in the photo at the top of this page. The following examples deal with the tablesaw, but the same principles apply to tilting your jointer fence or bandsaw table.
To use the bevel for setting the tilt angle on a tablesaw blade, hold the gauge head flat against the table with its blade pointing upward and slide the gauge against the sawblade. Make sure the edge of the bevel blade is square to the face of the sawblade. Adjust the arbor tilt until the sawblade lies down on the blade of the gauge with no light showing between the two.
To copy an angle onto the miter gauge, raise the sawblade to full height and loosen the adjustment on the miter gauge. Hold the bevel’s handle against the miter-gauge fence and swing the bevel-gauge blade until it lies snugly against the sawblade. Tighten the miter gauge, taking care not to change the angle as you do so.
In either process, make sure that the bevel’s blade does not rest against a sawtooth, preventing you from fully aligning the gauge.
Fine Woodworking Recommended Products

Stanley Powerlock 16-ft. tape measure
Tite-Mark Marking Gauge
Veritas Wheel Marking Gauge




Log in or create an account to post a comment.
Sign up Log in