Build a Chippendale Mirror
A wide range of skills in a small project
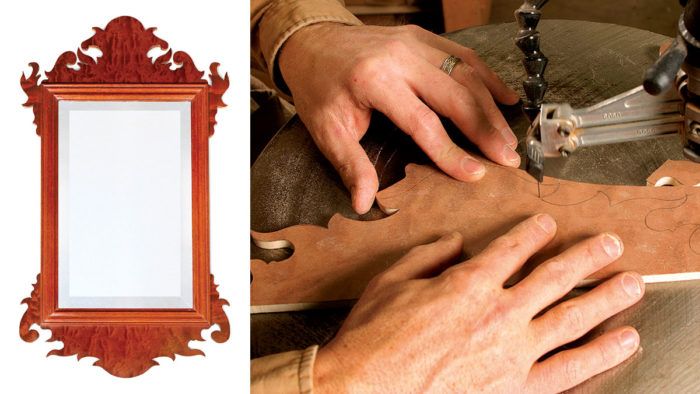
Synopsis: For a small project, this Chippendale mirror uses a wide range of woodworking skills, from basic design and layout to veneering and scrollwork. The piece has a visible mitered frame that sits on top of a poplar subframe. Surrounding the frame are decorative attachments made from a shop-made core veneered on both sides. A scrollsaw is used to shape the ornamental crest and ears. The piece is finished with a non-grain-raising burnt umber dye, followed by garnet shellac.
During the late 18th century, elaborately framed mirrors, known as looking glasses, served as testimonials to the wealth of their owners. A looking glass similar to the one shown here would have cost the owner 10 to 12 shillings, a hefty price considering that the average wage for a skilled tradesman of the time was about 6 shillings a day.
This is the first serious piece I give my students to make. Because I’m blending a traditional piece into a modern curriculum, I don’t go nuts over historical precedence and technique, and I take full advantage of modern machinery. For a small project, this mirror introduces a wide range of skills from basic design and layout to veneering and scrollwork. Each year, my class ends up with a great collection of stunning mirrors that they present as thank-you gifts to mom and dad for the thousands doled out for tuition.
Begin by constructing a two-layer frame
Despite its elaborate appearance, this project has only two main parts. The frame, which I make first, consists of a visible mitered molding in mahogany that sits on top of a poplar subframe; surrounding it are scrollsawn parts made from a shopmade core with figured veneer (in this case makore) as the face veneer and plain veneer on the back.
The common way to build a frame is to use 3/4-in.-thick primary wood and miter the corners. Even when the joints are splined or nailed, this is a poor approach. I make a poplar subframe with half-lap corners using stock that is 5⁄8 in. thick by 1 in. wide. This approach creates a much stronger frame, uses less primary wood, and is historically correct. don’t worry about the contrasting woods—when stained, the poplar will blend right in.
Before you start milling, purchase the mirror so that you can measure its exact dimensions and size the frame accordingly. You could use ordinary 1⁄8-in.-thick flat mirror, but this frame justifies the extra cost of 1⁄4-in.-thick mirror with a 1-in. beveled edge.
Mill the poplar subframe members an extra 1⁄16 in. long to allow the joints to overhang slightly, and cut the half laps on the tablesaw using a miter gauge with an auxiliary fence to prevent blowout, and a tenoning jig for the cheek cuts. dry-fit the subframe, glue opposite corners to make sure they are square, and then glue the rest. Trim the overhang with a chisel, making sure that you don’t round the edges. remember that the veneered ornamental pieces will be glued to this surface and any irregularities will make for a poor joint. If the frame turns out square, mitering the molding pieces is a snap. If the frame is at all out of square, you’ll have to fudge the joints in order to get a nice, tight fit.
From Fine Woodworking #185
For the full article, download the PDF below:
Fine Woodworking Recommended Products

Dividers

Blackwing Pencils

Circle Guide

Get the Plan
CAD-drawn plans and a cutlist for this project are available in the Fine Woodworking store.


Log in or create an account to post a comment.
Sign up Log in