Sculpt Flowing Joinery with an Angle Grinder
Ideal tool lends precision to curves with little practice required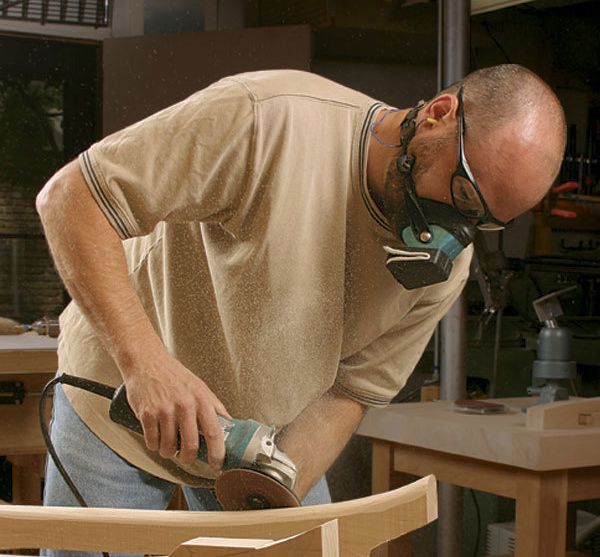
Synopsis: Shaping a piece of furniture with an angle grinder can be both exhilarating and terrifying. Sculptor and woodworker Jere Williams does it all the time. He finds it the ideal method for producing the flowing joinery that characterizes his work. He joins his furniture with simple butt joints and floating tenons, and doesn’t use the grinder until he has completed the frame. He says the only way to achieve uniformity, balance, and symmetry is to work on the entire piece at once, slowly shaping the entire surface down to its finished form.
My background is in sculpture, and the qualities that I most admire in modernist pieces are the organic forms and lines, the sense of peaceful repose, and the strong tactile attraction. I felt that these highly desirable qualities were lacking in my studio furniture, so I began designing with a flowing, organic style of joinery.
The shaping technique was not easy to perfect. I tried spokeshaves, drawknives, wood rasps, and carving gouges before settling on the angle grinder as the main tool for the job. Now I use these flowing surfaces and joints on both tables and chairs. Creating an organic feel in a piece also enhances its handcrafted appeal.
The only real drawback to this approach is the amount of dust it creates, so do your grinding outdoors if you can. When I work inside, I use open windows and an exhaust fan to create good airflow, and I wear earplugs, protective glasses, and a Dustfoe 88 respirator.
Shaping a piece of furniture with a grinder is both exhilarating and terrifying. After investing a great deal of time, money, and energy into making a perfect chair or table frame, it can be frightening to come near it with an aggressive grinder. But you’ll be surprised at your level of control with the right grinding attachment and a little practice.
I prefer not to use power-sculpting or -carving wheels on the grinder because they tend to bounce and are completely inflexible. Instead I use a rubber backer with abrasive-coated fiber disks. Strictly speaking, this means I am sanding, but most sculptors (and welders) still call this grinding. Combined with the raw speed and power of the grinder, these attachments allow you to remove material with unmatched speed and accuracy. Also, you can work the grain in a number of directions.
After grinding, I smooth the surfaces with a series of familiar woodworking tools.
Lay out curves and cut joinery carefully
This type of joinery demands precision because the process of shaping the jointed areas will expose any internal gaps. To be sure that all of the tenon shoulders are perfectly flush, I use simple butt joints and floating tenons, with mating mortises made on a horizontal mortising machine (though a router could do the job).
For strength, the tenons must be as large and long as possible, which means they will penetrate 1 in. or more into each piece, often at an angle and coming close to the final outer surface. This requires careful layout of both the curves and the mortises.
First, joint and plane the stock to a thickness and width that will allow enough room for the shape of the finished piece.
From Fine Woodworking #185
For the full article, download the PDF below:
Fine Woodworking Recommended Products
Ridgid EB4424 Oscillating Spindle/Belt Sander
Lie-Nielsen No. 102 Low Angle Block Plane
Leigh Super 18 Jig




Log in or create an account to post a comment.
Sign up Log in