Fumed finish: authentic Arts and Crafts
Ammonia technique adds distinctive and permanent color
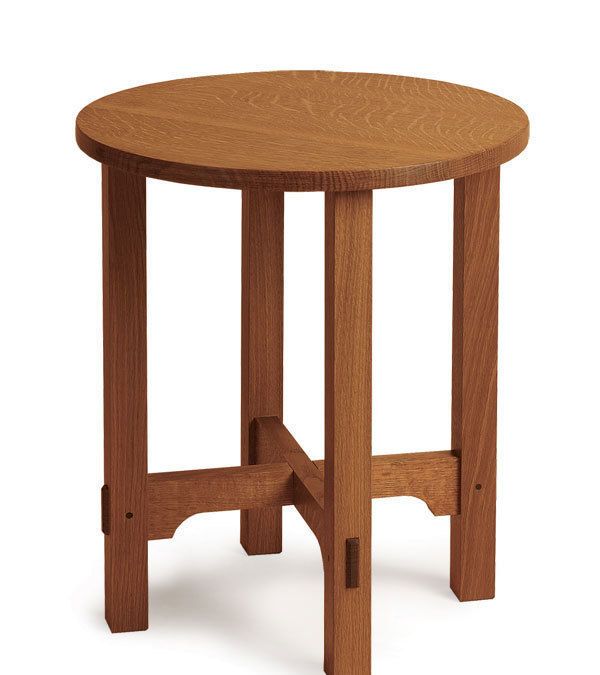
Having been faithful to Gustav Stickley’s design ideas and materials when building my table (see “Arts and Crafts Side Table“), it seemed only right to use his finishing method.
The technique that Stickley and other Arts and Crafts furniture makers employed was to expose their oak pieces to ammonia fumes. This gave the furniture its distinctive brown appearance and highlighted the rays of quartersawn oak.
This method has several advantages over dyeing or staining. With open-pored woods, pigment stains will collect in the pores, exaggerating the grain structure; dyes avoid this problem but are not lightfast; and both dyes and stains are labor-intensive to apply. With fuming, time and nature do all the work and the resulting change is permanent.
There are also several disadvantages to the process. Household ammonia won’t do the job. You’ll have to find industrial-strength ammonium hydroxide, which is dangerous stuff. Also, ammonia reacts with tannin in the wood, the amount of which varies from tree to tree. You probably can’t create your whole piece from a single tree, but try to use as few boards as possible and make the most visible parts, such as tabletops, out of a single board.
Save your offcuts for fuming samples
To get an idea of how long your project will need to be fumed, do a trial run with scrap pieces from the boards you used. Take the pieces out of the fuming tent at intervals and record the length of time on each piece. Not only will you see how long it will take to get the desired color, but you also will see if different parts of the table will darken at different rates. In this case, the scrap from the base got noticeably darker than the corner scrap from the tabletop, so I knew that I’d have to fume the top longer. Fuming makes white oak brown, but with a greenish cast. Warm up the look by using a finish with an inherent amber cast.
Set up the fuming tent
The wood won’t achieve full color on any surface that is in contact with another surface, so the easiest way to achieve an even color is to assemble your project before fuming it. If possible, dry-assemble it so that you can take it apart after it has been fumed and apply a coat of finish before glue-up. You will need an enclosure big enough to hold the whole project. I used a large cardboard box, but you may need to construct a tent from thick plastic and battens to enclose the fumes.
It is unlikely that the enclosure will be totally fume-proof, so try to do the fuming outside. Higher temperatures will speed up the process, so make sure the temperature is about the same when you fume your project as when you fumed the samples. Ensure that no children or pets can disturb the process or come into contact with the ammonia. Reduce the chances of wind toppling the box by placing bricks on the top or tying it down.
When my table had fumed long enough to get the base to the color I wanted, I took the base out and left the top in, placing it on a cardboard stand to let the fumes circulate.
After the fuming has ended, let your project shed fumes for 24 hours before you apply a finish. Test the finish that you plan to use on a piece of the scrap fumed earlier. Choices include boiled linseed oil for a darker look, tung oil, or an oil/varnish mix, any of which can be topcoated with shellac.
 |
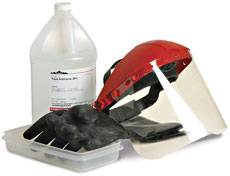
How to handle ammonia. Take care not to come in contact with the 28% ammonia solution. Wear heavy-duty gloves and eye protection, and use a glass or plastic container to hold the liquid when fuming. |
Not your mom’s ammonia
The ammonium hydroxide used for fuming contains around 28% ammonia compared to less than 5% in household ammonia. You should therefore take extra precautions when handling this material, also known as aqua (or aqueous) ammonia.
Avoid eye or skin contact with the ammonia by using goggles or a full-face shield, and protective gloves. A respirator with cartridges designed for ammonia is ideal, but basic charcoal vapor filters will reduce the exposure. If you don’t have a respirator, use a fan and stay upwind of the fumes.
Use a glass or plastic container rather than a metal one to hold the ammonia while fuming. Make sure that you don’t use an aluminum pie plate because the ammonia will dissolve it.
After you have finished fuming, dispose of the used ammonia in a large bucket of water, which can then be poured on the ground or on the compost heap. It makes a good fertilizer.
If you can find this type of ammonia locally, you will save yourself a large fee for shipping and handling this hazardous material. This type of ammonia is used in the manufacture of large blueprints, so possible sources include office-supply stores. You can purchase it online at www.hvchemical.com for just under $14 a gallon, but the shipping will cost you $39.
From Fine Woodworking #186


Log in or create an account to post a comment.
Sign up Log in