5 Essential Bandsaw Jigs
Build these jigs to make precise tapers, circles, wedges, and curves on the bandsaw safely and easily.

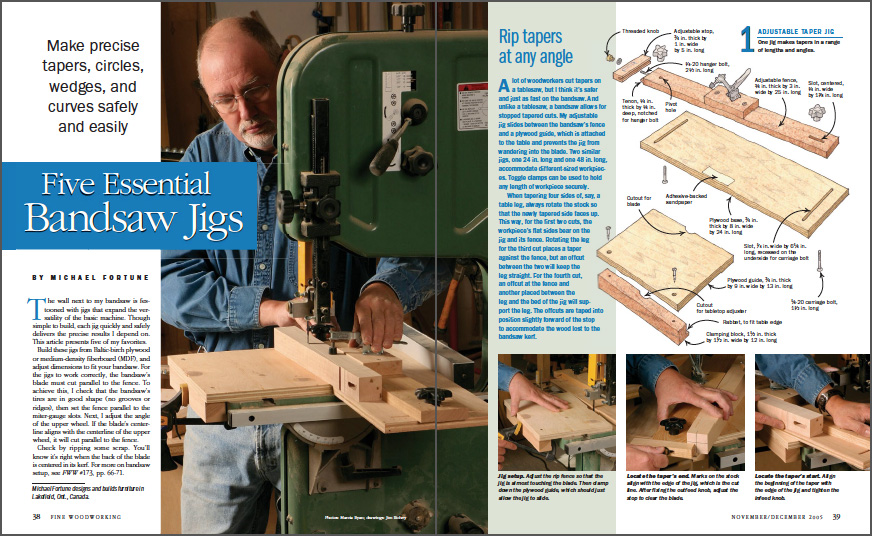
Synopsis: Rip tapers at any angle. Cut circles of any size. Safely cut small wedges and reproduce curved shapes, all on Michael Fortune’s favorite machine, the bandsaw. Fortune maintains that it’s safer and easier to do all kinds of tasks on the bandsaw, especially if you have these handy jigs. In addition to plans and step-by-step instructions for making and using his jigs, Fortune gives tips that will help you get the most from your bandsaw.

The wall next to my bandsaw is festooned with jigs that expand the versatility of the basic machine. Though simple to build, each jig quickly and safely delivers the precise results I depend on. This article presents five of my favorites.
Build these jigs from Baltic-birch plywood or medium-density fiberboard (MDF), and adjust dimensions to fit your bandsaw. For the jigs to work correctly, the bandsaw’s blade must cut parallel to the fence. To achieve this, I check that the bandsaw’s tires are in good shape (no grooves or ridges), then set the fence parallel to the miter-gauge slots. Next, I adjust the angle of the upper wheel. If the blade’s centerline aligns with the centerline of the upper wheel, it will cut parallel to the fence.
Check by ripping some scrap. You’ll know it’s right when the back of the blade is centered in its kerf. For more on bandsaw setup, see FWW #173, pp. 66-71.
Rip tapers at any angle
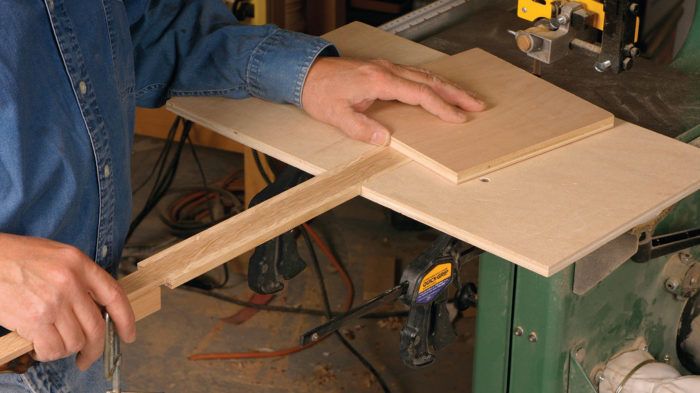
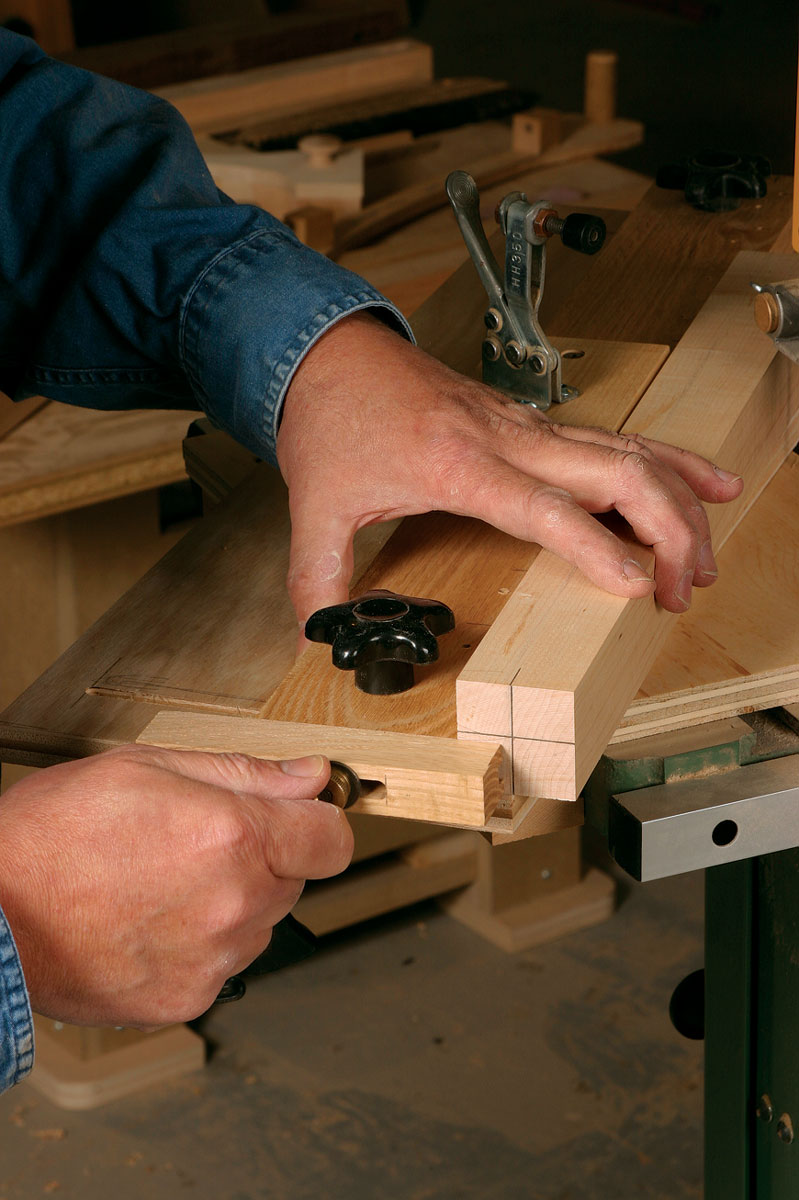
A lot of woodworkers cut tapers on a tablesaw, but I think it’s safer and just as fast on the bandsaw. And unlike a tablesaw, a bandsaw allows for stopped tapered cuts. My adjustable jig slides between the bandsaw’s fence and a plywood guide, which is attached to the table and prevents the jig from wandering into the blade. Two similar jigs, one 24 in. long and one 48 in. long, accommodate different-sized workpieces. Toggle clamps can be used to hold any length of workpiece securely.
When tapering four sides of, say, a table leg, always rotate the stock so that the newly tapered side faces up. This way, for the first two cuts, the workpiece’s flat sides bear on the jig and its fence. Rotating the leg for the third cut places a taper against the fence, but an offcut between the two will keep the leg straight. For the fourth cut, an offcut at the fence and another placed between the leg and the bed of the jig will support the leg. The offcuts are taped into position slightly forward of the stop to accommodate the wood lost to the bandsaw kerf.

From Fine Woodworking #180
To view the entire article, please click the View PDF button below.
Fine Woodworking Recommended Products

Ridgid EB4424 Oscillating Spindle/Belt Sander

Blackwing Pencils

Stanley Powerlock 16-ft. tape measure


Comments
I know this is an article from 15 years ago, but this is still a great set of jigs
Log in or create an account to post a comment.
Sign up Log in