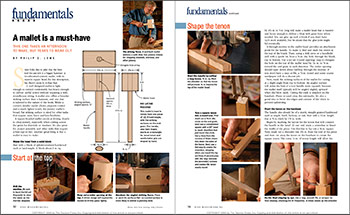
A Mallet is a Must-Have Tool
This mallet takes an afternoon to make, but years to wear out.

Synopsis: With its massive square head, a woodworker’s joinery mallet is light enough to control but heavy enough to deliver plenty of power where you need it. The joinery mallet’s broad, flat striking surface is ideal for driving chisels to chop joinery, especially when cutting across the grain for dovetails or mortises. It’s also great for project assembly and other shop tasks that require a firm rap or two. A mallet is easy to make with the tools and materials in your own shop. In Fundamentals, Phil Lowe shows you how.
Some folks like to joke that the best tool for any job is a bigger hammer. A woodworker’s joinery mallet, with its massive square head, fits that description, but there’s more to it than that.
A well-designed mallet is light enough to control comfortably but heavy enough to deliver useful power without requiring a wild, roundhouse swing. A mallet also offers a broader striking surface than a hammer, and one that is tailored to the nature of the work. While a carver’s slender mallet allows pinpoint control and a much lighter touch, the joinery mallet’s broad, flat striking surface is ideal for other tasks that require more force and less flexibility.
A square-headed mallet excels at driving chisels to chop joinery, especially when cutting across the grain for dovetails or mortises. It’s also great for project assembly and other tasks that require a firm rap or two. Another great thing is that a mallet is easy to make.
Make the head from a solid block Start with a blank of splinter-resistant hardwood such as hard maple. A block about 3 in. sq. by 4 1⁄2 in. to 5 in. long will make a mallet head that is massive and heavy enough to deliver a blow with great force when needed. You can glue up such a block if you don’t have 12/4 stock available, but be aware that the glue joint might fail eventually.
A through-mortise in the mallet head provides an attachment point for the handle. To make it, find and mark the center in the top of the blank. Then, using a drill press or a handheld drill with a spade bit, bore a 3⁄4-in.-dia. hole through the blank, top to bottom. Use a rat-tail (round tapering) rasp to elongate the hole on the top of the mallet head by 1⁄16 in. to 1⁄8 in. toward the end grain in each direction. The wider opening should taper down about halfway through the mortise. If you don’t have a rasp or file, a 1⁄2-in. dowel and some coarse sandpaper will do a decent job.
Next, mark the striking surfaces of the mallet for cutting at a slight angle from top to bottom. An angled surface will strike the butt of a tool handle more squarely because the mallet itself typically will be angled slightly upward when the blow lands. Cutting the ends is simplest on the bandsaw. Plane or sand away the sawmarks. It’s also a good idea to bevel the edges and corners of the block to prevent splintering.
 From Fine Woodworking #189
To view the entire article, please click the View PDF button below:
Fine Woodworking Recommended Products

Veritas Precision Square

Starrett 12-in. combination square

Olfa Knife


Log in or create an account to post a comment.
Sign up Log in