Easy Dovetail Layout
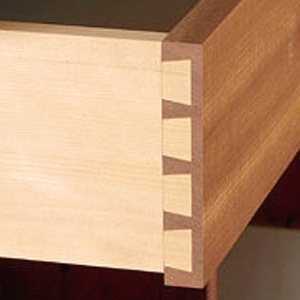
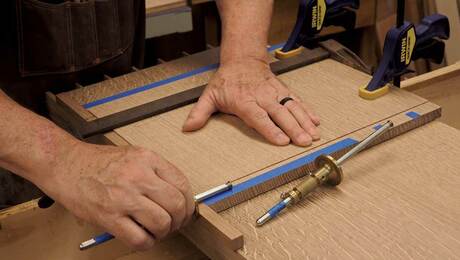
Lay out hand-cut dovetails with a ruler and simple mathAttractive hand-cut dovetails start with proper layout of the pins and tails. In this video, Gary Rogowski shares his easy method that requires only a ruler and simple math.
This approach works for any dovetail layout, no matter the width of the board or the number of pins and tails. Also, learn how Gary quickly sets the dovetail angle with a simple reference guide drawn on the back of his workbench bench hook.


Comments
I DO NOT LIKE THAT I MUST BE FORCED TO START A FREE TRIAL BEFORE I CAN WATCH THIS VIDEO!!
Fine Woodworking is not a non-profit organization. They provide value and deserve to be paid for it. That said, it is a FREE trial. You can cancel and walk away.
What bothers me is being asked to start a free trial at EVERY video, even though I am already a member. You would think that THAT is what the cookies are for!!
Get over it. Nothing is free and if giving them your email address is too high a price you can decline.
Straight forward as usual. Thanks, Gary.
Great video, simple solution Gary.
Blue Rocco and Little Joe can you get any lazier, is it really asking that much to sign into your account to watch a video?
There is some confusion here regarding sign-in. I agree, it does appear one needs to create a new account to view each video. However, there is the option to Sign-in to one's existing account. The option is not that visisible and worse - it does not always work. The web designers need to fix this. Sincerely, this is not rocket science. Put yourself in the position of the the user before you roll-out an interface.
A half-pin doesn't necessarily have to be one-half of your full pins. It's just an expression. Also, your pin size should be matched by the width of the chisel you're going to use. That's so you can chop the final waste at the scribe line from shoulder-to-shoulder after removing most of the waste with a fret or coping saw.
Great concise video on great layout technique.
What's with all the whiners and shouters? Go use a different site---or get off your a** and create your own site if you aren't satisfied with this one.
Not sure why there is so much complaining about a free video ... all you have to do is sign into your account and you are all set. If this is too much trouble you can always not watch.
Why is it called a Dove Tail anyway. I've never tried it although woodworking is my hobby. I've got a long way to go with my joinery.
This technique for laying out the first half of your dovetail joint has been around for longer than I have any knowledge of, and it is certainly useful if high precision in the spacing of your tails is critical (I can think of no structural integrity situation where that is the case).
This technique should probably be part of the curriculum of any course on dovetail joinery as well, considering it can be used to lay out precision spacing across the length or width of any work piece for any other purpose.
However, you can just as well lay out you spacing by eye and achieve even enough spacing that does not detract from eye appeal. (I do this almost routinely with good results) And if you think you need high repeat precision for every element of your project, you can simply lay out and cut your first piece and then use it to as a template to lay out your remaining pieces. Finally, you may want to incorporate variable spacing of your tails to add a little artistic pizzazz to your project, in which case this technique may be less than useful.
Hi PhilDom. It’s called a dove tail because the shape of the tail half of the joint approximates the shape of a bird’s tail. Why the dove species of bird was chosen is beyond me. You might also ask how the complementary half of the dove tail joint (the pin) got its name. I don’t know, but it doesn’t look like any pin I’ve ever used.
Is there a part 2 to this? Or is it expected to make the cuts then use the cut outs as a guide to create the other half of the joint?
btw, this video was an eye opener for me. Thank you very much.
These complainers need to just pay for a full membership.
Clear, concise and to the point. Very good video.
I used to know how to do this. This is a useful reminder.
I have been using a Leigh dovetail jig for my router, but I'm finding the use of hand tools, mixed with power tools, is more enjoyable. (My shop is for enjoyment, not profit!)
This video is very valuable, and I will start using this method immediately. One question, when I cut the tails, should I cut on the pencil line, or just inside the pencil line?
A Part Two video (laying out the pins) would be great!
Thank you!!
Try this video. >> When a Pencil beats a knife for tight joinery.
There's also a good article >> Layout:When pencil beats knife by Steve Brown. Stay on waist side of line for pins if you've gone tails first
Log in or create an account to post a comment.
Sign up Log in