Router-Table Basics
Are you getting the most from this workshop fixture?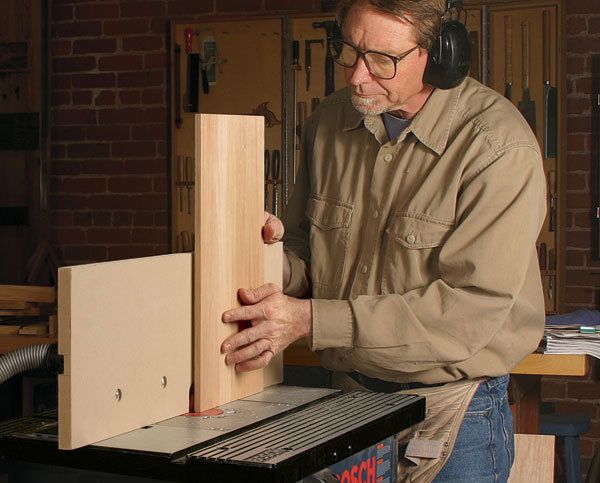
Synopsis: The router table enables even those with small shops to easily produce moldings, cut rabbets, dadoes, and other joinery, and replicate shaped furniture parts. Gary Rogowski has been using this tool for more than 30 years. In that time, he’s collected an array of tips and advice for users — from initial setup to time-saving jigs. Here, he demonstrates how to set up the router table for comfort and efficiency, how to properly feed stock, how to produce different types of moldings, how to use straight cuts for basic joinery, how to set up stopped cuts, how to raise a panel, how to cut sliding dovetail and grooves, and how to avoid tearout when template routing.
From Fine Woodworking #190
Contrary to what some woodworkers believe, a router is not the quickest way to ruin a piece of wood. In fact, when mounted underneath a flat table, a router is one of my shop’s most versatile and reliable tools.
I began using router tables in the 1970s, shortly after seeing one for the first time and not long after I became a woodworker. The idea was an instant winner: a table or cabinet with a router mounted upside down underneath so that the bit stands straight up through a hole in the surface. The table’s broad, flat top and square fence support the work and provide reference surfaces for accurate cutting. It’s also easy to clamp blocks to the table for stopped cuts.
The tool’s combination of easy use and accuracy has helped transform woodworking, especially for the small shop. With a properly set up table, a woodworker can produce hundreds of feet of molding in a single shop session. The user also can cut rabbets, dadoes, and other joinery, and—with the help of templates—can easily replicate shaped furniture parts.
There are a great many things that a router table can help you accomplish. Here are the techniques I turn to time and again for great-looking and accurate results.
Don’t bypass the basics When setting up and using a router table, you’ll want to pay attention to a few basics.
Take care to set up the table at a comfortable height that lets you see and control the work. The older I get, the taller I like mine. On store-bought models, check that the mounting insert is flat and level with the table surface. Shim it with leveling screws or pieces of masking tape; if it’s not level, you won’t get a consistent depth of cut. The fence should be flat, straight, and square to the worksurface.
Always make sure that the fence opening is closed as tightly as possible without interfering with the bit. This will ensure the best support for the stock as it passes the cutter.
When feeding stock past the bit, bear in mind a couple of things. First, keep the stock between you and the bit; in other words, don’t trap it between the bit and the fence. Move the wood from right to left (into the bit’s rotation). The rotating bit will try to pull the work into the fence or into the bearing on the bit, giving you good control and better accuracy. For most operations, you’ll feed the work into the bit with your right hand and use your left to hold the piece snug against the fence or table as you move it past the bit.
For the full article, download the PDF below:
Fine Woodworking Recommended Products

Starrett 12-in. combination square
Rockler Deluxe Panel Clamp
Sawstop Miter Gauge




Log in or create an account to post a comment.
Sign up Log in