Maple-Leaf Marquetry
Create this intricate design using double-bevel techniques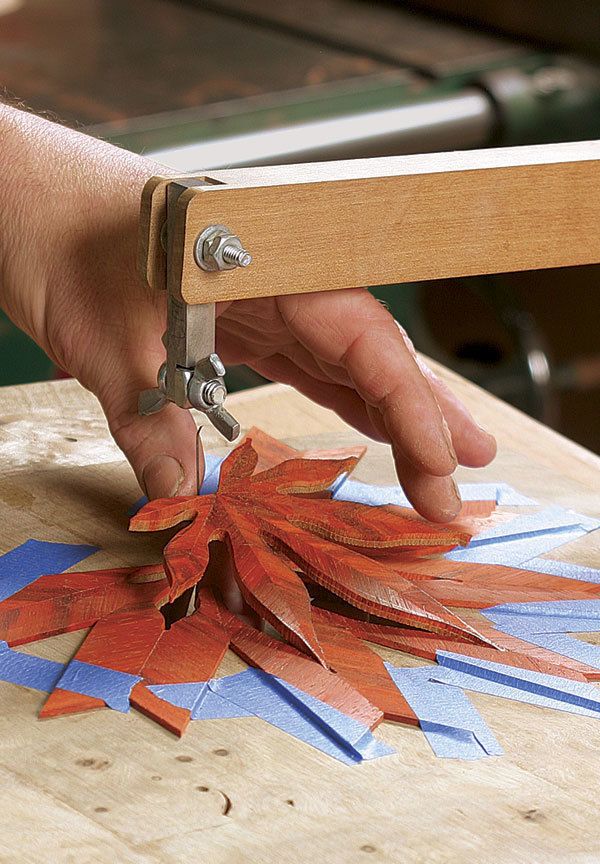
Synopsis: A companion article to “Elegant Veneered Boxes,” this Master Class details how to use double-bevel marquetry techniques to veneer a box with a cascading maple-leaf pattern. To achieve matching bevels, Janofsky cuts the inlay piece and background at the same time, using a scrollsaw with its table at an angle. Instructions are included on how to prepare the veneer blanks for the leaves, prepare the background veneer, design the pattern, cut out and inlay the leaves, and add stems for the final touch.
I use a variety of veneering techniques on the pieces I make. For this box, marquetry yields a pattern of overlapping Japanese maple leaves that cascade down the sides, a look inspired by Japanese prints and lacquerware.
Sometimes called double bevel marquetry, my method involves inlaying each element into the background veneer as though it were a tapered plug in a tapered hole.
To achieve matching bevels, you cut the inlay piece and the background at the same time, using a scrollsaw with its table canted at a slight angle. As long as you have the correct table angle and move the work in the right direction, the parts will fit. Actually, the sawing does take a certain amount of head-scratching and some practice, but mainly it requires a tolerance for tedium. (I use a foot-powered, shopmade saw that cuts at a leisurely pace, but a motorized scrollsaw will work, too.)
Build blanks for leaves
The main task is preparing the veneer blanks for the leaves, which are made from a number of pieces glued together rather than a single sheet. The seams between the pieces mimic the veins in a real leaf.
First, saw a bunch of 1⁄16-in.-thick veneers for the leaves and for the background. I generally do this on a bandsaw. If the saw is well tuned and the blade sharp, the veneers may not need any thicknessing; otherwise, I cut them slightly thick and then sand them.
Assemble blanks for the leaves
I keep a supply of reddish and brownish woods around the shop to make veneer for the leaves. Part of the fun comes from trying out different woods. However, if you use padauk, keep in mind that the wood will become darker and duller. Also, an alcohol-based finish will cause the pigment in padauk to bleed, so avoid using shellac.
To make the blanks for the leaves, bundle consecutive cuts of straight-grained veneer and crosscut the bundle at a 45° angle, creating a bunch of trapezoidal pieces about 3⁄4 in. wide. The more cleanly and accurately you cut these, the better.
Take one piece, flip it over, and bookmatch it to another, forming a chevron pattern, and edge-glue the pair.
When the chevrons are dry, use a jig on the tablesaw to put a steeper point on the already pointed ends, keeping the point aligned with the joint in the center.
Then begin gluing these assemblies together—first three, then five, then seven pieces—with the points converging at the base of what will be the leaf.
From Fine Woodworking #192
For the full article, download the PDF below:
Fine Woodworking Recommended Products

Bahco 6-Inch Card Scraper
Whiteside 9500 Solid Brass Router Inlay Router Bit Set







Log in or create an account to post a comment.
Sign up Log in