The Secret to Making Perfect Joints
Trim hidden areas to quickly produce a flawless fit
Synopsis: Joints that fit perfectly are every woodworker’s goal, but it’s a common misconception that every surface must match perfectly in order to achieve that goal. Undercutting — using angled relief cuts on surfaces that are not essential for glue strength — can give you quality joints in less time. The key is knowing when and where to use the technique. Stuart Lipp gives his take on undercutting in a number of situations: on mortises and tenons, drawer pulls, dovetails, moldings, glue blocks, edge joints, and screw holes.
It is a common misconception that fitting a joint means methodically paring the entire area until all the surfaces match perfectly, but in many cases, wood needs to be removed only from hidden surfaces to allow a joint to close completely. I call this technique undercutting.
Do not mistake undercutting as taking the easy way out; undercutting is part of being a conscientious and concerned woodworker. The secret is knowing when to employ the technique. First, dry-fit a joint. Then decide if undercutting is the best option, or the entire joint needs trimming.
Undercutting can mean a few different things, but it usually involves angled relief cuts on surfaces that are not essential for glue strength. For example, when fitting a mortise and tenon, rather than planing the entire shoulder just chisel out the inner surfaces. By the way, if you undercut a joint and it still needs trimming at the edges, you have less material to remove.
I’ll show you ways to apply undercutting to a wide variety of joints and situations. Over the past few years I have noticed myself employing this method more frequently, and in every situation the result is improved quality in far less time.
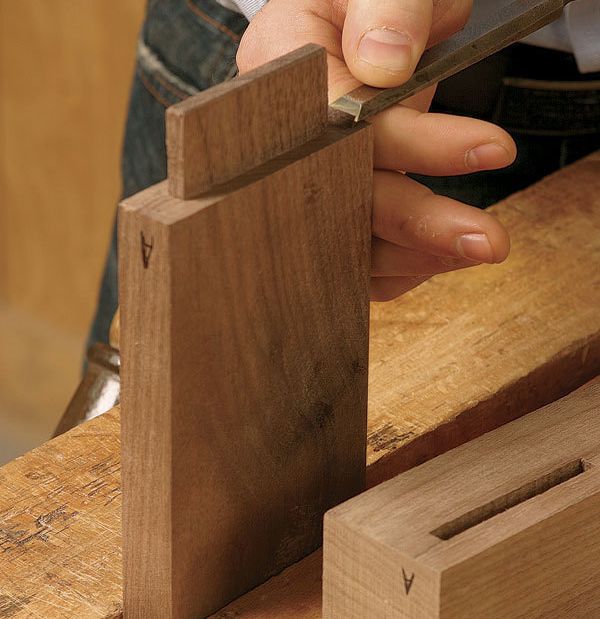
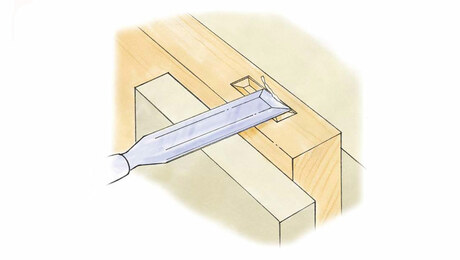
Mortise-and-tenon joints employ two forms of undercutting. The most well known is to make the depth of the mortise greater than the length of the tenon, giving excess glue a place to go and allowing the joint to close. But what if the tenon shoulder still does not fit well? You can spend a lot of time with a chisel or shoulder plane trying to pare a perfect 90° shoulder, or you can quickly undercut it.
Put the workpiece in a vise, tenon up, and use a chisel to pare the end grain in from the edge of the shoulder to the tenon. Remember to keep the outermost edge crisp. Undercut enough material for the shoulder to fit, but be careful not to take too much; a 1⁄32-in. bevel should be more than enough. Do this all the way around the shoulder and you will improve the fit of the joint. The technique is not magic—you still may need to pare the visible edges—but undercutting leaves less area to fit.
From Fine Woodworking #193
For the full article, download the PDF below:
Fine Woodworking Recommended Products

Pfiel Chip Carving Knife

Suizan Japanese Pull Saw

Starrett 4" Double Square


Log in or create an account to post a comment.
Sign up Log in