Weekend Project: Make a Traditional Mirror Frame
Read the directions and download the free project plan for this nicely proportioned mirror frame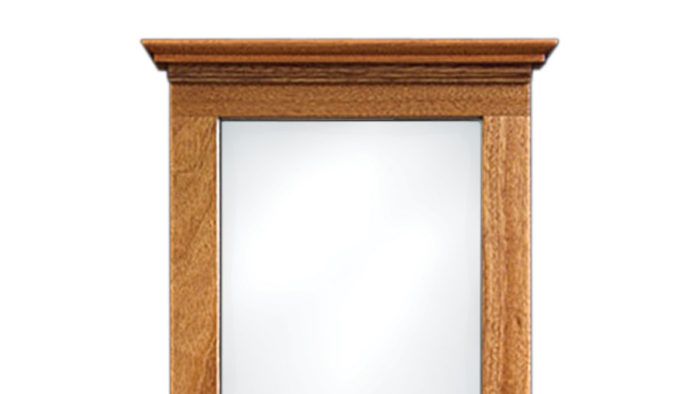
This traditional mirror frame is the third one I’ve made. The first one was designed to fit above a radiator cover in the foyer of my house. I used old chestnut boards that I didn’t have the heart to put in the trash. Next, I made a frame out of oak and put it in a shop for sale. It went quickly. Then I designed the variation shown here, using mahogany. The top molding gives the piece its traditional look. The small shelf attached just below the mirror adds some visual interest.
Make the basic frame
Mill the parts for the top and bottom rails and the stiles. Cut half-lap joints on the tablesaw to connect the stiles and the top rails. The half-lap recess in the bottom rail is essentially the same as the socket for a half-blind dovetail joint. Use a sharp dovetail saw to begin cutting the two sides of the recess, then use a wide chisel to chop and pare away the waste.
I use the tablesaw to rabbet the frame to house the mirror, and I make the rabbet cuts before assembling the frame. As an alternative, you could use a router and a bearing-guided bit to cut the rabbet after it’s assembled. If you do, you’ll have to square up the corners with a chisel.
Glue and clamp the frame together. While the glue sets, begin shaping the remaining pieces.
Cut the top molding and shelf
The top molding and shelf are shaped with the same techniques–removing most of the waste on the tablesaw, then using handplanes to put a fair curve on three faces. (If you prefer, you can shape these pieces with router bits.)
After cutting the stock for the top molding to size, use the tablesaw to cut a 1/2 x 5/16 in. rabbet. Use a rabbet plane and sandpaper to create the curve.
Removing waste on the shelf requires two rabbets. The first is 7/8 x 5/16, which removes most of the waste. The second is 1/8 [check] x 3/16 in., which creates the reveal below the curve, as you can see in the photo and the plan. Once you’ve removed the waste, use handplanes or a router to create the curve.
Shape the remaining pieces
Cut the cove molding that fits below the top molding. The easiest way is to use a router to cut the profile on a piece of wider stock, then rip it to size on the tablesaw. Likewise, rout the bullnose profile on the bottom trim piece and cut it to size. Cut the thin cleat that fits below the shelf and cut matching ogee curves on the ends. The plan gives the radiuses I use, but feel free to make changes to suit your own style.
Finally, cut the two bottom shelf brackets from 3/4-in.-thick stock. The plan gives the radiuses I use on the face, but feel free to make changes.
Assemble everything, sand, and finish
I use biscuits to attach the top molding to the frame. To attach the cove, I use glue and a 23-ga. pin nailer. If you don’t have that tool, glue and clamps will work just fine.
Attach the shelf and the shelf brackets with glue and screws driven through the back of the frame. Glue the cleat in place before attaching the brackets. Finally, attach the bottom trim with glue.
I sand the mirror, beginning with P150 paper and working up to P220. Then I raise the grain and hit the wood again with fresh P220 paper. After that, I apply four coats of hand-rubbed polyurethane, with a topcoat of wax.
When the finish has dried, install the mirror. Use glazier’s points and small dabs of silicon caulk to hold the glass in place. Cover the back with kraft paper to protect the mirror.
Download the plans below by clicking ‘View PDF’
Fine Woodworking Recommended Products

Suizan Japanese Pull Saw






Log in or create an account to post a comment.
Sign up Log in