Kid's Woodworking Project: A T-rex Figure
A play figure that first and second graders can build, from the students of the Clear Spring School in Eureka Springs, Ark.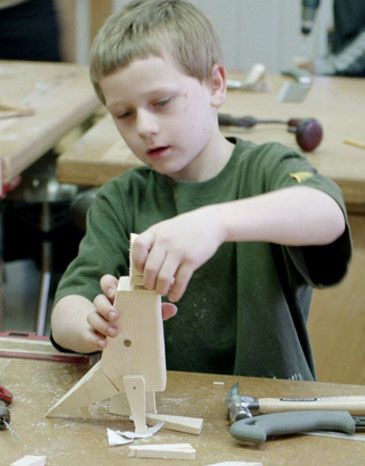
The projects in this series were first made by the students at the Clear Spring School, a small independent school in Northwest Arkansas. When my daughter Lucy was a student there, I developed a woodworking program called Wisdom of the Hands. It recognizes the importance of integrating the head and hands in the development of intelligence for all students. My daughter is now in college, but woodworking remains a favorite activity throughout the school. The direct, hands-on problem-solving that goes on in the woodshop helps the kids in all their other classes.
 T-rex was designed as an integrated woodworking activity for first- and second-grade study of dinosaurs. (Naturally, older kids can make this figure, too.) The figure is made from a single 7-in.-long 2×4, with 1/8-in.-dia. dowels added for teeth and arms. A 1/4-in.-dia.dowel in an oversized hole allows the jaw to move. The finished dinosaur is sturdy enough for play, and the movable jaw provides lifelike animation. It is great for kids to learn that hours of great play don’t have to come from store-bought toys or video games. They can come through the loving guidance of a parent, grandparent or teacher.
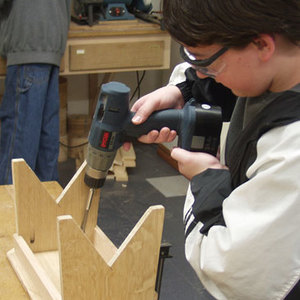
To make the figure, glue the cutting template onto the workpiece with spray adhesive, or simply mark the lines based on the measurements shown in the drawing. Have the kids clamp the workpiece in a vise and orient it after each cut so that all the cuts are vertical. Have the kids use a Japanese-style pull saw, and follow the numbers on the cutting template to make the cuts in sequence. To drill holes, have kids use a hand-powered drill. Let the kids choose the exact position of the legs and the teeth, as well as the location of the holes for the dowel arms.
Don’t let the kids have all the fun making a T-rex. Building one yourself first will help you anticipate when your child will need the most help. It will also provide an example to excite your child’s imagination and help you explain the steps involved. Then, when your child’s T-rex is complete, growl and bite at each other. Let the play begin and let it be fierce.
|
Rules for Grownups 1. Set an example of caring craftsmanship. Rules for Kids 1. Listen to what the grownups tell you. Rules for Working Safely 1. No woodworking without adult supervision. |
How to Build the T-Rex Figure 1. Grownups cut the 2×4 to size and glue the saw-cut template onto the wood or mark and number the cut lines. 2. Kids clamp the wood in a vise and drill the 1/4-in. and 5/16-in. holes in the side, as shown on the template. Drill the larger hole first, then the smaller one. 3. Kids shift the wood in the vise so that the line for the first cut is vertical. Make that cut. Your child may need help getting the saw started. 4. Kids shift the wood so that the line for each succeeding cut is vertical, then make that cut. Grownups can help by watching to make sure the saw is cutting horizontal at the end of each cut so that the parts will separate cleanly. Some of the cuts are hard work. Sometimes a short break can help. If asked, grownups can help a bit too, but let the kids have the pleasure of making the final cut. 5. When all the pieces have been cut, kids sand them, using a block wrapped with P150-grit sandpaper. 6. Kids drill 1/8-in.-dia. holes in the jaw and the head for short pieces of dowel to make teeth. Put in as many dowels as needed to make the T-Rex look fierce. Cut short pieces of 1/8-in. dowel and glue them into the holes. Cutting the dowels short is hard work, and grownups can help. It’s easiest to sand them to a uniform height after the glue has dried. 7. Kids drill a 1/4-in.-dia. hole in the body and glue in a 1-in. length of dowel to support the jaw and head. The T-rex is more fierce if the head and jaw are positioned about 3/8″ forward on the body. Move the jaw piece around on the top of the body to help find the right place to drill the hole. 8. Kids drill 1/4-in.-dia. holes in the body and tail and glue them together, using a 1-in. length of 1/4-in.-dia. dowel in the holes. Then nail and glue the legs to the body. While the glue is still wet, move the legs to support the body in the desired position. Drive 1-in. panel nails into the legs to help hold them in place. (Kids often want to use only nails, so the legs move.) 9. Kids drill 1/8-in.-dia. holes in the body for pieces of dowel to make the arms. Cut the dowels to length and glue them in the holes. |
|
One way to saw along a line As anyone who has cut dovetails will know, it’s hard to master the technique of making angled cuts. When you try to follow a long angled line down through a board, it can be easy for the saw to wander away from the line. In woodworking with kids, I encourage them to always orient the wood so that the cut line is vertical. That way, they can take advantage of their own natural motions and the guidance their own bodies and gravity provides. At Clear Spring School, this simple technique helps us to get better results and it also helps the child be become better aware of his or her posture and the natural mechanics of the human body. |
Fine Woodworking Recommended Products

Suizan Japanese Pull Saw






Log in or create an account to post a comment.
Sign up Log in