8 Tips for Flawless Moldings
Smart router setup and technique yield crisp profiles and silky surfaces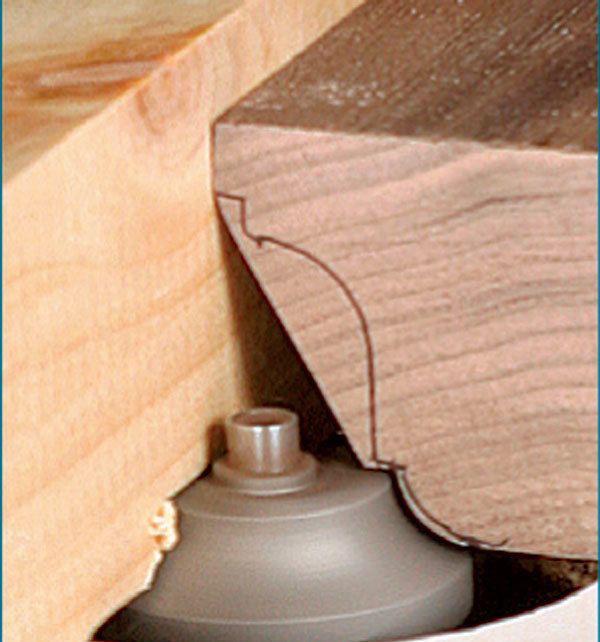
Synopsis: Creating molding safely and cleanly requires that you use proper tools and pay careful attention to technique. Here, Steve Latta shares tips for making sure that the moldings you build will fit well and look their best. They include choosing the right router-table setup, burying the bit to eliminate tearout, roughing out profiles on the tablesaw, using a wide blank for safety, cutting in the proper sequence to avoid chipout, using an offset fence, and techniques for ripping and cleanup. With Latta’s help, you’ll soon be creating molding that gives all your woodworking the perfect finishing touch.
A crisp molding lends the same touch of elegance to a wellmade cabinet that a silk tie bestows on a sharp-dressed man. But in order for their magic to work, neckties and moldings both must be treated with care. A molding with torn-out grain or fuzzy edges will spoil the effect—like a soup stain in the middle of your chest.
I don’t have to fuss with a necktie very often, but my students and I do run plenty of molding. I’ve adopted several techniques for making sure the results fit well and look their best. Creating molding safely and cleanly requires careful attention in three areas: cutting profiles, cleaning them up, and, finally, ripping the individual molding strips. The suggestions here touch on all of these areas.
1 Use a sacrificial fence to tame tearout
To eliminate tearout, I like to bury the bit in a wooden fence, creating a zero clearance cavity that lets the fence serve as a chipbreaker. There are two types of this fence that I make most often; both start with a good scrap of wide 2x stock with a jointed face and edge.
The first is a very simple fence that I make by using the bit itself to cut the zero-clearance cavity. Clamp one end, bury the bit a little deeper than you need, then bring the fence back to the appropriate setting and clamp the free end. If you are raising the bit into the fence, go only as high as necessary. Creating a cavity taller than your final bit height reduces the chipbreaking effectiveness.
For complex bits or those that can’t cut their way into the fence, such as bearing-guided bits, I drill the fence opening with a Forstner bit. This also makes it easier for me to joint the infeed side if I need an offset fence. I also cut a channel in the back of the fence for chip removal.
To prevent chipout in heavily figured stock, I reorient this fence so that the bit is literally buried in the infeed side. To do this safely, clamp a straight backer board behind the fence. Loosen the clamps that hold the fence and, with the router running, slide the infeed side of the fence into the bit. The movement is very controlled because the rotation of the bit pushes the fence against the backer board. After setting the fence, reclamp and continue running the molding.
Another advantage of any sacrificial wooden fence: I can quickly screw guards or hold-downs in place.
From Fine Woodworking #197
For the full article, download the PDF below:
Fine Woodworking Recommended Products
Dubuque Clamp Works Bar Clamps - 4 pack
Bessey K-Body Parallel-Jaw Clamp

Festool DF 500 Q-Set Domino Joiner






Log in or create an account to post a comment.
Sign up Log in