New Twist on a Sleigh Bed
Curved slats and simple carving make this bed stand out from the crowd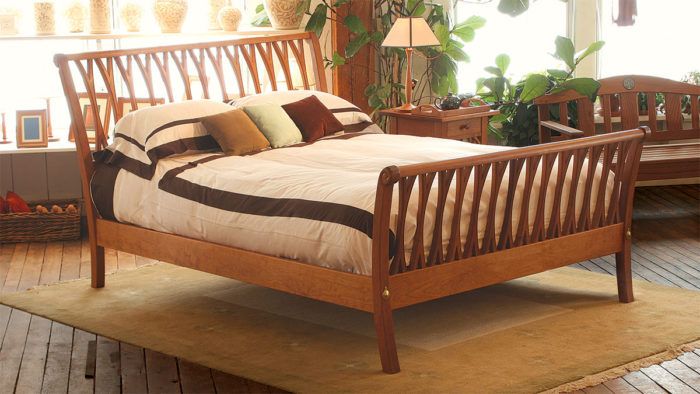
Synopsis: With its X-shaped back slats and hand-carved curls on the legs, this bed belongs to a family of furniture that Charles Shackleton designed as an homage to the fork-back chairs of his native Ireland. Making the bed requires a combination of handwork and machine work. The legs are cut on the bandsaw using templates, which also help to position the mortises. The curved design at the top of the legs is carved by hand. The X-shaped slats are cut on the bandsaw and beaded either by hand or with a router, and are joined to the upper and lower cross rails with dowels. Jigs and templates simplify construction and make assembly easier.
Correction: The dowels connecting the top rails to the legs should be 1/2 in. dia. and not 3/8 in. as shown, while those connecting the X-slats to the rails should be 3/8 in. dia. and extend 1/2 in. into the slats and the rails. The distance from the base of the footboard leg to the bottom of the lower cross-rail mortise should be 13-1/4 in. and not 14-1/4 in.
In 1776, my great-great-great-grandfather (great-grandfather of the Antarctic explorer Sir Ernest Shackleton) started the Anna Liffey flour mill on the banks of the river Liffey near dublin, Ireland. After I emigrated to Vermont in 1981 and started a handmade furniture business, I enjoyed returning to visit relatives who still lived in the old mill house. In their dining room, I spotted some beautiful chairs. known as Irish fork-backs because of their X-shaped back slats, these chairs were a wonderful combination of simplicity and sophistication. I thought that with a few changes their classic design could translate into more contemporary pieces.
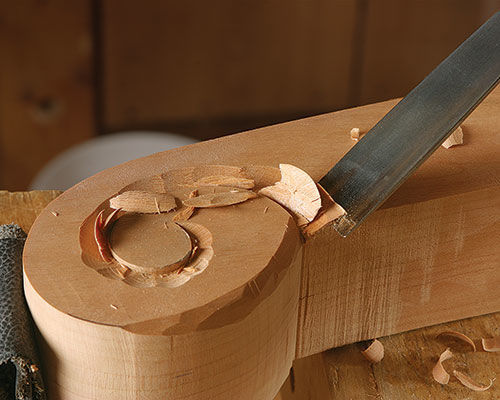
The chair I designed was very popular with customers, who requested other pieces like it, spawning a family of furniture I call the Anna Liffey range. This bed is a member of that group. Besides the X shapes, the bed has another subtle design element, simple hand-carved curls on the ends of the legs, a whimsical trademark of my work. Making the bed requires a nice combination of machine work and handwork. To simplify the steps, I’ll demonstrate several handy jigs and templates.
I prefer cherry for this bed because of its attractive color and grain, but walnut, maple, or mahogany would work as well.
The four legs are the foundation
Begin by creating templates for the legs on pieces of 1⁄8-in.-thick plywood. This will simplify laying out the legs on the 10/4 cherry, which has been flattened and milled to 2 in. thick. Try to get all four legs from the same board to keep color and grain uniform. If the board is at least 7 in. wide, it can be just over 8 ft. long.
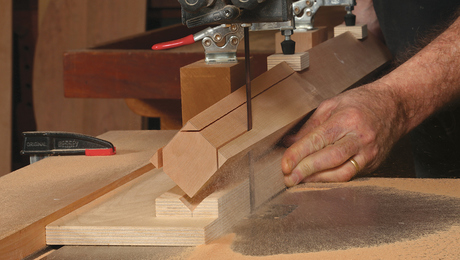
Cut out the legs on a bandsaw. Next, use the leg templates to lay out the mortises for the side rails and the lower cross rails, and then cut them using a router, a drill press, or a hollow-chisel mortiser.
Remove the bandsaw marks on the curved parts of the legs using a bench plane, a compass plane, a spokeshave, or just sandpaper. Lay out and then carve the curl on the outside of each leg. All the other corners receive a 1⁄8-in. roundover; the bottom of the leg gets a 1⁄4-in. roundover. Last, sand the legs to P320-grit. This may seem excessive, but because I use a linseed-oil finish, it minimizes blotching on cherry.
From Fine Woodworking #197
For the full article, download the PDF below:







Log in or create an account to post a comment.
Sign up Log in