Two Ways to Make Sturdy Cabinet Doors
How to make stylish solid-panel or glass-panel doors with strong mortise-and-tenon joints
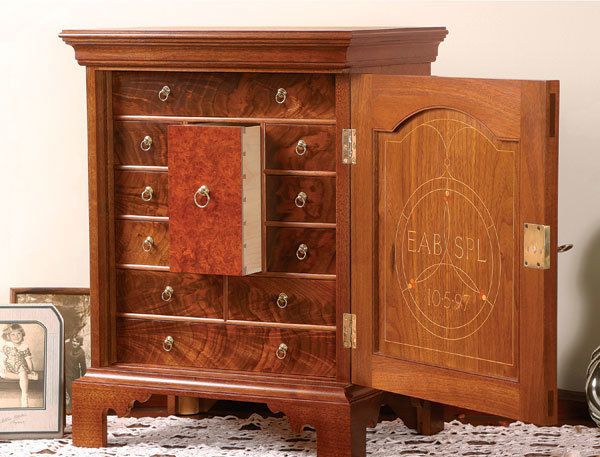
When I reproduce an 18th-century piece, I build doors whose joints will outlast these achy joints of mine. My clients pay for that, and I would not sleep at night giving them anything less. Here, I’ll summarize the best methods for making strong, classic solid-panel doors and frames for glass panels.
 Solid panel
Full mortise-and-tenon joints make this the best method for constructing fine furniture. Additionally, the tenon’s offset shoulder adds rigidity to the joint. The profiled corner must be mitered for the joint to close. Here’s how to cut this joint:
After cutting the stock to its rough size, mold a profile and cut a slot in all the frame members. I often resort to standard router bits. By mixing and matching, I have an infinite variety of profiles available. To cut the slot, use a slot-cutting bit or a dado head on the tablesaw.
Mortises are cut next, usually located on the stile members and the same thickness as the width of the groove. I generally cut the mortises to within 3/8-in. of the outside edges of the doors. But if you’re making doors whose backs will be rabbeted for an overlay construction, leave at least 5/8-in. beyond the mortise.
Next, cut tenons on the rails. This involves a couple of setups on the tablesaw because the rear shoulder is offset more than the front. This helps make the joint very strong and look good from both sides. To account for shrinkage, I prefer to machine tenons a hair oversized, then let the stock settle overnight.
For a tight fit, handplane the cheeks until the joint slips together snugly.
 |
Shape the rails and stiles on the router table. The sticking portion of a cope-and-stick bit cuts the profile and groove in one pass. Set the fence flush with the bearing. |
 |
Rails must have offset shoulders. Guide the stock along the tablesaw fence and push it using a backer block for extra support. |
 |
Cutting the cheeks without a tenoning jig. The rail is pushed along an auxiliary fence clamped to the tablesaw’s fence. A backer block prevents tearout. |
 |
Make final adjustments using a chisel. The back wall of the groove on the stiles must be removed up to the miter. Use a guide block to miter the inside corners of the profile. To locate the miter, fit a rail to a stile as far as it will go, mark the inside corner, disassemble and clamp the jig to the stock. Then shave away the waste with a chisel. |
 Glass Panel
There’s no offset shoulder on the tenon in this joint, because an offset shoulder would get in the way of the rabbet for the glass panel.
After milling the rail and stile stock to rough sizes, run the molding with a router. Next, cut the mortises, same as before. But forget about setting up for the extra shoulder cut on the back of the rails. Cut all the tenons with continuous shoulders all the way around.
The molded profile must be mitered for the joint to close. Both the front and rear walls of the slots must join in a miter. Use the same jig as mentioned earlier and a wide chisel to miter both at the same time.
For glass panels, rip off the rear walls of the groove, which eliminates the miter. To hold the glass, I’ll often rely on tinted glazing putty alone. You could also rip strips of the same species of wood and screw or nail them in place. Cut the bottom piece in two for ease of removal should the glass need replacement.
If you like this construction method and want to apply it to floating wood panels, here’s a trick to make the back of the frame look as elegant as the front. Run a profile along the back inside edge of the frame. That funny-looking miter is transformed into an elegant inside corner, and the door will look good on both sides.
 |
Use a sticking bit or make your own profile from stock router bits. A straight bit, left, a cove bit, and a slot cutter were used to mold this profile. As an added touch, both sides of this frame were profiled. |
 |
Shoulders are the same height on all sides of the rails. After cutting the shoulders, raise the blade high enough to remove the cheeks. |
 |
Miter both walls of the groove. Using a guide block and chisel, pare away the miter, which in this construction will show on both the front and back of the door. |
 |
A glass panel is fitted from the rear. After ripping away the rear wall of the groove, insert the glass and secure it with small strips of wood nailed or screwed in place. |
Fine Woodworking Recommended Products

Freud Super Dado Saw Blade Set 8" x 5/8" Bore

Leigh Super 18 Jig

Veritas Precision Square


Log in or create an account to post a comment.
Sign up Log in