Repairing Veneer with a Can
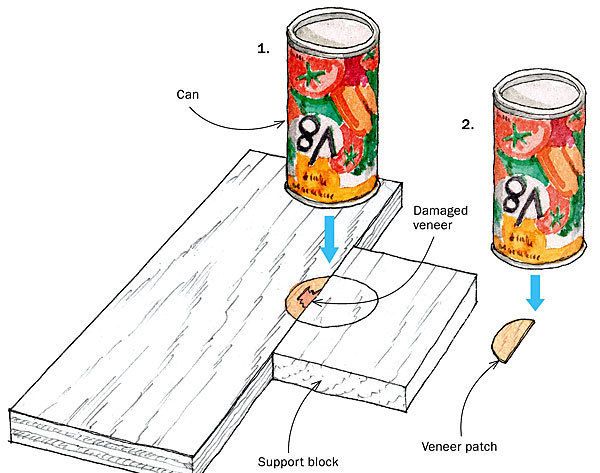
A good way of repairing damaged veneer is to use a metal can to guide identical cuts in the damaged piece and in the veneer sheet for the repair.
Place the can over the damaged area and hold it securely while you cut a crisp line. Use as small a can as possible to keep the repair area small. If the damage is on the edge or end of the piece, just place a portion of the can over the damaged area, supporting the rest on a scrap of wood.
To clean out the damaged section, I typically use a chisel, but you also could use a router with a straight bit set to make a cut that’s equal to the thickness of the veneer. Now, place the can on a sheet of veneer that matches the grain of the workpiece, and cut around it to make the patch. Trim the patch if the repair is on an edge, then glue it in place. Clamp the veneer in place using a wood block as a caul, with a piece of wax paper between the repair and the block to prevent the block from sticking. When dry, sand the patch flush.
Drawings by Jim Richey

Drawings by Jim Richey
Fine Woodworking Recommended Products
Whiteside 9500 Solid Brass Router Inlay Router Bit Set
WoodRiver Router Bit Storage Case
Bahco 6-Inch Card Scraper




Log in or create an account to post a comment.
Sign up Log in