How They Did It: Slat-and-Rivet Construction
Blending cabinetmaking and boatbuilding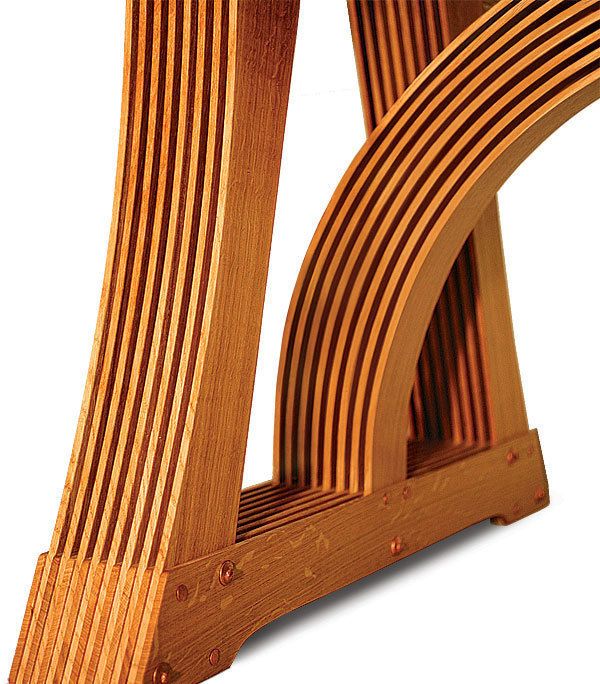
In a move away from typical solid-wood construction with invisible glue joints, Petter Southall (see his arched table) has developed an innovative design/construction method using 3/8-in. slats joined with copper boat rivets to create tables, benches, beds, chairs, and sideboards. The genius of this approach is the combination of beauty, strength, and the efficient use of wood. There is cross-grain wood movement in each joint, but because the pieces are thin, they are able to restrain each other. Also, the rivets allow more movement than glue would. Ultimately, the table is extremely strong and rigid, though the construction is surprisingly basic.
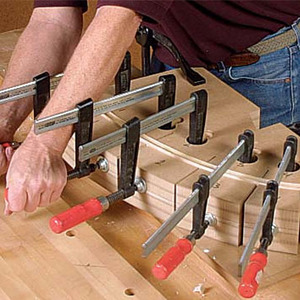
1. Assemble the slats Southall begins with the end units and arranges all the slats around a clamping jig to keep them in place.
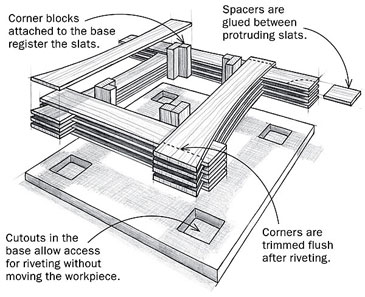
The pieces are left overlong and will be cut to size on the bandsaw after the rivets are in place.
2. Drill and rivet Southall uses a handheld drill in a drill-press attachment to drill the rivet holes. Standard copper rivets with roves are set with a ball-peen hammer.
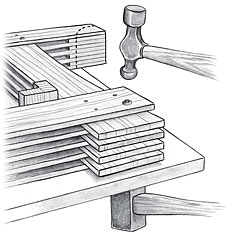
A heavy hammer is used on the nail-head side for support.
3. Steam-bend the arches All the slats are pulled from the steambox and bent at the same time on a wide form.
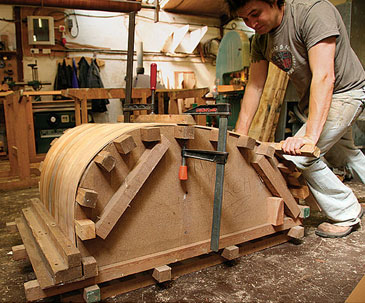
The slats are over-bent to allow for springback.
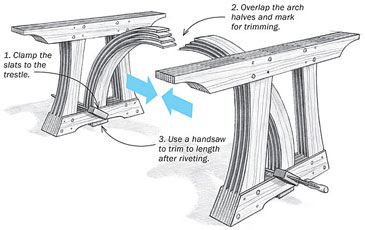
4. Connect the arch halves With the bottoms of the arches clamped to the trestles, the tops are overlapped at the center and loosely clamped.
To create the staggered overlap, Southall draws a cutoff line on each slat, and then slides out one slat at a time so he can cut it to length with a handsaw before hand-drilling and setting the rivets.
From Fine Woodworking #200
Photos: Petter Southall; Drawings: John Tetreault
Fine Woodworking Recommended Products

Olfa Knife
Pfiel Chip Carving Knife
Leigh Super 18 Jig








Log in or create an account to post a comment.
Sign up Log in