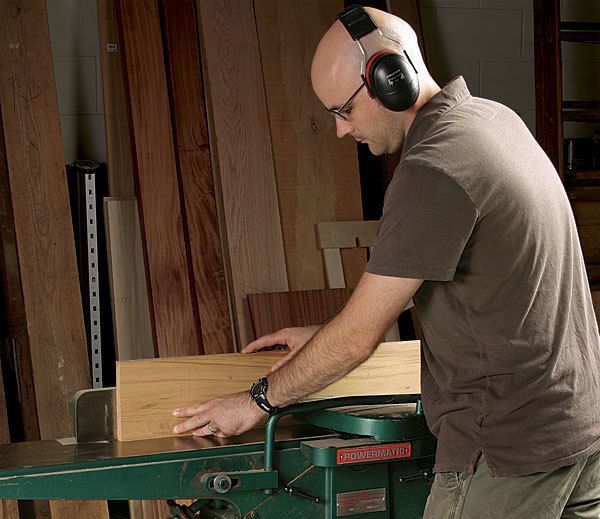
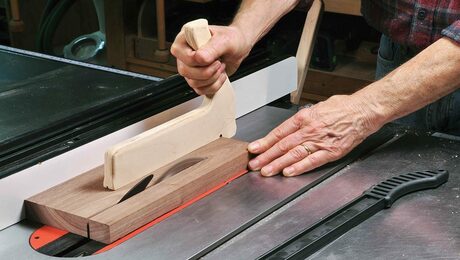
FIRST, CHECK YOUR TECHNIQUE: Press the board against the fence with your left hand, and transfer the pressure of your right hand to the outfeed side of the board as soon as possible.
QUESTION:
I am having trouble with my 6-in. jointer. Every board I edge-joint ends up tapered. I have adjusted the outfeed table, checked the gibs and locking nuts, and even tried taking a very light (1/32-in.) cut. Nothing I do gets rid of the taper. Do you have any suggestions on the cause and solution?
—Tony Granelli, Idlewild, MI
ANSWER:
Before you blame the machine, check your technique. First, try transferring pressure to the outfeed side of the workpiece as soon as possible. Keeping pressure on the infeed side will cause tapering.
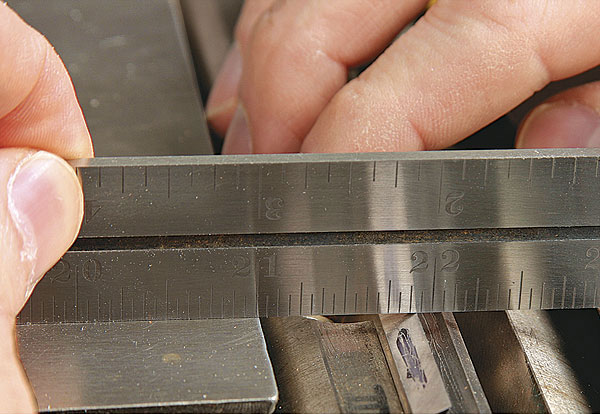
THEN CHECK THE HEIGHT OF THE OUTFEED TABLE: With a knife at the highest point in its rotation, the gap between the straightedge and the outfeed table should be no more than the thickness of a piece of photocopier paper.
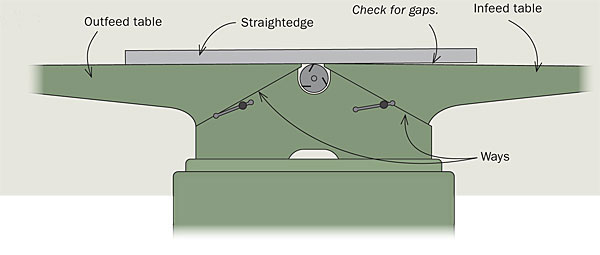
If aligning the outfeed table doesn’t get rid of the taper, check that the infeed and outfeed tables are coplanar. Raise the infeed table to full height, move the cutterhead so that no knife is above the tabletop, and lay a 4-ft. straightedge along the infeed and outfeed tables. If the tables aren’t in the same plane, you’ll have to shim the ways to fix the problem.If that doesn’t work, check that your outfeed table is set slightly below the highest point of the knives’ arc. Align the cutterhead so that one blade is at its high point and lay a straightedge across the knife and table. There should be a gap no greater than the thickness of a sheet of photocopier paper between the straightedge and outfeed table just after the cutterhead.
LAST, MAKE SURE THE TABLES ARE COPLANAR: If there’s any space between the straightedge and the tables, then the tables aren’t coplanar. If each table is flat, you can shim the ways to bring them into alignment. If the tables are not flat, you’ll have to have them reground.
Drawing by Vince Babak
Fine Woodworking Recommended Products
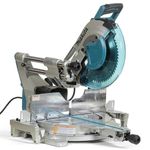
Makita LS1219L Miter Saw
This is the saw I want in my shop. For one, it’s easy to use. All of the controls are easy to reach and manipulate, and the glide mechanism is both robust and smooth. The handle works well for righties and lefties. Then there are added bonuses that no other saw has. For instance, its hold-down is superb, as it can move to different locations, hinges for a greater range of coverage, and actually holds down the work. In addition, the saw has two points of dust collection, letting it firmly beat the rest of the field. The one downside was the saw’s laser, which was so faint we had to turn off the shop lights to see it. Still, all these pluses in a package that fits tight to the wall? That’s a winner for me.
The gauge has a quick and easy method for fitting the guide bar precisely to your tablesaw’s miter slot. This means the gauge can be recalibrated if necessary for continued accuracy. The face of the protractor head can be adjusted square to the table and also square to the guide bar. This ensures accurate cuts, and it, too, can be readjusted if the need arises. The protractor head has stainless-steel knobs and fittings and high-contrast, easy-to-read white numbers and increments.
If you have a helical cutter head machine, having learned from bitter experience, the bearing seats may be uneven. This can be compensated for in knife cutter heads because the adjustment of the knives can make up for a lack of parallelism of the cutter head axis to the outfeed table
Shim the cutter head under the low side - not too difficult. this is far easier than shimming the outfield table and then doing the same for the indeed table. Fix one thing versus fixing multiples.
It wasn't easy to learn but it taught me a lot about the machine
With its graceful curves, cabriole legs, and ornamental back splat, a Queen Anne side chair is a bucket list build for many woodworkers. Dan Faia had a very specific Queen…
Become an UNLIMITED member and get it all: searchable online archive of every issue, how-to videos, Complete Illustrated Guide to Woodworking digital series, print magazine, e-newsletter, and more.
We use cookies, pixels, script and other tracking technologies to analyze and improve our service, to improve and personalize content, and for advertising to you.
We also share information about your use of our site with third-party social media, advertising and analytics partners.
You can view our Privacy Policy
here and our Terms of Use here.


Comments
If you have a helical cutter head machine, having learned from bitter experience, the bearing seats may be uneven. This can be compensated for in knife cutter heads because the adjustment of the knives can make up for a lack of parallelism of the cutter head axis to the outfeed table
Shim the cutter head under the low side - not too difficult. this is far easier than shimming the outfield table and then doing the same for the indeed table. Fix one thing versus fixing multiples.
It wasn't easy to learn but it taught me a lot about the machine
Log in or create an account to post a comment.
Sign up Log in