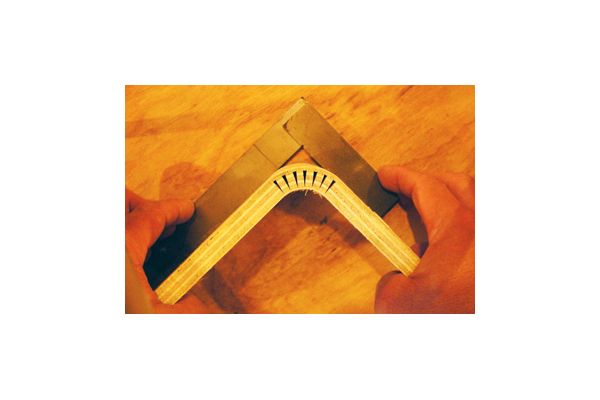
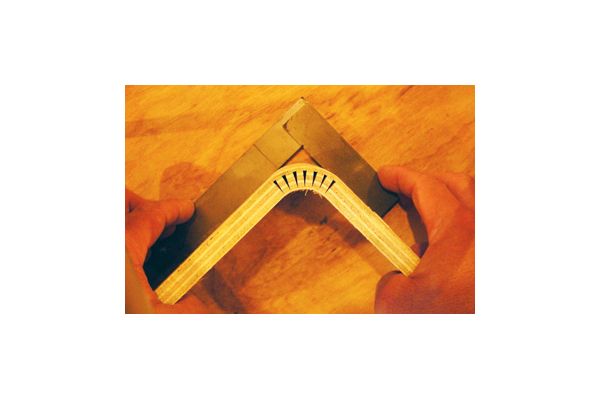
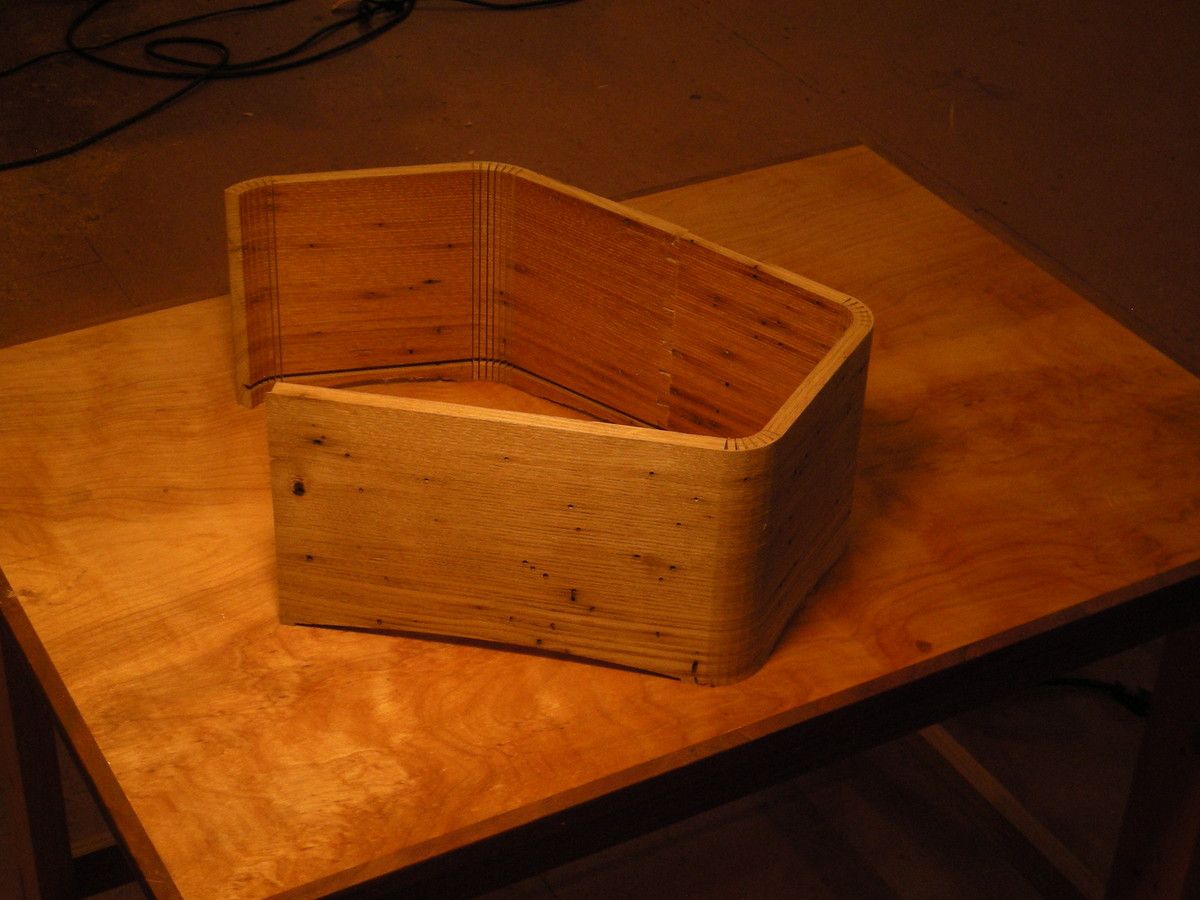
See it bend. The series of kerfs allows the solid wood to turn the 90 degree corner.
This how-to article was submitted by Gene Jameson.
For as long as I can remember, I’ve been enamored with furniture that has curves. Pieces that have nonlinear forms and organic shapes have always gotten my attention.
Whenever I see an article describing wood bending techniques, whether it is lamination, steaming or kerf-bending, I take notice. A few years ago I rediscovered a Fine Woodworking article about A Kerf-Bent Mirror Frame by Ken Picou. He used kerf-bending to a high-degree of accuracy to make a beautiful frame. I was fascinated by the beautiful contrast he achieved by using tinted epoxy to fill the kerfs. I wanted to incorporate some of the same techniques Picou used into a box.

Kerfed corners. Ken Picou’s mirror frame, as featured in Fine Woodworking #94. Photo: Sandor Nagyszalanczy
I ended up designing a box that was unique in several ways. The four sides of the box were from a single board. I used kerfs to give the flexibility needed to wrap the corners 90 degrees. The two ends of the board fit together with a dovetail joint, completing the general shape of the box. The bottom is contained within a groove, allowing for the creation of feet at the corners. The use of veneers and curved corners give this box characteristic Art Deco styling.

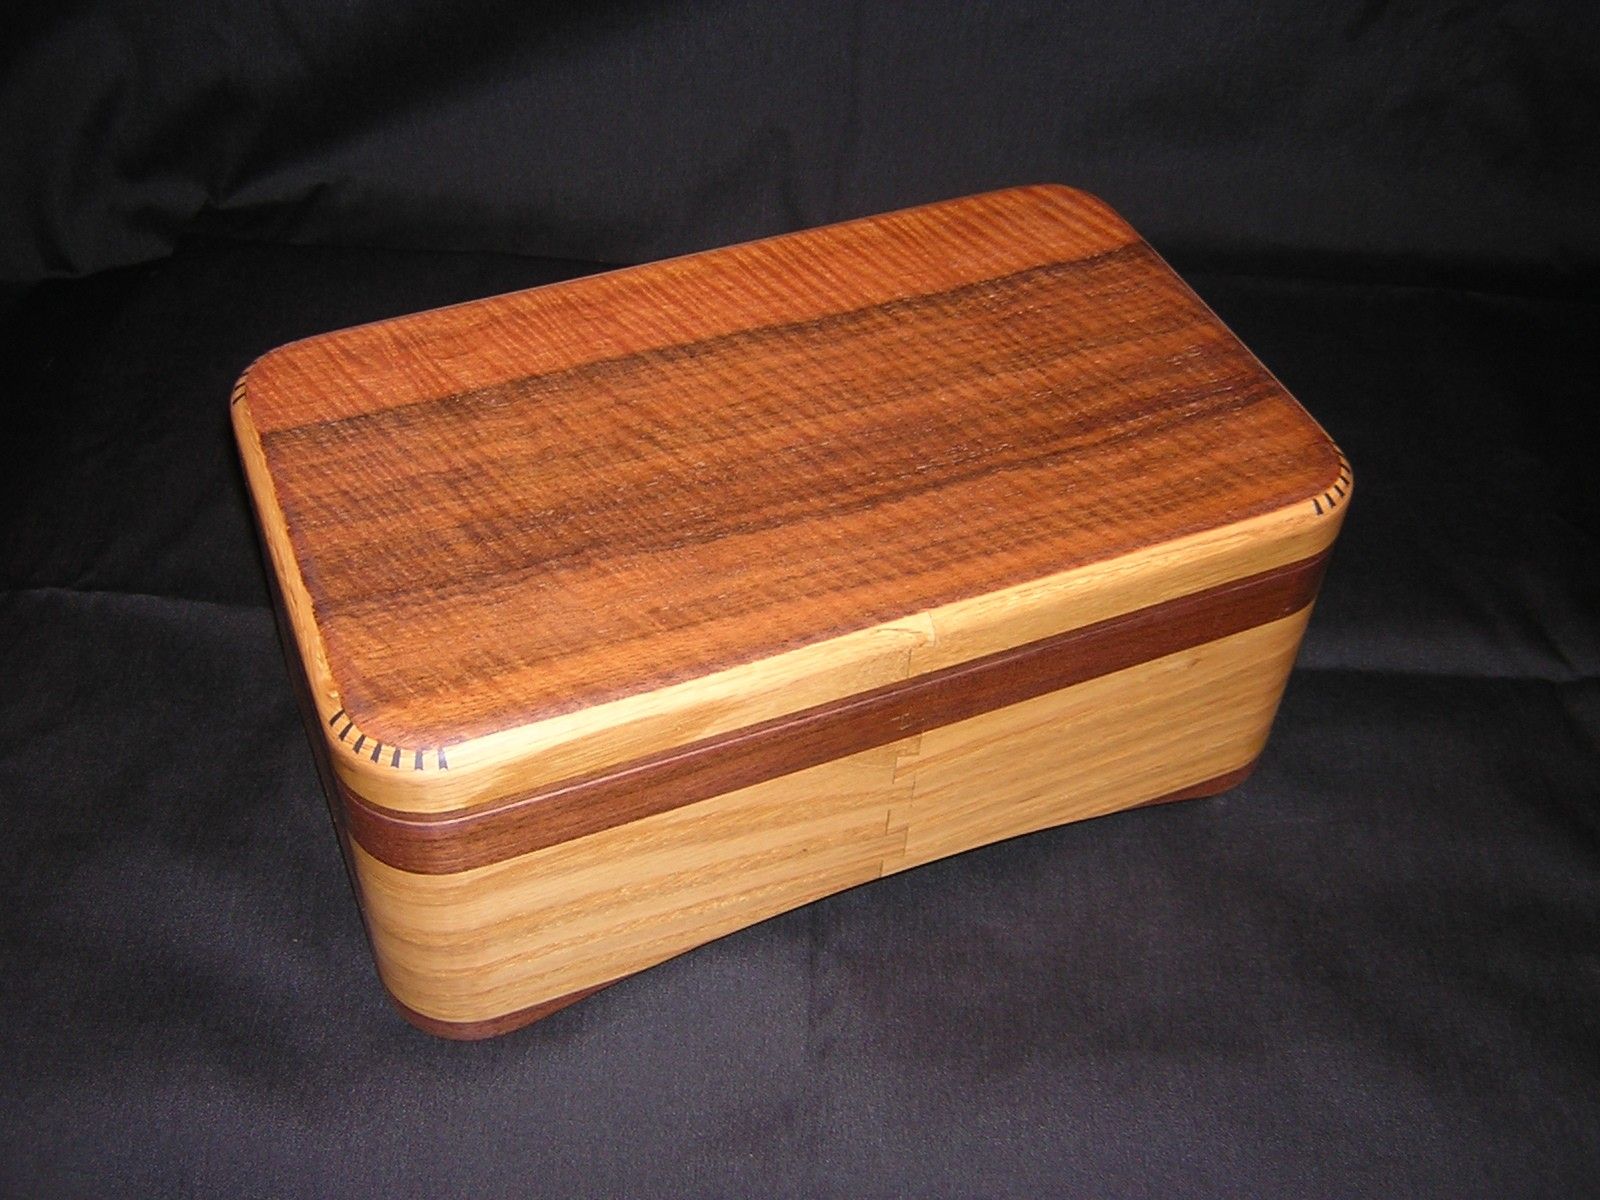
More kerfed corners. The author’s Deco-style box.
Naturally, the greater the degree of accuracy you achieve in setup and measurement, the better the results. Machinist tools are available to me so I use them. My goal is to measure to thousandths and cut to hundredths of inches (probably unrealistic but we have to have goals).
In my experience, I get the best results if I cut 7 kerfs with a thin-kerf blade in 1/2-in.-thick stock, leaving 1/16-in. of material to be bent. I have no formula to offer as the reason I chose seven kerfs. I chose that number arbitrarily, it ended up working well, so I continue to use seven kerfs at each corner. Leaving 1/16-in. of material to bend is also based on experience and the species of wood being used. Some types bend more freely than others. Obviously, the more thickness, the tougher it will be to make the bend; and the likelier the wood may break. If the material is too thin it may not leave enough material to sand the bends smooth. (For the specifics and the math forumulas used to calculate bending angles and kerf depths, click here.)

Deep vs. shallow kerf. The deeper the kerf, the less the remaining wood needs to flex. A shallow kerf produces a sharper facet on the remaining wood.
The space between kerfs is based purely on your preferences. The stock left between the kerfs does not bend. Only the thin stock left at each kerf bends. Widening the distance between kerfs increases the radius of the arc and vice versa. Also, the further apart the kerfs, the more faceted the arc will appear.
I usually make batches of boxes in order to capitalize on the setup time. I have also made templates for the bottom-side curves as well as the top and bottom panel. I have flexibility with the depth of each box, but I usually look for a board that’s at least 5 in. wide. The overall length and width are usually the same: 12 in. long by 8 in. wide.
The first step is to select the stock and mill it for the final dimensions. I usually end up using scraps or pieces that have a lot of sapwood. I’m not choosy, but if you don’t like the look of the wood, you can always veneer the sides. Once the stock is selected I mill it to 1/2 in. thick and to its finished width. I like to finish-sand each blank and put a coat or two of oil on the interior surface that will receive the kerfs. This helps with the clean up of any glue squeezeout that may occur. I believe it also helps reduce tear out at each of the kerfs. Of course,it’s easier to finish a flat board than the inside of a box.

Tight tolerances. Stock milled to 0.500 in.thick.

Prep work. Oiling the inside surface of the workpiece prior to cutting kerfs and other joints.
Next, I use a story board (see photo below) to lay out the locations of the kerfs and the overall length. I usually use a dovetail jig to join the two ends of the board. I center the dovetails on the long side of the box. In order to end up with enough stock and to have both long sides the same length, you have to add half of the dovetail depth to each end of the board.

Story board. The layout guide used to lay out the kerfs.
Before setting the blade height I determine the center of the blade so the kerfs will be centered on the layout lines. I do this by clamping a scrap of stock to the fence on my crosscut sled so it rests on the top surface of the box stock. I remove the stock, then raise the blade until it barely touches the alignment block when it’s moved past the blade. With an alternating top bevel blade, the kerf is shallowest in the middle and so produces a nice point at the center of the blade. This lets me register the stock at each of the kerf positions. Figure 8 shows a close-up of this “notch” in the alignment board.

Center-finder. One very light pass over a piece of scrap with an alternate top-bevel blade leaves a small arrow shape in the wood, which indicates the center of the saw kerf.
Now, I set the blade to the correct depth. I use a gauge block to get close, then make test cuts in scrap 1/2 in. plywood and test the bend. If I don’t get a 90-degree corner, I lower the blade slightly; if the corner goes past 90 degrees, I raise the blade.

On the square. Checking the plywood test piece.
Finally, it is time to cut the kerfs. Each board gets 28, so get comfortable. After the kerfs are cut I raise the blade and cut each blank to the final length then move to the dovetail jig. Resist the urge to bend the board. The thin material is fragile and once it is bent it does not like to go back and forth Then I cut a groove to receive the bottom panel and make the curves that define the bottom edge of the box. While at the router table I cut the 1/4-in. plywood panels for the top and bottom.

Kerf-cutting. Close-up of the crosscut sled with the alignment board clamped in place.

Too much handling. This would-be box broke along one kerf.

Vacuum templates. These are used to shape the scalloped bottom edges.
When it’s time to bend the box into its final shape. have a bucket of water, towels, and a hot iron close by. Depending on the type of wood, you may need steam to help make the wood pliable enough to bend into shape. Turn off all the shop equipment, take off your hearing protection, and go slowly. You want to listen to the wood as you bend it. It will make cracking sounds if it’s not pliable enough. Listen to it. Re-steam it and try again. You will find that it gets easier each time until it is finally done.

Ironing board. Steaming the wood at the kerfs to prepare it for bending
You may need to fine tune the kerfs to be able to reach the 90-degree angle. If the kerf is too deep and won’t bend to a full 90 degrees, sand the corners. Once all four corners are bent and still pliable, insert the bottom panel, then glue and clamp the dovetails in place and let it cure.

Fine-tuning. Lightly sanding the ends of the kerfs refines a close fit.
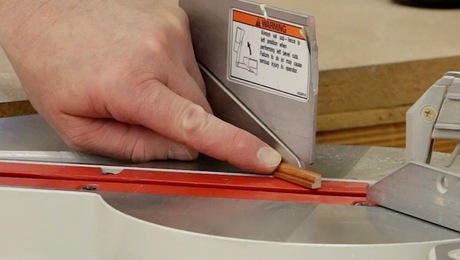
The kerf filler strips need to be cut. I usually cut these by trial and error. When I do find the right combination of blade angle (should be about 6.5 degrees) and strip thickness I generally cut lots of strips. Glue the filler strips in place and trim them flush. I use the router table to rabbet the lip in the top edge that will receive the top panel then glue the panel in place. Once the glue is dry, I re-sand the top to make sure it is flat then do some sanding to fair the curved corners and smooth the dovetails. Next, to the table saw to cut the off the lid.

Tablesaw chore. Cutting the filler strips to fill the kerfs.
The last thing to do is decide which piece of veneer will look best on the box. This is the fun part as veneer choices are endless and the small piece required is generally very affordable. I use a vacuum bag most of the time, but when it is only one lid to be veneered; I tend to use PVA glue and an iron.
After rounding the top edge of the lid and finish-sanding, the box is ready for its finish. The good part is half of it is already done.

Kerfs, complete. The finished box.




Log in or create an account to post a comment.
Sign up Log in