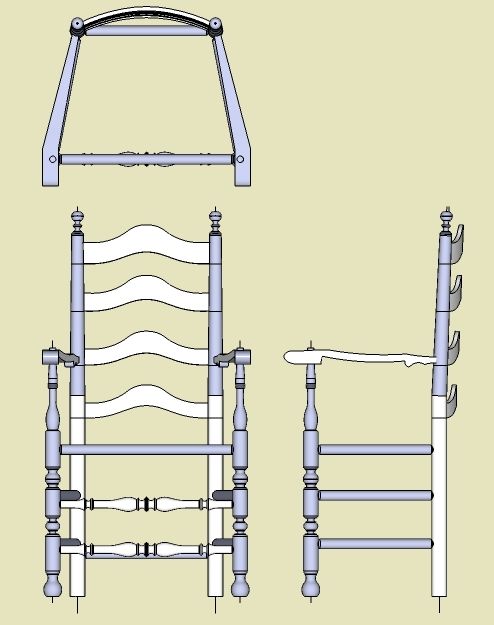
Last week I showed the creation of the Back Slats for this classic 18th C Ladder Back Chair. This week I’ll back-track and show how I started the modeling of the chair. First I need to give credit to Lester Margon who masterfully captured this design in his book “More American Furniture Treasures”. I can’t tell you how many times I’ve used his drawings for reproductions in my home. His drawings are exquisite and, I think, beautiful art.
I scanned Lester’s drawing and imported “as an image” into SketchUp. As I’ve explained before, I adjust the scanned image so that it is perfectly aligned with SketchUp’s axes, and also scale to full-size. Then I use the scanned image as a background for shaping and sizing components. Using the Line and Arc Tools, I draw over the boundaries of the various pieces of the chair. These sketch-overs produce flat planes that I copy over to a blank part of SketchUp for embellishment with the 3rd dimension and other details.
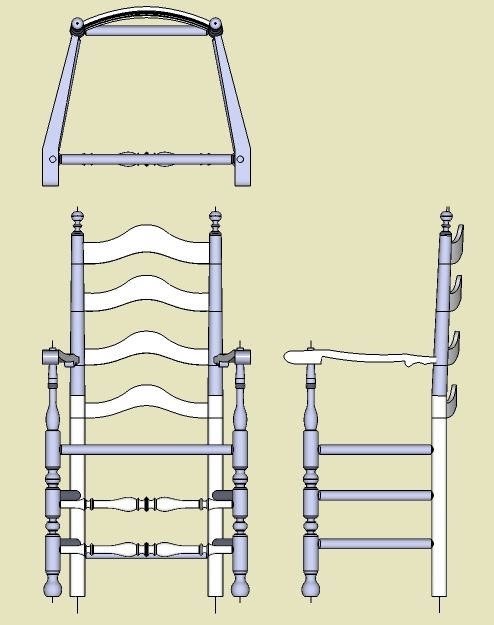
The first component that I create is the Back Post, and here are the steps that I used. But first I’ll show an orthographic drawing showing the front, side and top views. (I’ve made this orthographic from three copies of the overall chair, each copy rotated appropriately, then displayed with parallel projection.

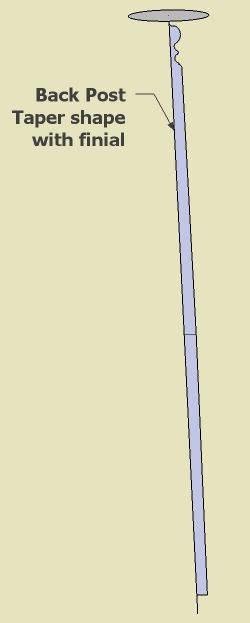
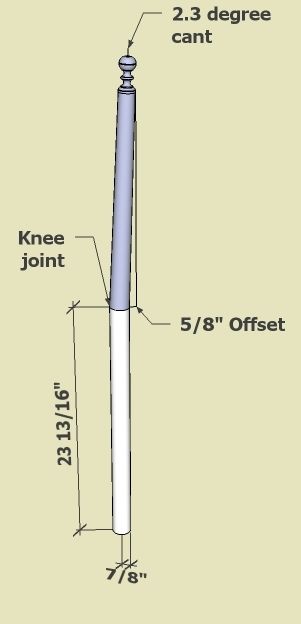
Step 1: By tracing over the Margon drawing, I create the half-shape of the turned Back Post. For turnings, I always extend the centerline beyond the two ends of the component. These extensions help position and dimension the components later in the process. I find that it helps to make the circle path by first running the radius in the red axis direction, which is aligned with the plane back post shape. I also placed a cut mark at the “knee” of the back post. This knee will be the location for the start of the bend backward for the upper section.

Step 2: After doing the Follow me, I made some additional cut marks in the upper taper section. At these points I’ve indicated a radius dimension to help me in the turning process. At these locations I will use the parting tool and calipers.

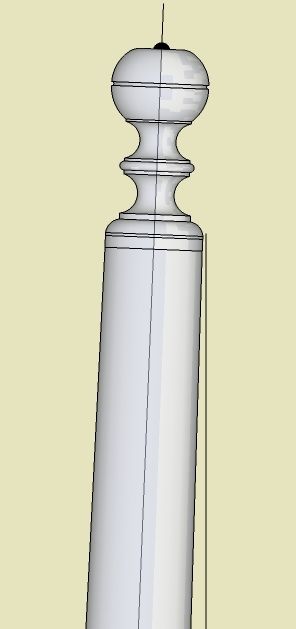
Step 3: I make a full-size template of the finial portion of the Back Post. This I will use to mark out the intricate cuts on the lathe. I like to use X-ray when making templates so I can see the centerline for helping with the template cutting process.

Step 4: Now I’m going to cheat a little bit. The Back Post is a “bent” shape to produce a slight cant with a 5/8″ offset from perpendicular. This will be a steam bend on an arc shape, but in SketchUp I will simplify by rotating at the “knee” in a straight line. I select the upper half of the back post and grab the Rotate Tool. I obtain the correct orientation of the Rotate Tool (green axis my case) and place on the centerpoint of the knee (visible in X-ray view). Then I rotate the upper tapered section 2.3 degrees.

There are ways to do this tapered bend on an arc and Dave Richards has sent me a solution which involves a special plug-in. Perhaps we’ll show this method in a later post.
Now we have a good start for the rest of the chair. I’ll show further construction steps in the future.



Comments
Hi
My post is not directly related to this particular topic but I couldn't find a place for a general Sketch Up query.
I am new to Sketch Up and have mastered all of the on-line tutorials. However, when I went to try designing something for myself I was hopelessly lost.
Can you recommend further publications etc that may be able to help me, or is there something for rank amateurs in Design Click & Build?
Cheers
Max
Max, I'm glad you raised the flag of the beginners in SketchUp. I recognize that many of our most recent posts have been more advanced applications. Particularly chairs are probably the most challenging modeling tasks.
However, I think we do have a plethora of help on beginning tasks in SketchUp. Perhaps you have not seen the "Archive" which includes some 150 posts many of which are on the basics.
To get to the Archive, note the panel on the right titled "About Design. Click. Build.". In the bottom of this box is a link to the older posts, and when you get there, you need to look for another box in the right hand panel which links you to the old "Archive".
Also, we like to hear specific issues that you are having, including attachments to emails that we can work with and help you along.
Keep in touch,
Tim
Log in or create an account to post a comment.
Sign up Log in