Make Your Own Ornaments
Contrasting woods and multiple-axis turning yield bold, distinctive tree decorations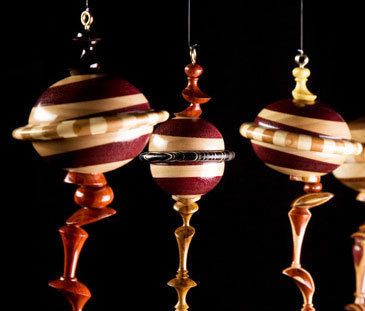
Christmas ornaments don’t have to be made of glass or metal. I make wood ornaments, consisting of a hollow ball with a turned ring around its midsection and finials top and bottom. They’re turned ornaments, made on a lathe. Making these ornaments is a good way to use small scraps of exotic woods. Here’s how I go about it:
Turning the ball
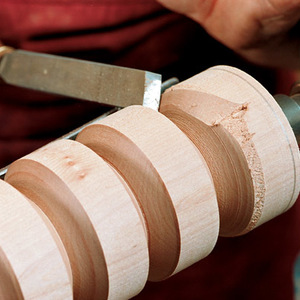
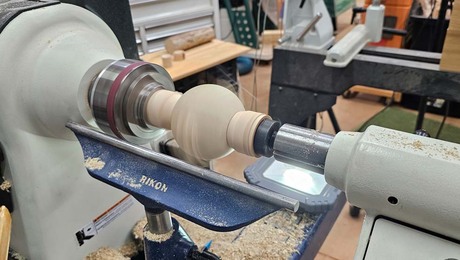
I begin by gluing up a blank that will become the large ball. To do this, I resaw 3/4-in.-thick by 16-in.-long pieces at 5 degrees to create wedges. I use a combination of maple and purpleheart, or maple, walnut, and leopardwood. Then I glue the wedges together, alternating the various colors, to form a long blank. I crosscut the blank to form square blocks, then mount a blank between centers on the lathe and turn it to form a cylinder. Next, I part the cylinder in half, mount one half in a four-jaw self-centering chuck, and hollow the blank like a tiny bowl. I leave a small tenon on the outer rim; later, I’ll fit that into a mortise in the decorative ring.
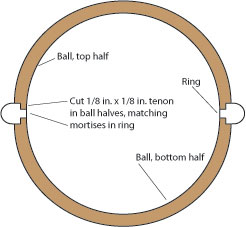
Once I’ve hollowed the middle, I shape the outside surface into a hemisphere, finish-sand it, and part it off the lathe. I do the same with the other half of the cylinder, checking to be sure that the two halves form a sphere–not an egg shape–when they’re joined together. It’s important to make this part of the ornament hollow; otherwise it will be too heavy and weigh down the tree branches.
 Turning the ring
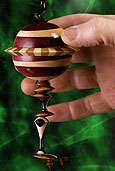
To make the multicolored rings, I rip cherry and poplar into wedges measuring 3/4 in. long by 5/16 in. at the thick end and 5/32 in. at the small end. The resulting wedge angle is 6 degrees on both sides. Fifteen pieces of each color will form a perfect circle when bundled together and glued to form a cylinder. Once the glue is cured, I crosscut the cylinder to form 5/16-in.-thick “pineapple slices,” which I mount on the lathe using an expanding jaw chuck. I true up the rings and shape the outer edge into a bead, then cut a mortise on both flat surfaces to accept the hemispheres. I glue the ball hemispheres into the mortises on the ring.
Turning the finials
I make the finials from laminated woods or solid stock, depending on what I have available. For the laminated blanks, I use a mixture of purpleheart, maple, ebony, padauk, jatoba, yellowheart, or whatever scraps I have lying around the shop. Sometimes, I scrounge around the floor looking for cutoffs I can use to create a top finial.
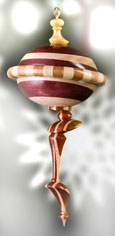 An eccentric chuck that I bought more than a year ago makes it possible to create the multi-axis finials. However, I soon found that there was a huge learning curve for this chuck. It took several hours of experimentation before I got good results. The chuck is designed much like a ball-and-socket joint, so you can change axis at any point during the turning process. A setscrew locks the chuck. First, turn a round tenon on the spindle blank and pound it into the steel ball of the chuck. Creating the form takes place in several stages, beginning at the end and working back toward the chuck. At each stage, you shift the axis in the opposite direction or rotate it to a different setscrew location on the chuck. Although the spindles look similar, I never really knew how each was going to turn out. Even the top finial was turned using the eccentric chuck, portraying a flying saucer navigating above the planetary form.
Final assembly
The spindles and balls come together at random. The bottom finial has a 1/4 in. long tenon that fits a hole drilled in the ball. I made every effort to create a whimsical off-axis effect when all the parts came together.
More from FineWoodworking.com:
- Tips for Turning Holiday Ornaments
- Simple, Tear-Drop Shaped Turned Christmas Ornaments
- Span Trees: A German Christmas Craft Tradition
Fine Woodworking Recommended Products
CrushGrind Pepper Mill Mechanism







Log in or create an account to post a comment.
Sign up Log in